
ID : 5653
USB Camera Setting
This section explains the setting of a USB camera manufactured by IDS.
Using IDS Camera Manager, set a camera ID and trigger mode.
Use a camera in the trigger mode.
The following table shows the correspondence between RC8 series version and camera driver's version.
| RC8 series Ver. | Camera driver's Ver. | USB camera (manufactured by IDS) |
|---|---|---|
| ~Ver.1.8.6 | 4.22.00 | USB2 uEye SE,RE,ME series, etc. (XS is not supported) |
| Ver.1.8.7~ | 4.30.00 | USB2 uEye SE,RE,ME,XS series, etc. |
| Ver.1.12.0~ | 4.50.00 |
Camera ID Setting
1
Start IDS Camera Manager
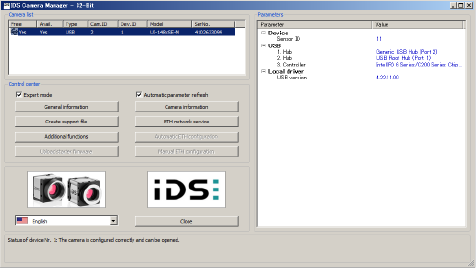
2
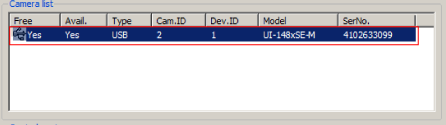
Select a camera to set ID from the camera list.
3
Click Camera information.
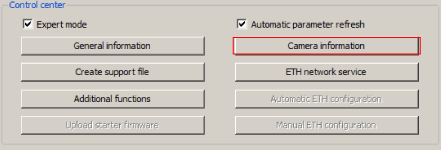
"Camera information" dialog box is displayed.
4
Enter an arbitrary Camera ID, and then click OK.
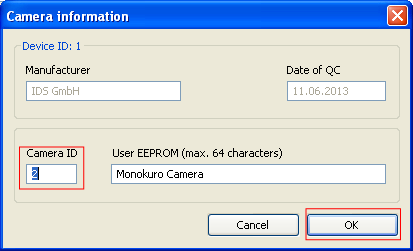
Camera ID ranges from 1 to 5.
User ID 1 to 5 correspond to ID 206 to 210 of the controller image storage area.
Do not use duplicate Camera ID when multiple cameras are used.
Trigger Mode Setting
1
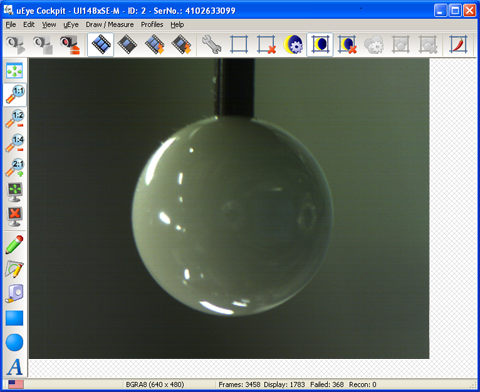
Double-click the model of a camera that you intend to set the shooting condition.
"uEye Cockpit", which is a window to process images, is displayed as shown below.
2
Click a button shown below. This button is used to capture a single flame by the trigger mode. Continuous mode is finished.
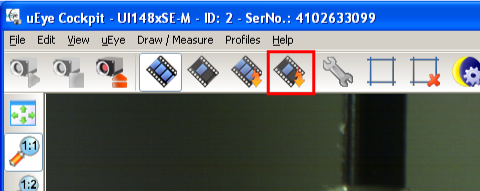
3
Click the Camera Properties button shown below.
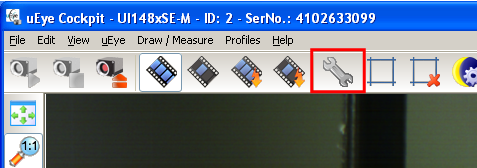
uEye camera parameter setting window is displayed.
4
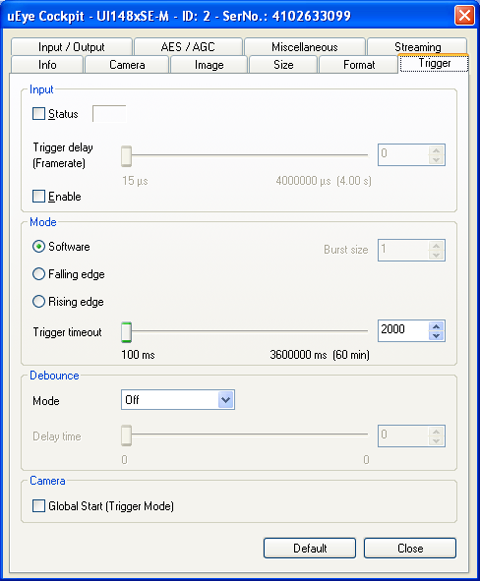
Select [Trigger] tab.

5
In the Mode area, select "Software".
(If hardware-trigger is used, select either "Falling edge" or "Rising edge".)
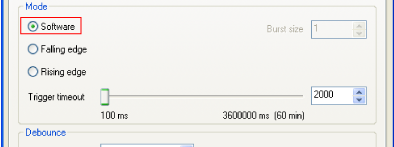
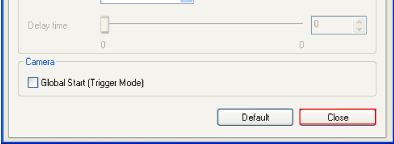
6
Click Close to finish the uEye camera parameter setting window.
7
Click File>Save Parameters>Parameter set to save the setting into the camera.
For details, refer to the camera setting manual of IDS.
Making the Robot Controller Recognize the Camera
To make a robot controller recognize a camera automatically, before you turn on the robot controller, connect the camera to the robot controller.
If you connect a camera to the robot controller after turning on the robot controller, the robot controller cannot recognize the camera automatically.
When the camera cannot be recognized automatically for any reason (such as the camera is connected after turning on the robot controller), make the robot controller recognize the camera manually. The following describes the operation procedures.
- In the Built-in vision menu, press [F6 Disconnect], close the Built-in vision function.
- [F6 Disconnect] is changed to [F6 Connect]. Press [F6 Connect] to recognize a camera.
For details, refer to "Displaying and Operating the Built-in Vision".
ID : 5653