
ID : 10546
Fixing Method of the Robot Controller
Install robot controller as shown below.
Installation Caution
The robot controller is not explosion-proof
- Set up the controller at the place where it is easy to replace air filters.
- Do not place anything within 200 mm from the air inlet and outlet of the robot controller.
- The robot controller has no air filter on the air outlet side. At installation, set up the controller so as to prevent dust or dirt from getting into the controller.
- System software installation, such as upgrade, is done by USB memory. When setting the controller, be sure to keep enough space in the vicinity of USB connector to connect USB memory.
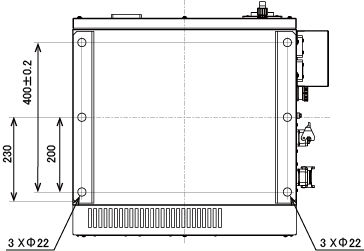
Fixing Method
Fix the stay to the bottom of the robot controller.
Before fixing, it is necessary to make the screw holes on the floor to screw the stay.
With referring to the following dimension diagram of the screw holes, perform the tapping on the floor. Use M16 bolts.
The figure is viewed from the bottom of the robot controller.
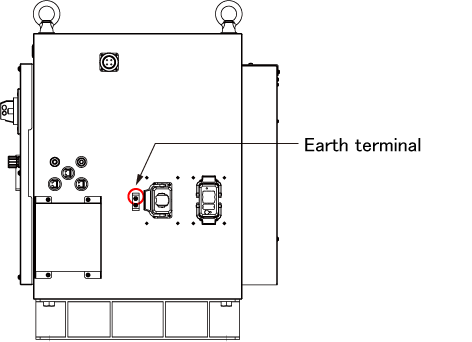
Grounding Method
Use the earth terminal to ground. The grounding resistance (protective ground) should not be more than 100Ω.
For the grounding wire, use the green/yellow wire of 5.5mm2 or more.
If the power transformer box is used, the grounding resistance (protective ground) should not be more than 10Ω.
ID : 10546