
ID : 11043
Fixing method of the MC9 series controller
Stand-alone installation, upright installation, wall-mount installation, and 19-inch rack mount installation are available.
Stand-alone Installation
Put the MC9 series controller on the flat area where all the rubber feet on the bottom of the MC9 series controller can be placed.
Wall-mount installation, Upright installation
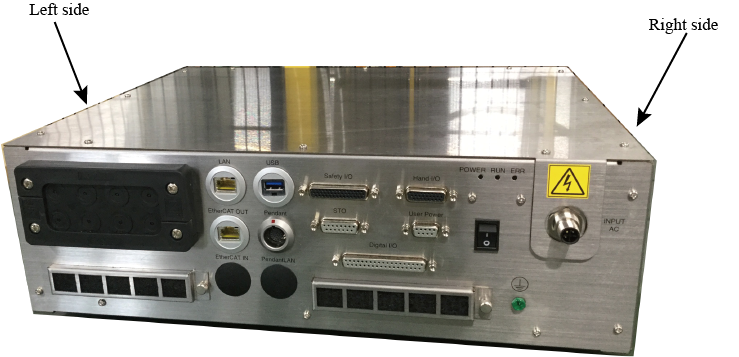
Remove the rubber feet from the bottom of the MC9 series controller. Using the fixing holes on the left and right side of the controller, fix it with the L-shaped metal fittings. (Prepare the metal fittings on customer side.)
Observe the following specifications whenusing the screws for the controller fixing metal fittings.
- Screw hole depth M5, length 7[mm] or less.
- Tightening torque : 3.3[Nm]±20%
- Right side (Unit: mm)

- Left side (Unit: mm)
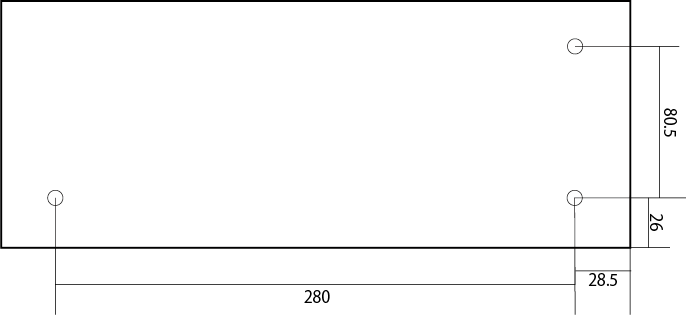
- Right side (Unit: mm)
Rubber feet are fixed with M4 screws Remove them if it is unnecessary.

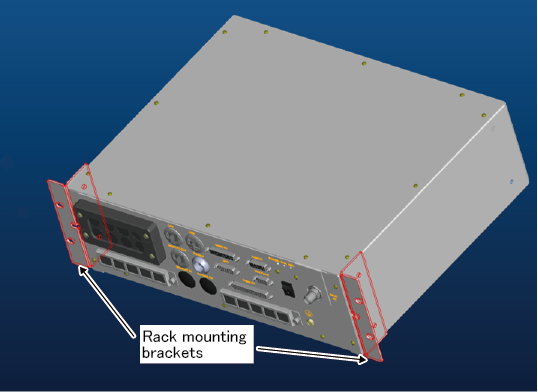
How to mount MC9 series controller in a 19-inch rack mount
For the 19-inch rack mount installation, you need to prepare the rack mount bracket set (option part).
| Part number | Option Name | Option parts name |
|---|---|---|
| 414880-0670 | Rack-mount bracket set |
|
How to mount the Rack-mount bracket
1
Remove the rubber feet on the bottom of the MC9 series controller.
2
Using the fixing holes on the left and right side of the MC9 series controller, fix it with the rack-mount bracket
To fix the rack-mount bracket, use the fixing screws that are accompanied with the rack-mount bracket set.
Tighten up the screws with the torque of 3.3[Nm]±20% .
ID : 11043