
ID : 7064
Timer
This part automatically triggers action source code for the TIMER event at the interval specified by the property interval.
Multiple timers can be created. However, as the number of the timers increases, the load ratio of CPU will be increased. Please create only the number of the timers to be required.
Timer Example
1
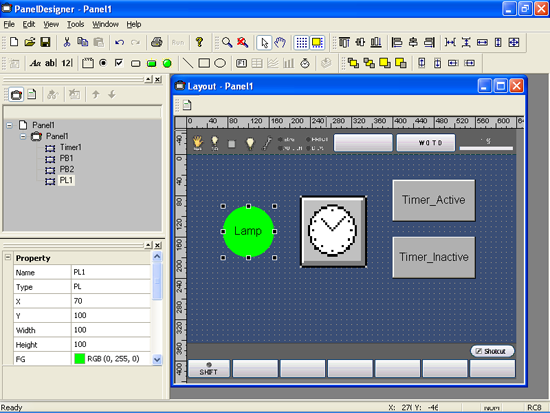
Load the editor and place a timer anywhere on the panel layout in the Layout window. Note, however, that the final result will not appear on the teach pendant screen.
2 Changing Timer Properties
The main properties here are active, which controls (and indicates) timer status, and interval, which controls event frequency.
This example uses buttons to enable and disable a timer which alternately switches a pilot lamp on and off.
Load the editor and place a timer, two buttons, and a pilot lamp on the panel layout in the Layout window.
3 Adding Action Source Code
Open the Source Code Edit window, select Timer1 and TIMER, create the action source code skeleton, and add the following line to switch the lamp ON and OFF.
If PL1.state = 1
then PL1.state = 0
Else
PL1.state = 1
End if
Add the following lines so that the CLICKED events for PB1 ("Start") and PB2 ("Stop") respectively enable and disable the timer.
Timer1.active = 1 Timer1.active = 0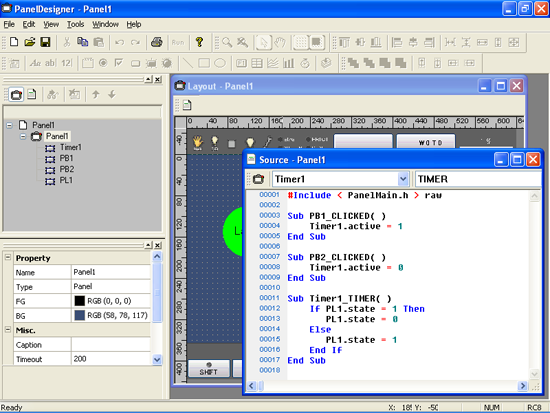
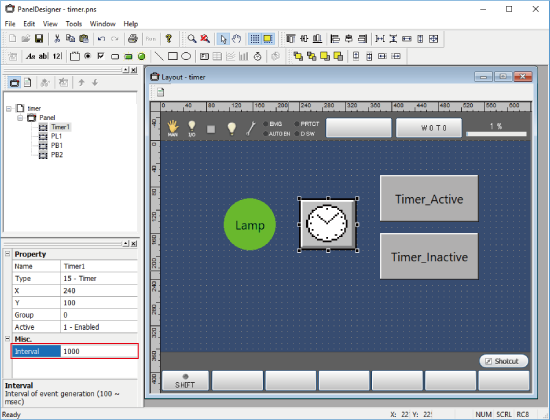
Specifying the Timer Interval
To specify the timer interval, change the value of Interval at Property. The unit is ms.
If the timer interval is extremely short, CPU load will be increased. Therefore, please avoid it as much as possible.
ID : 7064