
Setting of Detection Level
Use the teach pendant or command to set the sensitivity of collision detection (detection level) for each axis. The input range is "0 to 1000%" during an automatic operation, and "0 to 100%" during a manual operation. Increasing the value decreases the sensitivity, and decreasing the value increases the sensitivity.
The settings made with the teach pendant is kept after the controller power is turned OFF. The settings made with the command returns to the original settings after the controller power is turned OFF.
For details of the command, refer to SetCollisionDetection.
Setting Procedure During Automatic Operation
This page contains a description of setting procedure with the teach pendant operation during an automatic operation. The level cannot be set while the robot is running.
1
Operate the robot and record the control log.
2
In the [Collision detection setting] screen, select the axis numbers for which to set the detection level and press [F4 Easy teach].
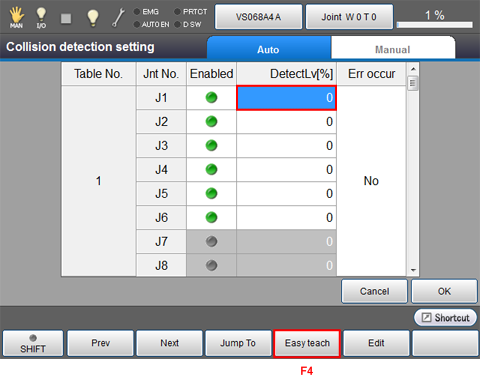
The Easy Teach Setting screen appears.
3
Press [F1 Refresh graph] to read the control log.
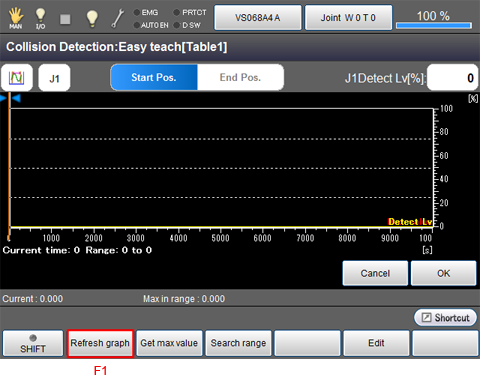
The control log recorded in STEP 1 is read.
4
Use the [R1] and [R2] buttons to specify the range for retrieving the maximum value and press [F2 Get max value].
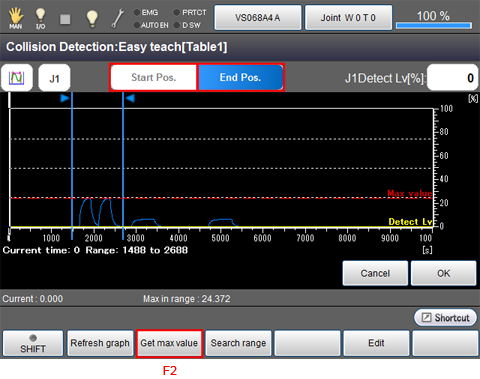
To change the retrieving range for the maximum value, press [F3 Search range].
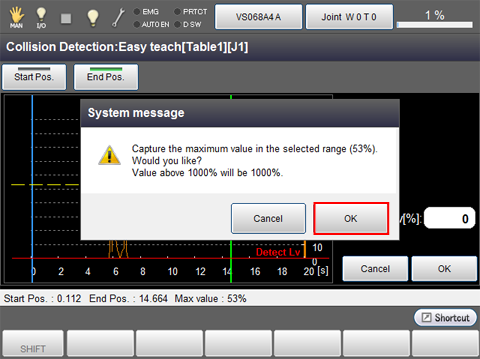
A system message is displayed. Press [OK] to confirm it.
Press [Cancel] to stop changing the settings.
5
The maximum value will be obtained in the Detection Level display area. Obtain the maximum value of each axis that the setting is required by following STEP 2 to STEP5. Pressing an "J*Detect Lv" icon for axis setting located on the upper right of the screen will enable you to select an axis. Once the maximum values for all axes are obtained, click [OK].
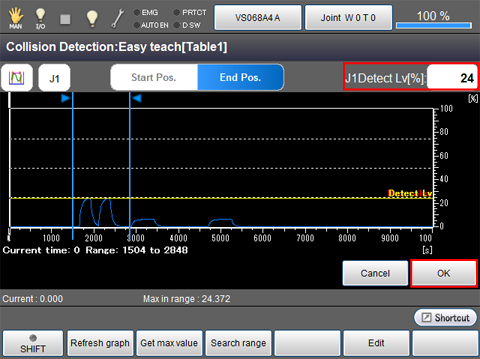
6
When you have completed setting all the axes, press [OK].

The settings are saved, and the screen returns to the [Collision detection setting] screen.
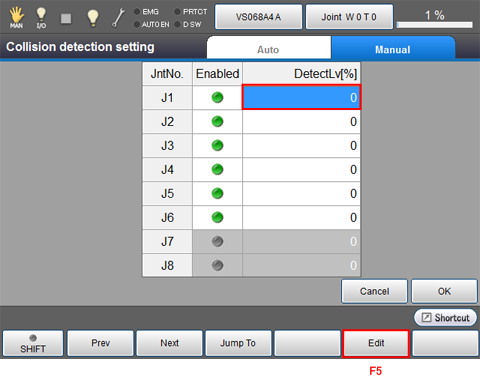
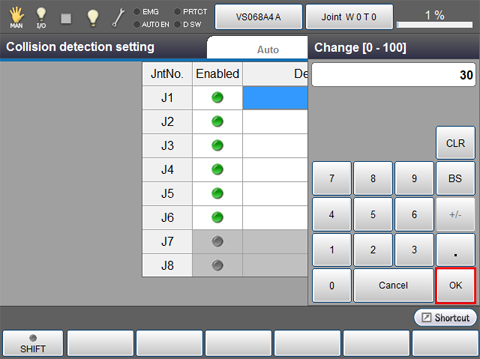
The detection level can be manually specified. Select the axis numbers to set and press [F5 Edit] to call up the numeric keypad. Enter the value and press [OK] to confirm it.
After completing all the settings, press [OK] on the [Collision detection settings] screen to save the settings.
Setting Procedure During Manual Operation
This page contains a description of setting procedure with the teach pendant operation during a manual operation.
1
Select the axis numbers for which to set the detection level and press [F5 Edit].
2
Use the numeric keyboard that appears to enter the value and press [OK].
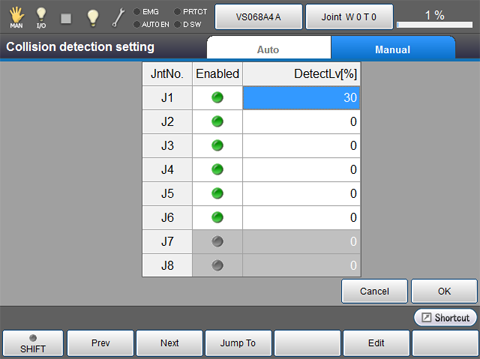
The entered value is displayed as follows.
3
Enter the level for the axes requiring setting according to STEP1 and STEP 2.
4
When you have completed setting all the axes, press [OK].
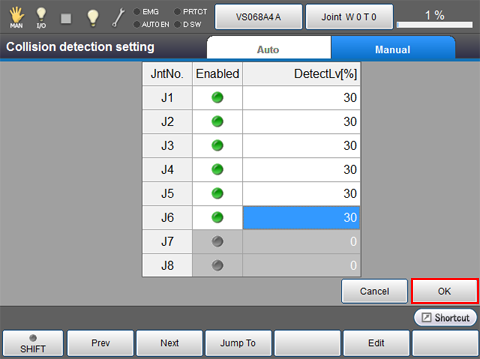
The settings are saved, and the screen returns to the [Collision detection setting] screen.