
ID : 10889
Robot Controller Setting
Set parameters of the robot controller with WICNAPSIII.
1
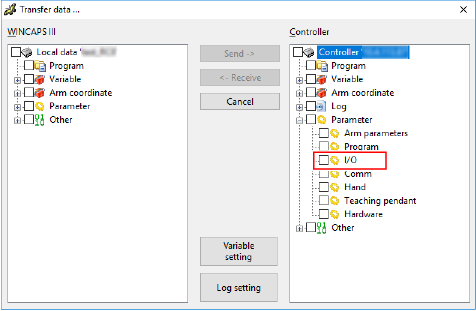
Transfer "I/O" data from the robot controller to WINCAPSIII. If WINCAPSIII has already received robot controller's I/O data, go on to the next step.
For details on how to transfer data from robot controller to WINCAPSIII, refer to "Data Transfer". To show "I/O" data, expand "Parameter" in the Controller data list of the [Transfer data] window. (see the figure below)
2
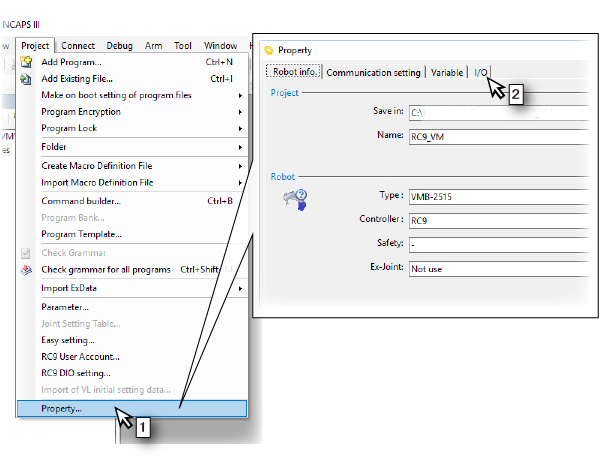
Open the setting window of the field network slave terminal parameters.
- From the [Project] menu, select [Property].
- On the [Property] window, click the [I/O] tab.
3
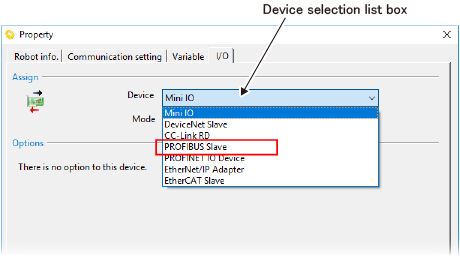
If you added a PROFIBUS slave terminal into an already existing robot controller, change the device.
From the [Device selection list box], select "PROFIBUS slave".
4
Set the number of input/output bytes and node address.
For about the number of IO points, refer to “Quick Reference Table for the Number of Input/Output Slots". I/O can be added or removed by one byte; this will determine the maximum number of I/O.

| Setting value | Default Setting | |
|---|---|---|
| Input setting (byte) | "8", "12", "16", "20" or "32" | 8 |
| Output setting (byte) | "8", "12", "16", "20" or "32" | 8 |
| Node address | 1 to 125 | 1 |
5
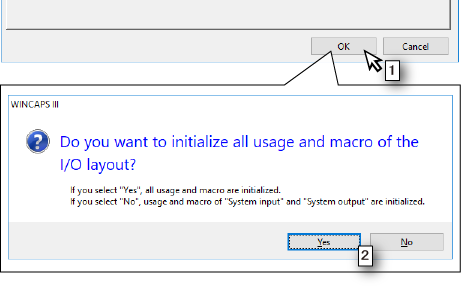
- Click [OK] button.
- A message box that asks if you initializes the I/O allocation will appear. Click "Yes" or "No".
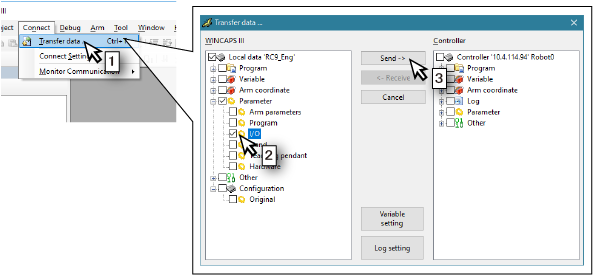
6
Send your setting data to the robot controller.
- Select [Transfer data] from the [Connect] menu.
- Open [Parameter] in the [WINCAPSIII] pane and select the check box of [I/O].
- Click the [Send] button.
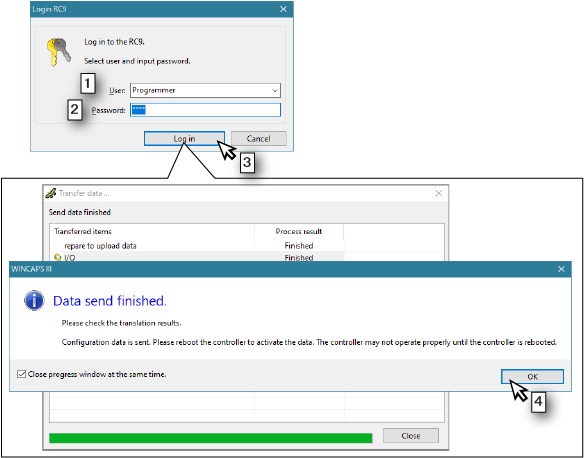
7
- The [Login RC9] window will appear. Select the user accounts of user level "Programmer" or higher among users set in the robot controller.
- Enter a password.
- Click the [Log in] button.
- When the window that finished sending data is displayed, click the [OK] button.
- Reboot the power of the robot controller.
This completes the robot controller setting.
ID : 10889
- Related Information
- Quick Reference Table for the Number of Input/Output Bytes