
ID : 2647
Connector Assembly Procedure
This section describes how to assemble an Ethernet cable into the tightening nut.
The color printed on the terminal is for the straight-through connection (TIA/EIA-568-B). If you connect a cable with other connection method, refer to "Pin Assignment and Printed Wire Color".
You can refer to the following link which provides a video for assembly procedure.
https://video.phoenixcontact.com/tutorial/global/2015/15_4_006_Hardware_Tutorial_Sensor-actuator_connectors_EN.mp4
1
Prepare a cable terminal.
Strip the cable jacket by the length of L1 (40 to 80 mm) from the cable end.
(Recommended tool : Phoenix contact : WIREFOX-D 11 (1212160))
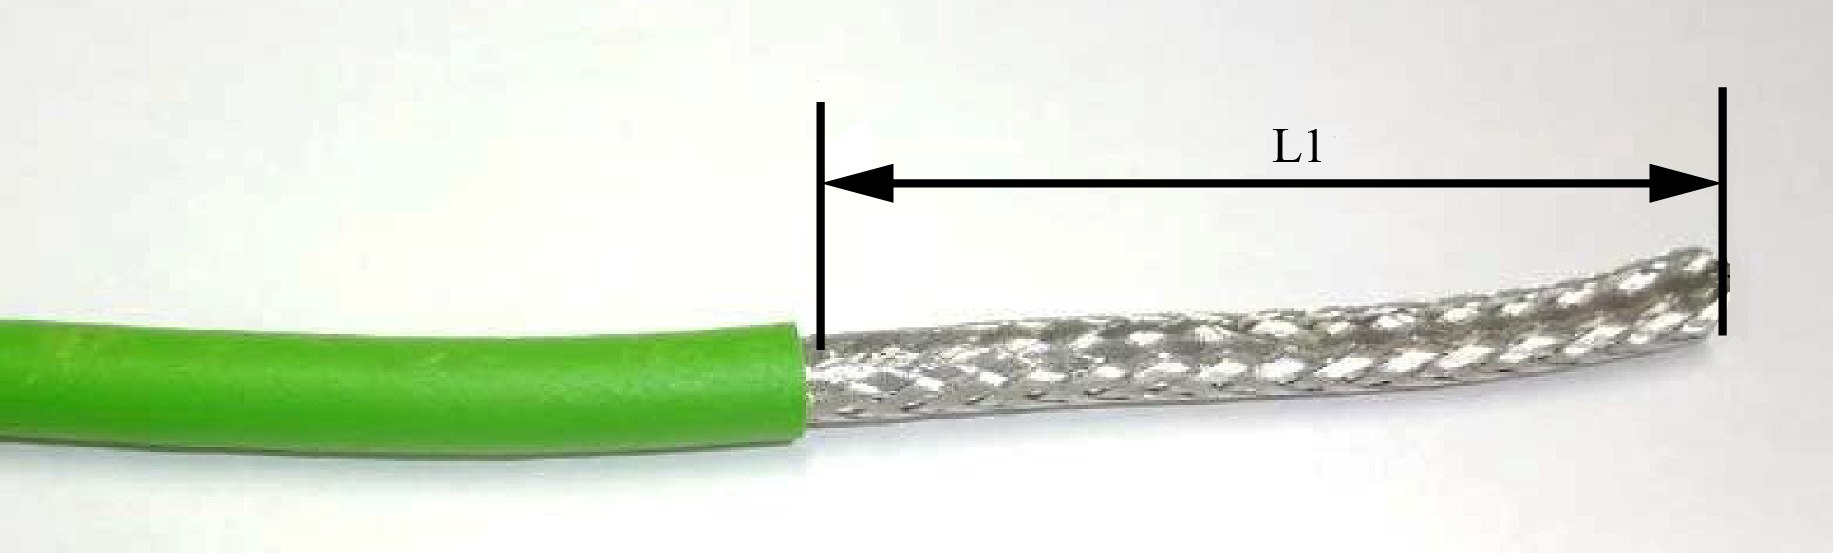
The longer L1 will make easier to the following process.
2
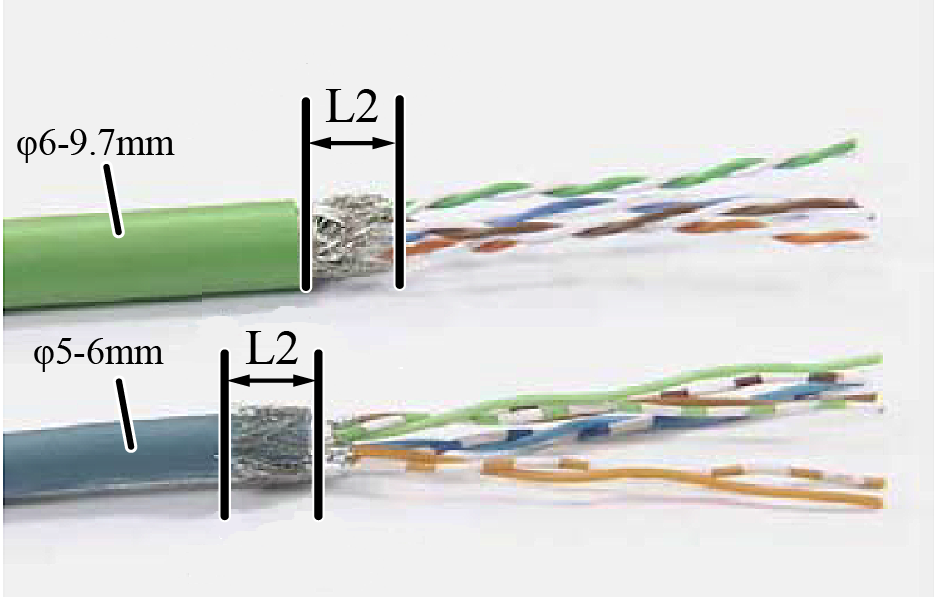
Prepare the braided shield of the cable.
Shorten the braided shield to L2 (= approximately 6 mm), and then remove all objects (aluminum foil covering the wires or strings between wires) other than wires.
Note that the process differs depending on the outer diameter of the cable.
- φ≧6mm : do not fold back
- φ<6mm : fold back on the cable sheath
3
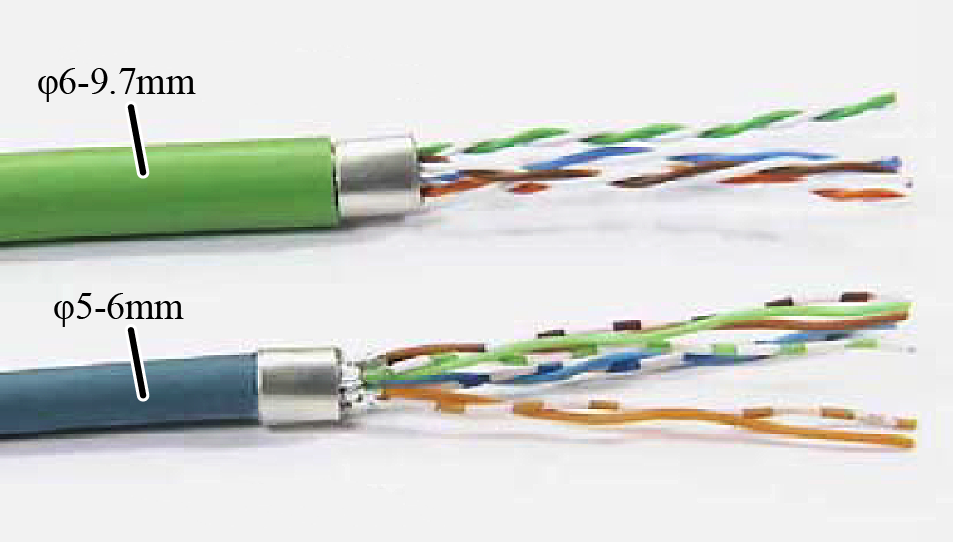
With a provided adhesive conductive tape, bundle the braided shield so that the diameter is approximately φ6 to 7.
If you use a twisted-pair cable, to make the operation easier, it is recommended to untwist the wires and align each wire along with the order of the terminal colors of the tightening nut (see STEP5).
4
Pass the cable line through the tightening nut.
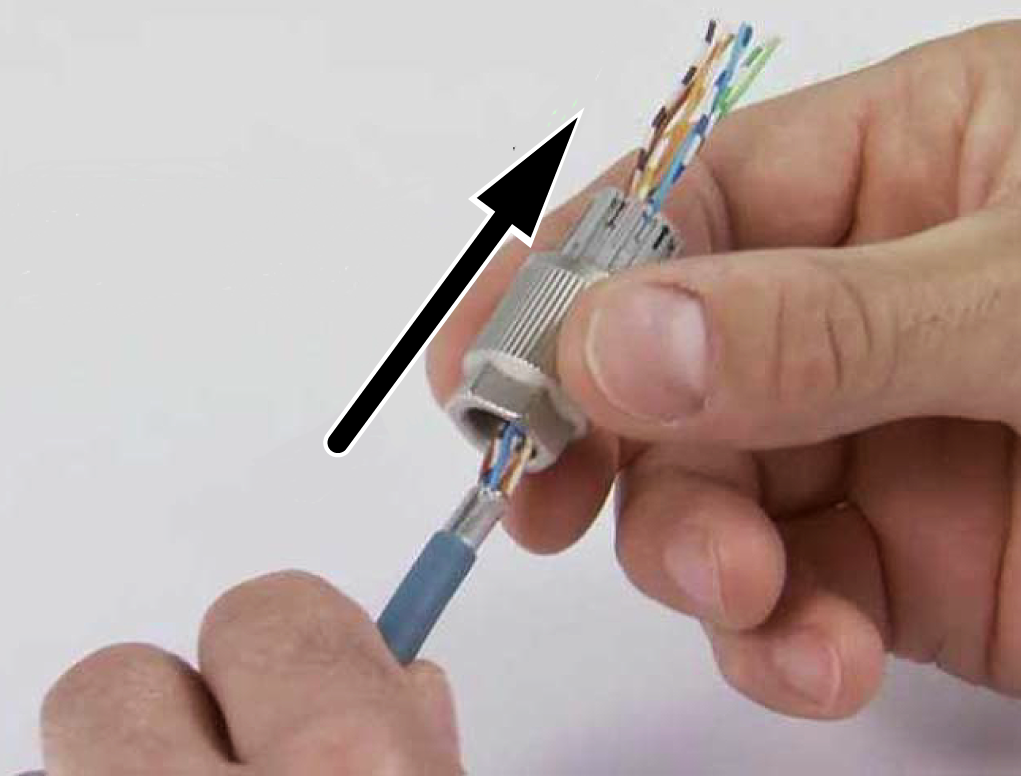
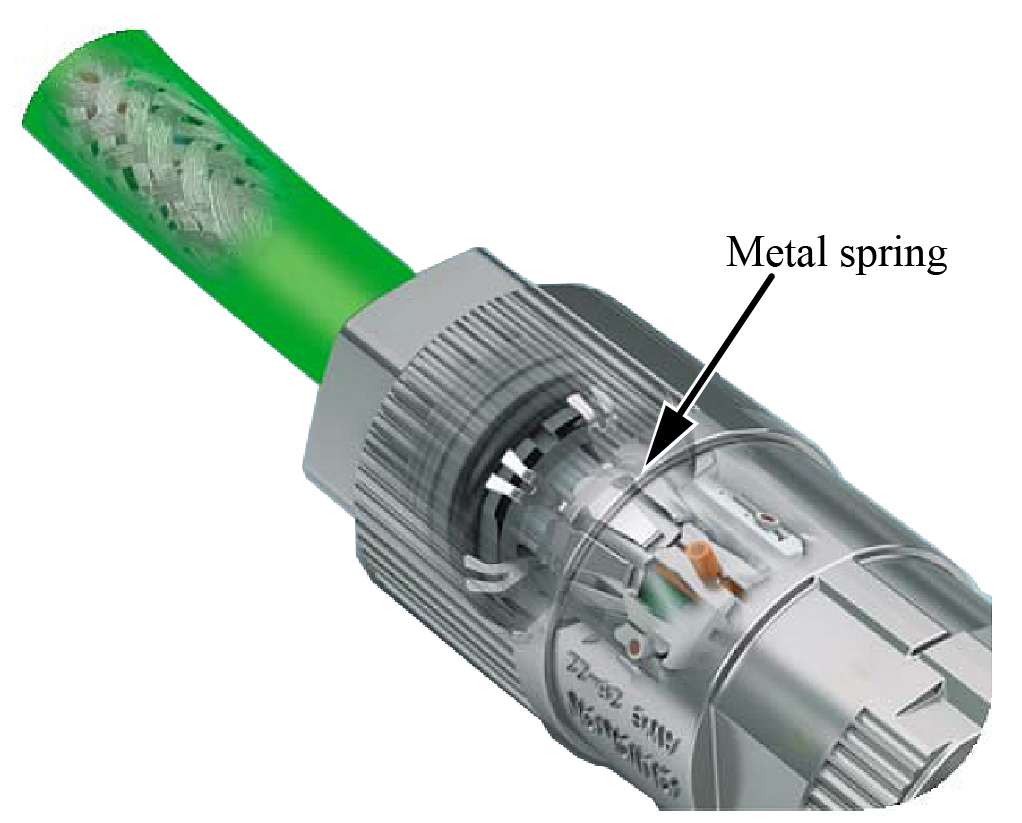
Slightly push the cable so that the bundled part of the braided shield contacts with the metal spring that locates inside of the tightening nut.
5
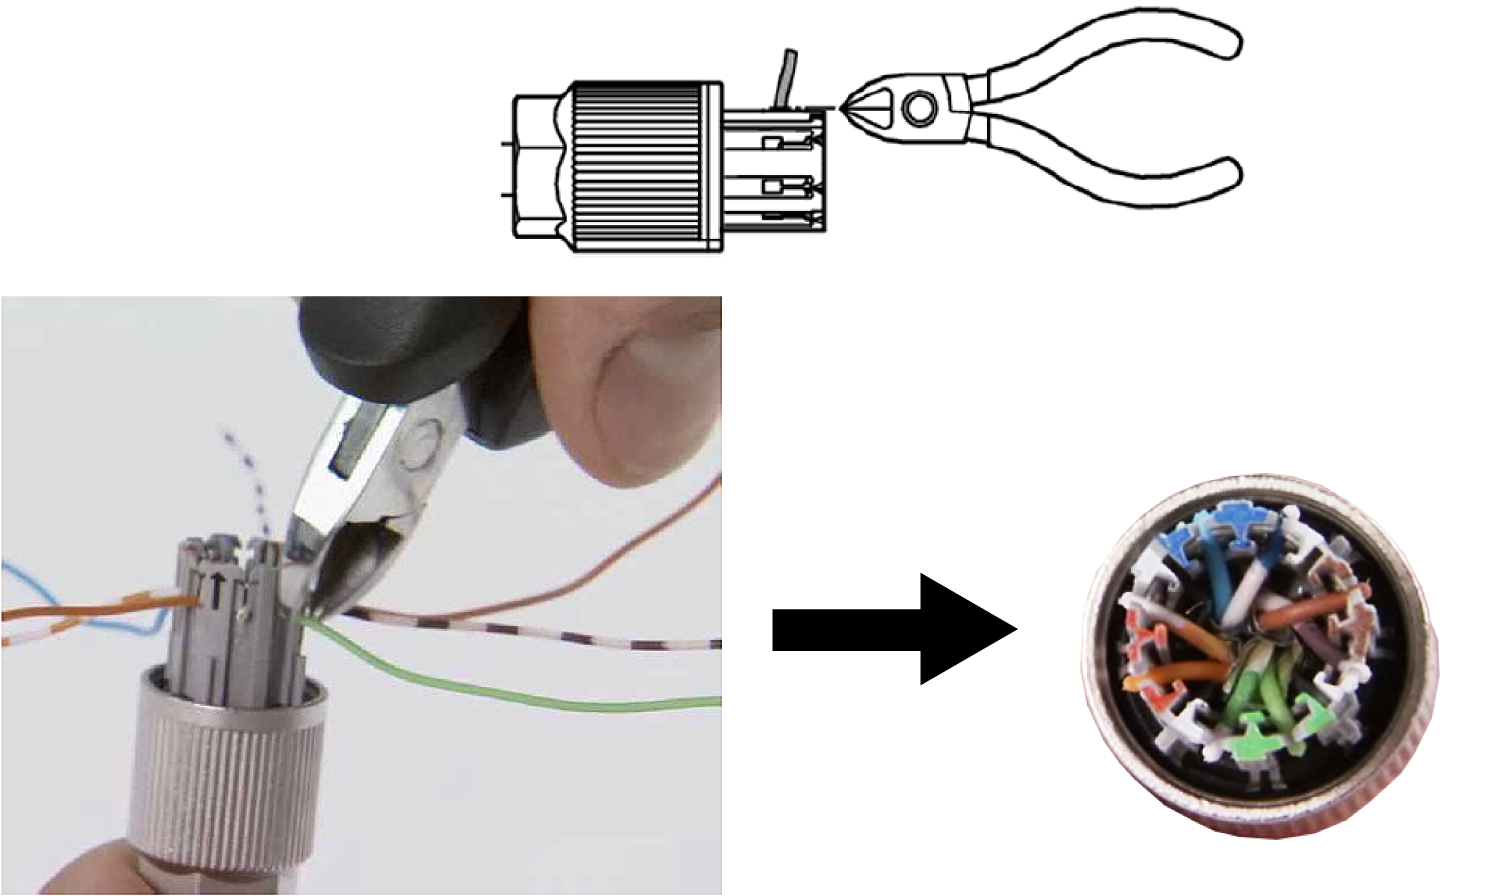
Check a wire color and push the wire to the terminal's slit which color is same as the wire color.

6
Cut the excessive wires with a diagonal pliers.
7
Match the arrow mark on the plug and the tightening nut, and then insert the tightening nut into the plug.
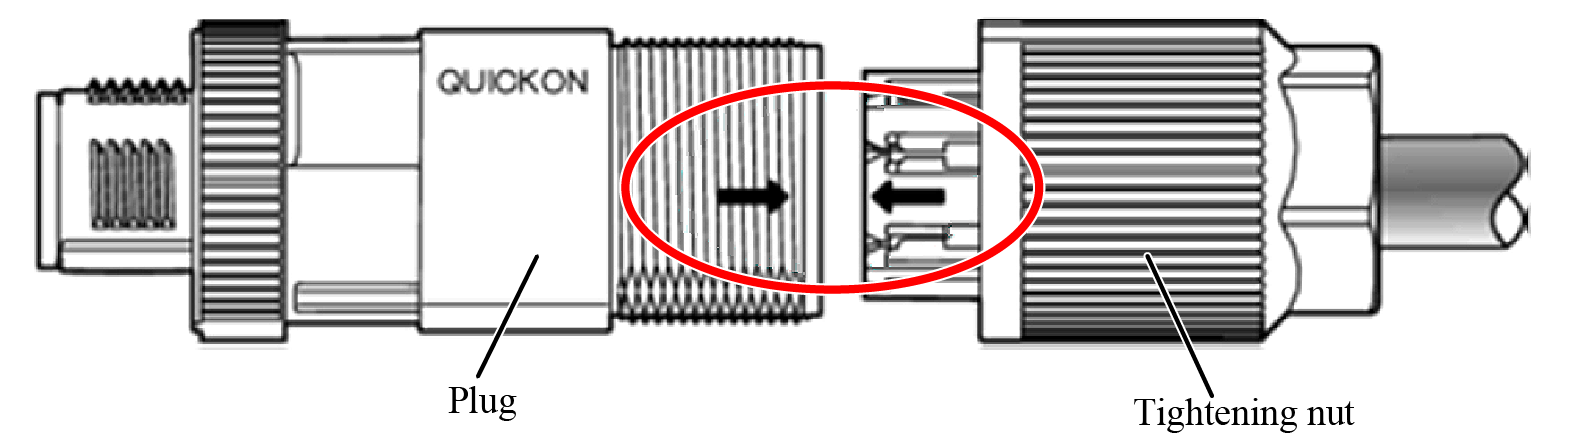
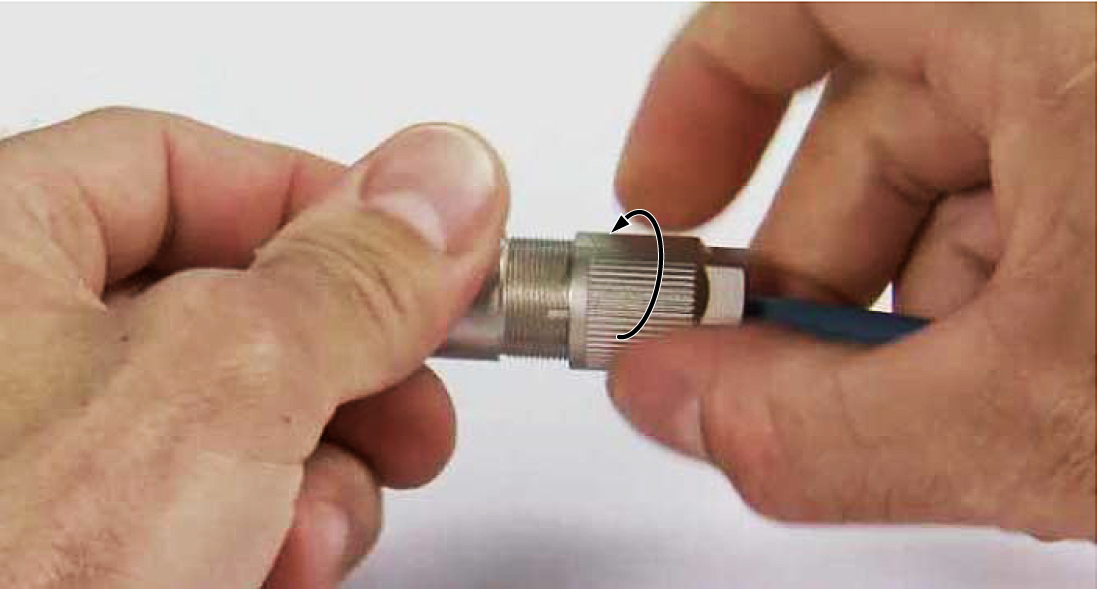
Rotate the tightening nut manually until the arrow mark is no longer visible.
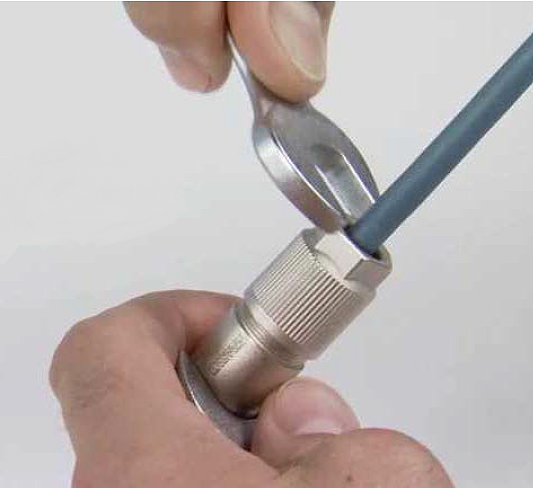
8
With a wrench (size: 15 mm), pinch the plane surfaces on the plug side face to secure, and then tighten the tightening nut with a torque wrench. (Recommended torque : 5 Nm)
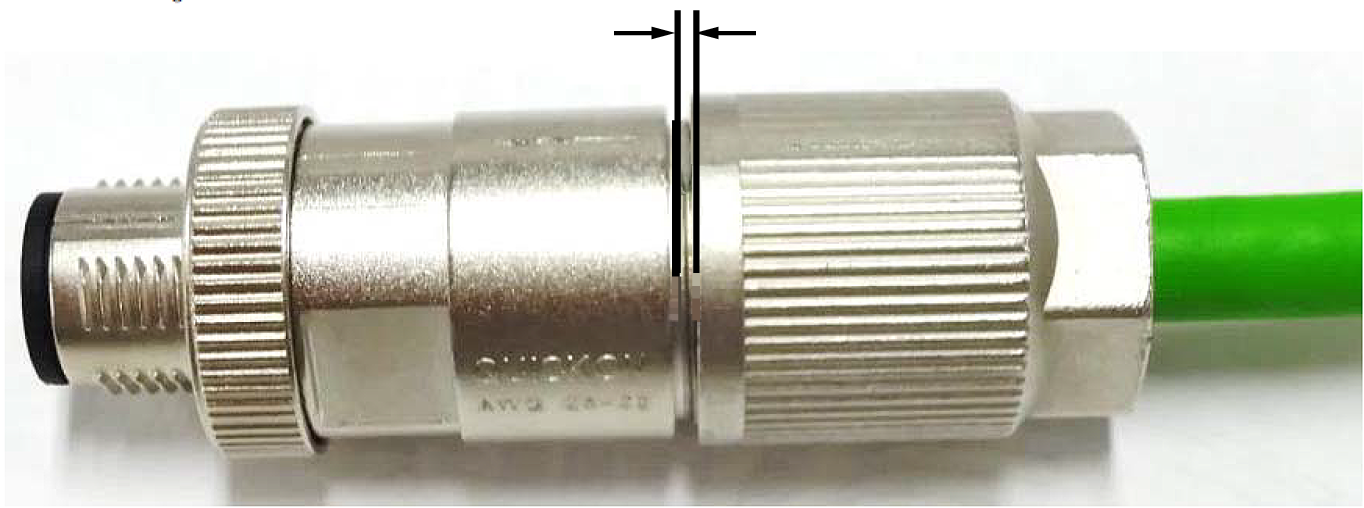
Depending on the cable size and/or the material of the sheath used, there may be a gap between the plug and the tightening nut though, it does not affect the waterproof performance.
ID : 2647