ID : 2787
Correct CALSET
1
When you click [Correct CALSET], a message "Are you sure to back up current data before correction?" appears.
To back up the current CALSET value, click [OK].
2
From the [Target joint to correct] area, select an axis that you intend to correct the CALSET value (an axis that you have replaced the motor).
As you select more axes, the correction accuracy will be degraded. Select axes that you really need to correct.
3
Select any position data that you have been registered beforehand and teach the same position, and then click [Get] to register.

You must teach the position accurately (X, Y, Z) when you register the position. Robot attitude (Rx, Ry, Rz) does not affect the registration.
Before getting the current position, be sure to check if all preparations described in Registering a Reference position have completed.
Once the current values of all points are obtained, click [Next].

4
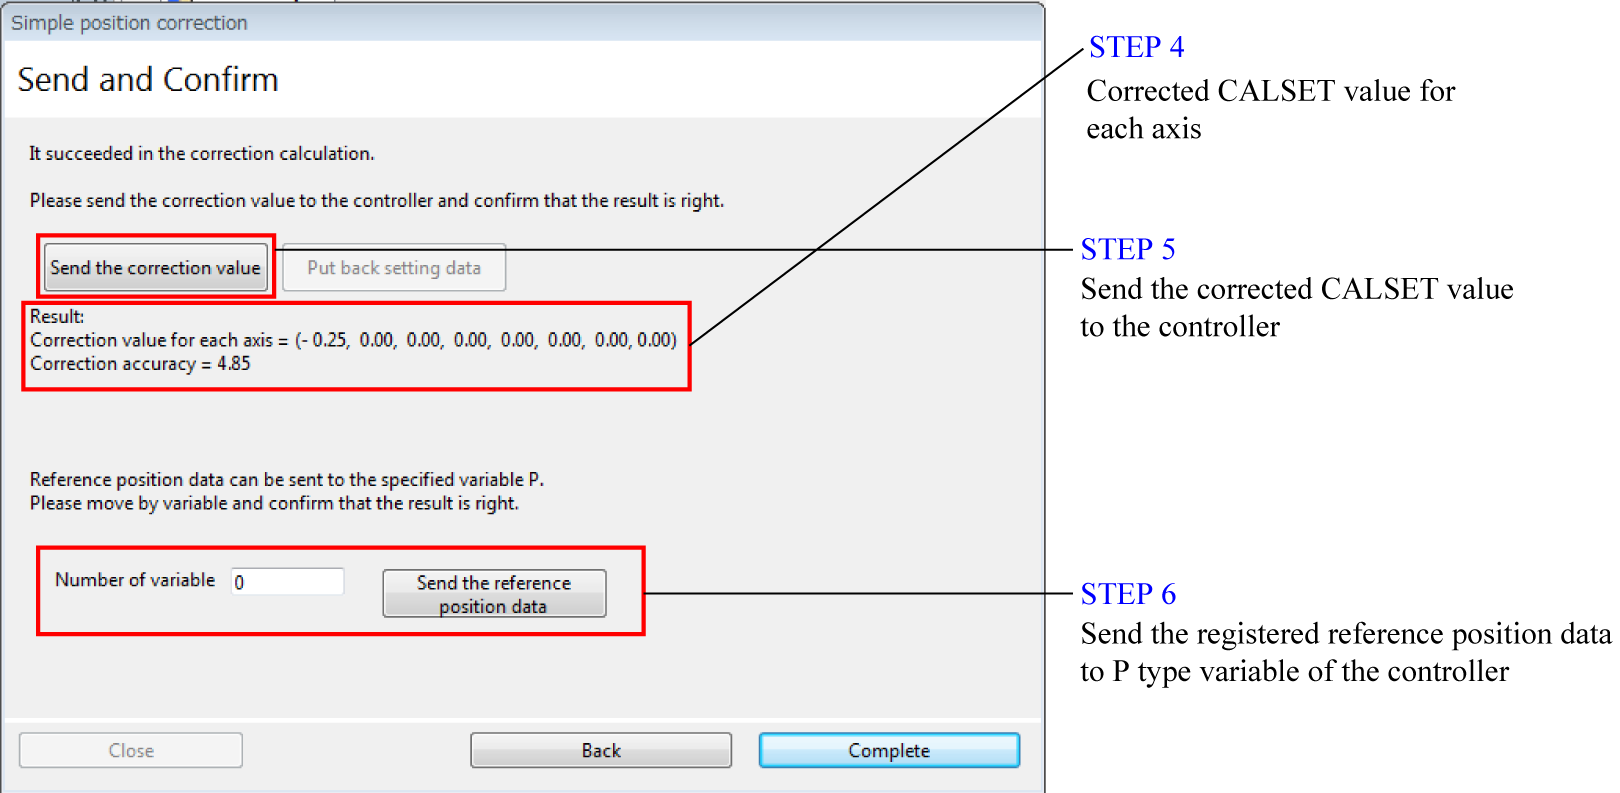
Check the CALSET value of each axis that the correction value has been calculated.
Correction accuracy is the value that shows the teaching accuracy. Correction accuracy is the total amount of the positional deviation between the taught positions in this step and the registered reference positions. Unit is millimeter. As you register more reference positions, the value tends to be larger.
5
Send the CALSET value of each axis that the correction value has been calculated to the controller.
6
Send the registered reference position data to the P type variable of the controller.
7
With a teach pendant, move the robot to the P type variable (reference position), check if the value has been corrected properly, and then click [Complete].
If values are not corrected properly, undo the data, and then teach the reference position again.
ID : 2787

