
ID : 4406
Configuring a Project
This function allows you to confirm and change the I/O allocation and the number of variables used.
1
Choose Project|Properties to display the property sheets for the project.
2
Click the tab containing the desired configuration option for the settings.
3
When configuration is complete, click OK button.
Click Cancel button will discard all changes.
If a different tab is selected before you click OK, entries on the previous tab will be discarded. Entries are not confirmed until you click OK button.
Be sure to click OK button to confirm the change before moving to another tab.
Property dialog box consists of the following tabs.
Robot Info. Tab
This displays project information.
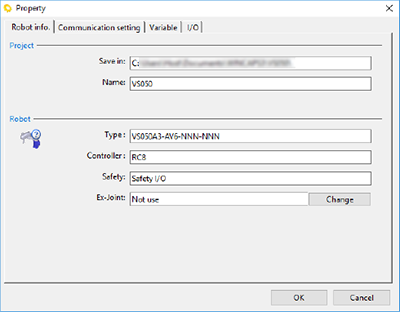
Project
This area displays the project save destination and the name.
Robot
This area displays the controller model and robot type.
[Change] button can switch "Use" / "Not use" for "Ex-joint".
Communication Setting Tab
This specifies the communications link to the robot controller and communications options.
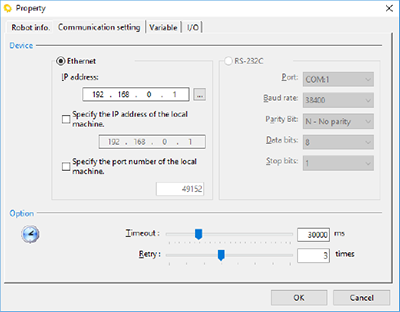
Ethernet
Enter the robot controller's IP address.
- IP address
Enter the robot controller's IP address. - Specify the IP address of the local machine.
If your computer has several network cards, you can specify the one to use when linking. Specify the network card's IP address. - Specify the port number of the local machine.
Check the box and enter the port number if you wish to specify the computer's port number when linking.
RS-232C
Enter RS-232C communication setting in line with those of the robot controller.
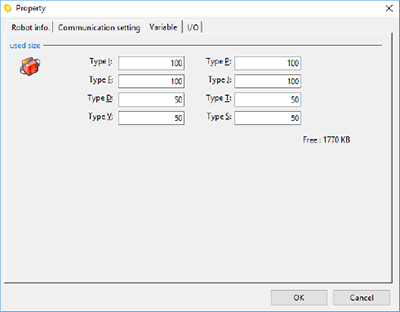
Variable Tab
This specifies the number of variables used.
The number of each variable needs to be same as that of the robot controller's project.
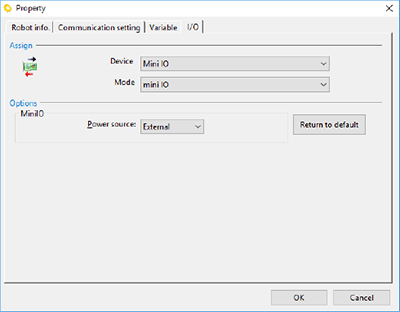
I/O Tab
This specifies I/O assignments and I/O options.
For further details on I/O specifications/settings for each device, refer to the Option Equipment Manual.
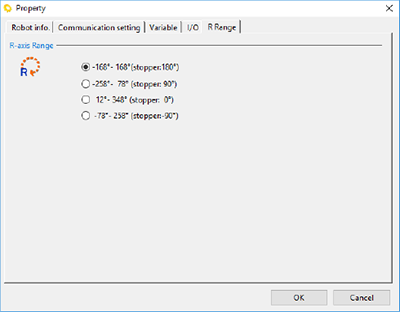
R Range tab
This tab is displayed only when XR series robot is used.
R axis motion range of robot controller can be changed.
For details, refer to WChanging the R-axis Motion Range Using WINCAPSIII in XR SERIES USER'S MANUAL.
ID : 4406