
ID : 5253
Loading WINCAPSIII
Start a programming support tool "WINCAPSIII".
1
On the Start menu, choose All Programs|DENSO ROBOTICS|WINCAPSIII|WINCAPSIII to display the dialog box for logging in.
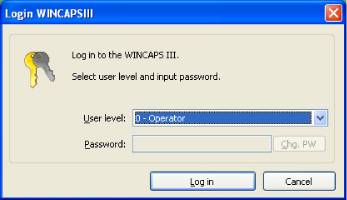
2
Specify user level and password.
Select 1-programmer then enter a password.
For details of password setting, refer to Registering a password of WINCAPSIII GUIDE.
Press the Log in button to load WINCAPSIII.
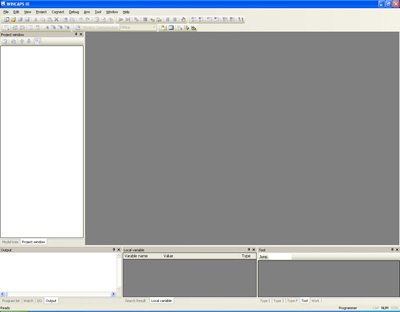
3
WINCAPSIII is loaded.
Creating a New Project
WINCAPSIII manages more than one robot program in projects.
Creating more than one program in a project and using a set of programs combined facilitates program management.
For creating a robot program, first create a new project.
WINCAPSIII provides a wizard for creating a new project.
New projects are created using the following two methods.
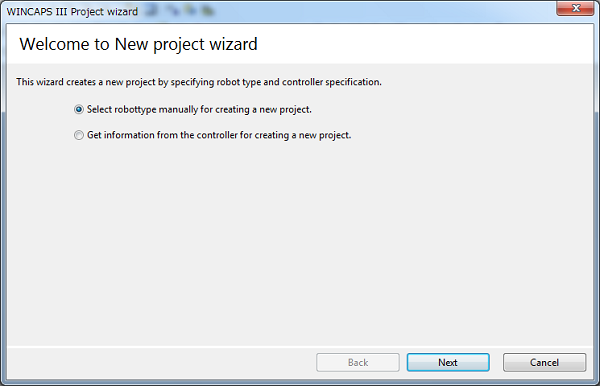
- Select robot type manually for creating a new project
This method can be used when the robot is not linked. Used for creating projects in advance of robot installation (when designing equipment, etc.) Match the settings with the controller to link to. Errors will occur during linking if the settings do not match. - Get information from the controller for creating a new project
If the robot and the controller are set up, import one of projects held in the robot controller into WINCAPSIII to create a new project. - Project name and location
- Robot type
- Robot controller options
In this section, create a new project by "Select robot type manually for creating a new project".
1
Choose File|New project to load this wizard.
Select "Select robot type manually for creating a new project" and click [Next].
The last four can be modified at any time, but not the first three:
2
Enter the name of a new project and specify the location to save the project folder. Then press Next.
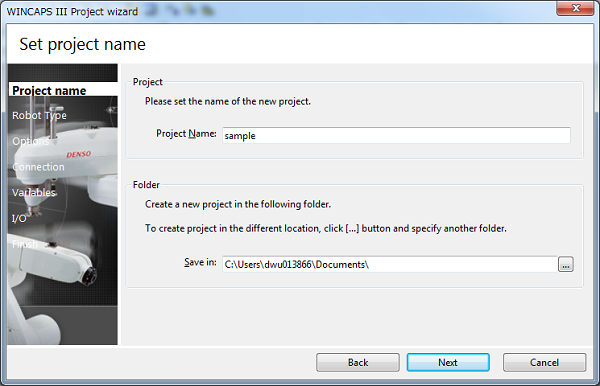
A new folder is created in the specified directory. The name of the new folder is the same as the project name that you've just created.
There is a basic setting that specifies where WINCAPSIII saves new projects. For further details on these settings, please refer to WINCAPSIII Basic Settings.
3
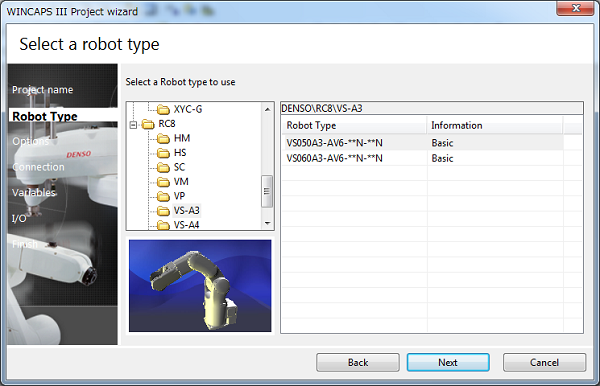
Select your robot controller and robot type, then press Next.
4
Select your robot controller specification then press Next.

Do not check the Customer specifications check box displayed by Robot controller options for standard robots. Use for robots with special specifications (with a "#" for the robot type).
5
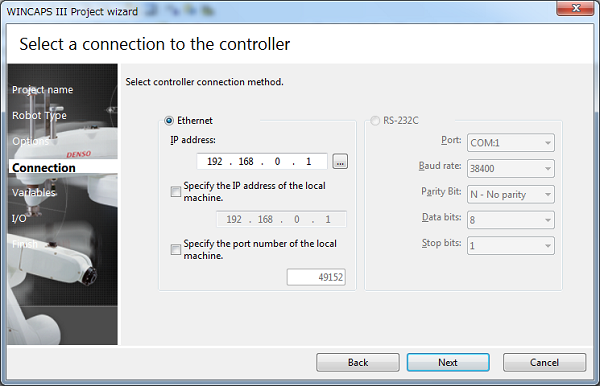
Select the interface between the controller and PC (WINCAPSIII) and specify the details, then press Next.
The interface can be changed even after creation of a project.
6
Enter the number of variables to use for each variable type, and then press Next.
The number of variables can be changed even after creation of a project.

7
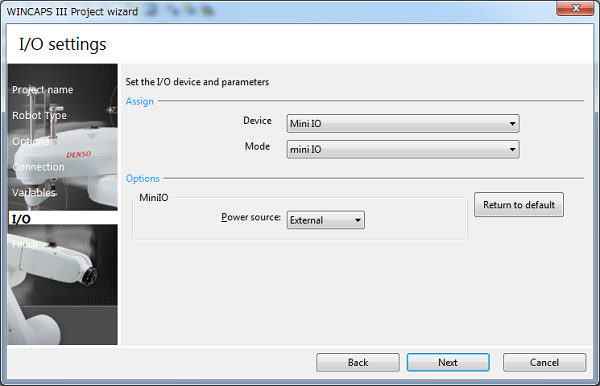
Set the I/O port.
The I/O port can be changed even after creation of a project.
Select the device connected to the controller and the assignment mode.
Configure the detailed device parameters according to your needs.
Then press [Next].
8
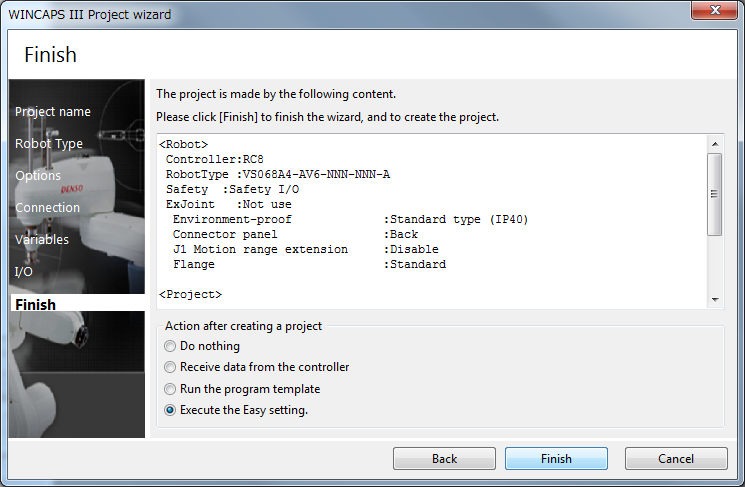
Confirm your settings. If they are correct, press Finish to terminate the wizard.
ID : 5253