
Setup Procedure when Operating with Two or More Robots
If you operate with two or more robots, you need to setup both a master controller and a slave controller, respectively.
- For the calibration of the conveyor tracking, perform in order of the master controller, the slave controller.
- Check that the joint setting of the slave controller is set to "Disable". If not, change the setting.
- Depending on the number of slave controllers and conveyors, sufficient performance may not be obtained because of the performance of the master controller's CPU. In that case, reduce the number of slave controllers and conveyors and split the system to lower the load on the master controller's CPU. Alternatively, consider to use a controller with a higher specification CPU as the master controller.
Setting for the Multicast
For the communicate from the master controller to a slave controller, communication method, called multicast, is used.
Multicast is a communication method, in which data is transmitted from one machine to multiple specific machines at the same time.
When multicast, special IP address, called "group address", is used to identify the group to be communicated.
When there is a different conveyor tracking system in the same segment with the set "group address", different "group address" has to be assigned to the other system, so that the communication interference does not occur.
| Item | Description |
|---|---|
| Multicast. Group address | Specify the group address used for multicast. Use the default value normally. To change the setting, use an IP address of Class D (224.0.0.0 to 239.255.255.255) |
| Multicast. Port number | Specify the port number used in multicast. Use the default value normally. |
| Multicast. I/F | Specify IP address of the Ethernet board which performs multicasting. When "255.255.255.255" is specified, the standard Ethernet board is selected. |
Setting Procedure for the Master Controller
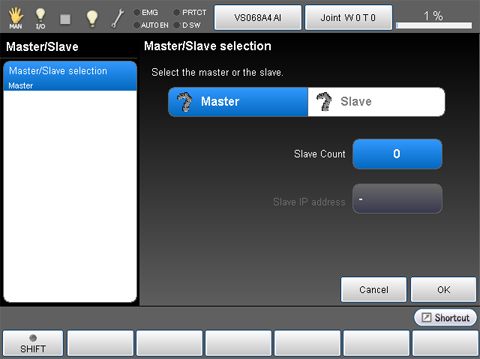
1 Displaying the [Master/Slave] window
On the "Tracking" window, press "Master/Slave" for the conveyor which should be set as a slave.

[Master/Slave] window is displayed.
2 Setting the Slave Count
Press [Slave Count].
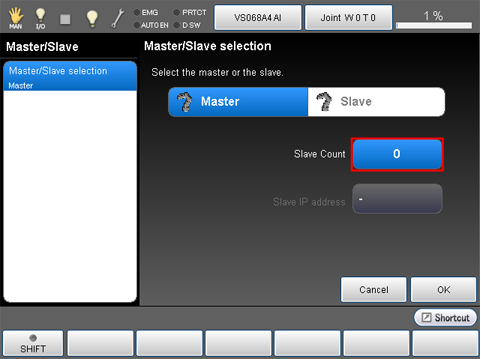
[Slave Count] window is displayed.
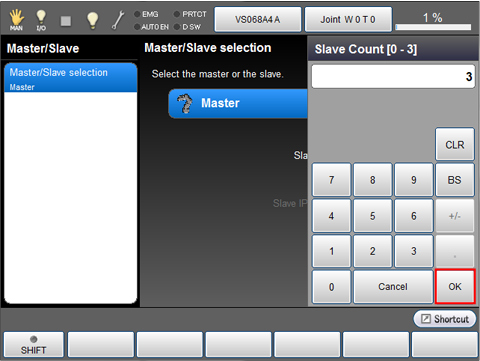
Enter the number of slave, and then press [OK].
This example assumes that three slaves are used.
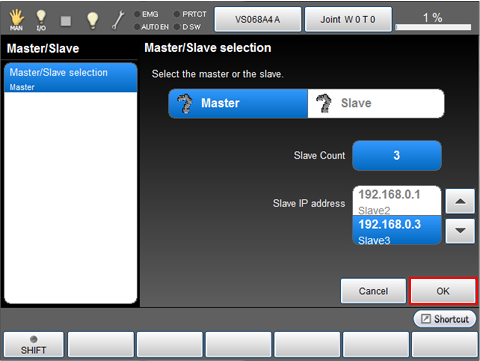
3 Setting the IP Address of Slaves
From the "Slave IP address" selection, press [Slave1].
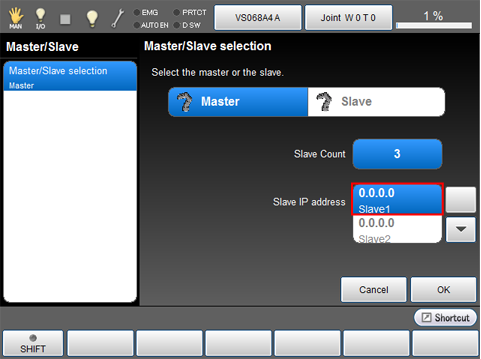
To select different slave address, use up and down allow keys.
[Slave IP address] is displayed.
Enter the I/P address of the slave controller using ten key, then press [OK].

Enter all slave controller's IP addresses by repeating Step 3.
4 Applying the Setting
Once master controller's settings are complete, press [OK].
When system message is displayed, press [OK] if everything is satisfactory.
To discard the new settings, press [Cancel].
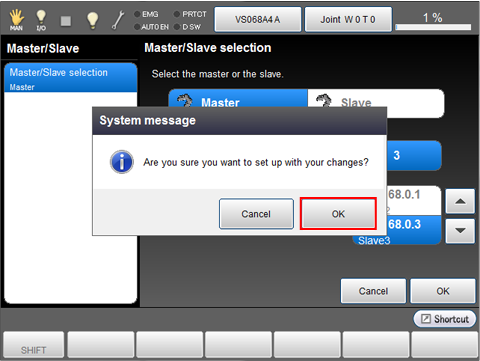
The setting change is confirmed and "Tracking" window is displayed.
5 Setting Up the Conveyor
Press [Setting] button of the "Conveyor 1" to setup.
The following steps are the same as the installation for one conveyor and one robot.
See "Selecting a Hardware", "Hardware Connection Confirmation", "Calibration".

Setting Procedure for the Slave Controller
1 Displaying the [Master/Slave] window
On the "Tracking" window, press "Master/Slave" for the conveyor which should be set as master.

[Master/Slave] window is displayed.

2 Setting the IP Address of Master
Press [Slave].

[Slave setting] window is displayed.
Press [Master IP address].
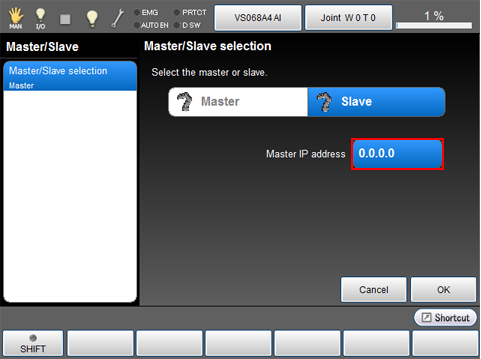
[Master IP address] is displayed.
Enter the I/P address of the master controller using ten key, then press [OK].

3 Applying the Setting
Once all item's settings are complete, press [OK].
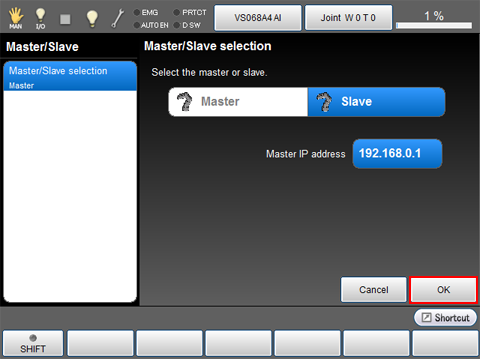
When system message is displayed, press [OK] if everything is satisfactory.
To discard the new settings, press [Cancel].

The setting change is confirmed and "Tracking [Slave]" window is displayed.
Check the system message then press [OK].

4 Switching to CAL the Slave (Run mode)
Start the [CAL the Slave (Run mode)] in the master controller.
Operation route: Top screen- [F10 Tracking] - [F4 CAL the Slave (Run mode)]
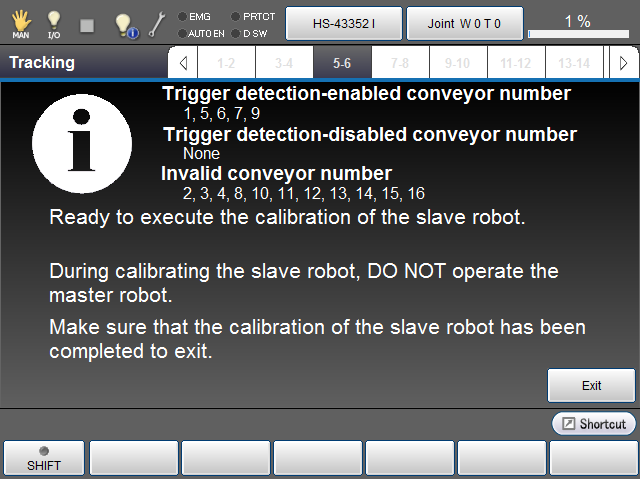
Do not operate the master controller during slave controller calibration.
5 Checking Connection with Master Controller
Press [Setting] on "Tracking [Slave]" window.
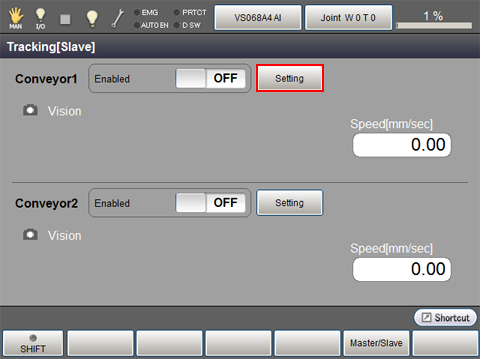
Conveyor setting window is displayed.

Start the conveyor then check whether the value of [Current encoder value], [Data buffer]changes properly. If the value changes, the setting is normal.
The "data buffer" in this context represents a "tracking buffer".
6 Setting Up the Conveyor
The following steps are the same as the installation for one conveyor and one robot.
See "Selecting a Hardware", "Hardware Connection Confirmation", "Conveyor - Robot Calibration", "Camera - Robot Calibration".
7 Terminating the CAL the Slave (Run Mode)
After calibration is complete, press [Exit Mode] of the master controller.
If You Use a Robot which was Used as Slave for a Master Robot.
You need to change the following items if you use a robot which was used as slave for a master robot.
- Connecting to the encoder for conveyor tracking
- Connecting to the I/O connector of the trigger signal
- Because the encoder of the conveyor tracking is not in use, select [Enable encoder only] to use the encoder.
- Because the robot is set as a slave, change it to a master.
If You do not Use a Slave Robot
If the system includes multiple robots but some of these robots are unused, delete unused robots from the slave list which has set by the master robot.
If robots fail to chuck a workpiece on the conveyor, the data of the workpiece is stored in the memory in the master robot. As stored data accumulates, the speed of calculation to assign robots to workpieces will be longer. As a result, the chuck start timing of the robot will be delayed.