
ID : 4030
Description of the Screen
Command for Remote TP/Virtual TP
Various screens can be displayed on the liquid crystal screen by using keys, buttons and switches on the Remote TP/Virtual TP.
Each screen has its own command menu. In the command menu, press function keys to select command.
Menu Items
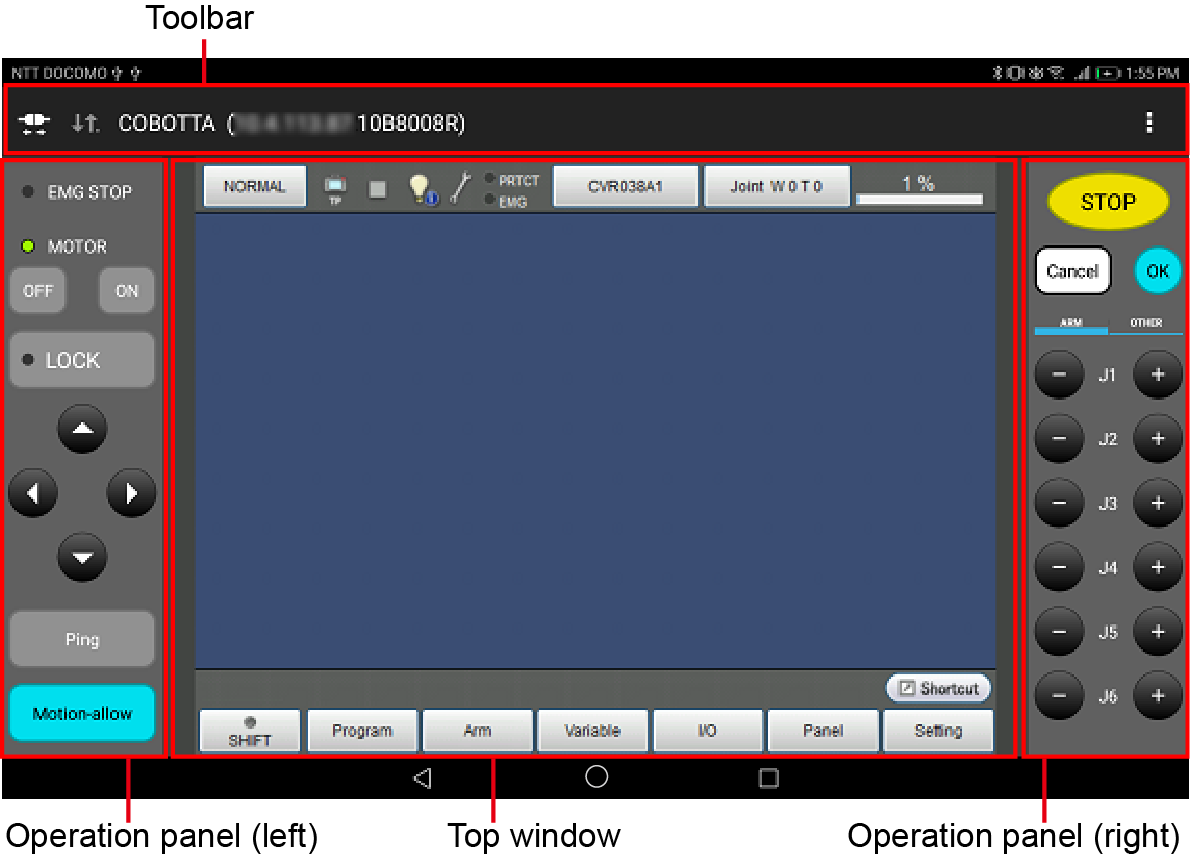
- Remote TP
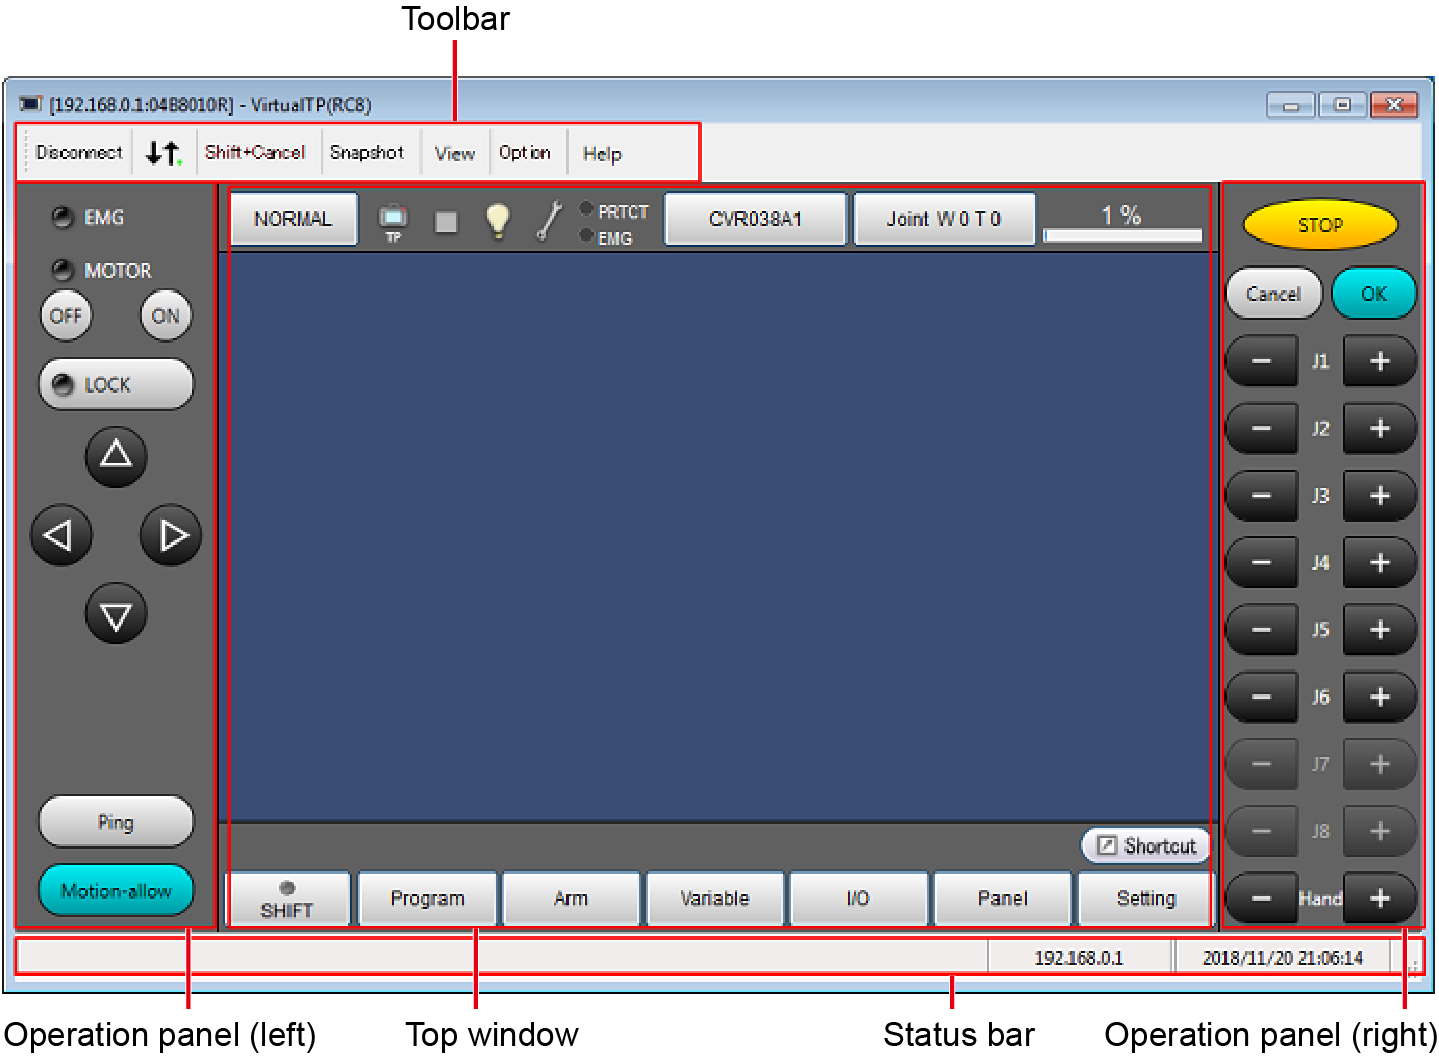
- Virtual TP
Toolbar
- Remote TP

- Virtual TP

| No. | Name | Description |
|---|---|---|
| (1) | Disconnect button | Disconnects the communication with COBOTTA |
| (2) | Connection indicator | Displays the communication status. While in connection, the lamp at the lower right of the icon flashes. |
| (3) | Connection destination information | Displays the destination name registered with Remote TP. The content in parentheses shows the destination IP address and serial number. |
| (4) | Menu | Displays terms of service, version information, copyright information, and MAC address. |
| (5) | Shift+Cancel button | Performs the function of "Shift + Cancel". |
| (6) | Snapshot button | Saves the displayed top window in a specified format. |
| (7) | View button | Changes the size of the top window. |
| (8) | Option button | Used to configure time out while in connection or auto-disconnection settings. |
| (9) | Help button | Displays the user's guide or application version of Virtual TP. |
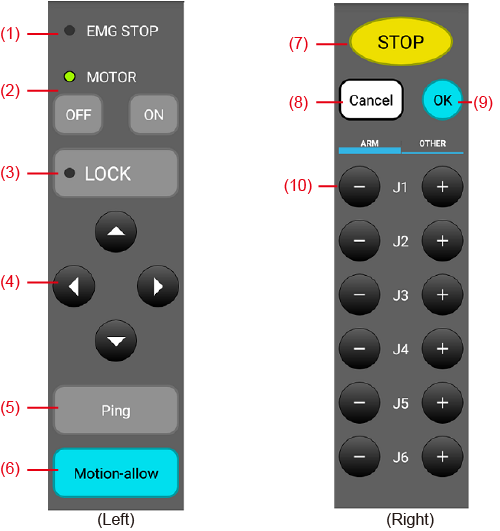
Operation Panel
- Remote TP
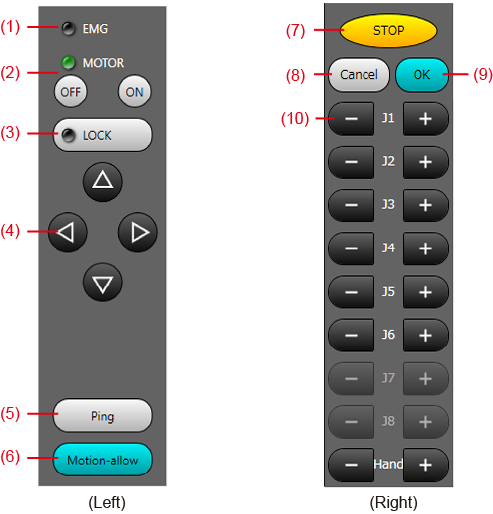
- Virtual TP
| No. | Name | Description |
|---|---|---|
| (1) | Emergency stop indicator | Displays the emergency stop status. The lamp is lit at the emergency stop. |
| (2) | Motor buttons | Turn on or off the motor. The lamp is lit when the motor is turned on. |
| (3) | Lock button | Turn on or off the machine lock. The lamp is lit when the machine lock is turned on. |
| (4) | Direction buttons | Moves the cursor on the top window. |
| (5) | Ping button | Confirms connection with COBOTTA. When pressing the button, the LED on COBOTTA flashes in green. |
| (6) | Motion-allow button | Must be pressed when moving the robot, such as moving to the variable-specified position. |
| (7) | Stop button | Performs "Stop". |
| (8) | Cancel button | Performs "Cancel". |
| (9) | OK button | Performs "OK". When moving the robot, such as moving to the variable-specified position, the Motion Allow button (or Shift key for a PC incompatible with a touch panel) must be pressed. |
| (10) | Axis operation buttons | Moves the corresponding axis. The Motion Allow button (or Shift key for a PC incompatible with a touch panel) must be pressed. |
Status Bar
Displays the IP Address of COBOTTA connected, annotation, and current time.
The status bar display area is only available for Virtual TP.
Top Window
The following image is the top window. Commands in the command menu can be sequentially reached from this top window.
The top window is common in Remote TP and Virtual TP.
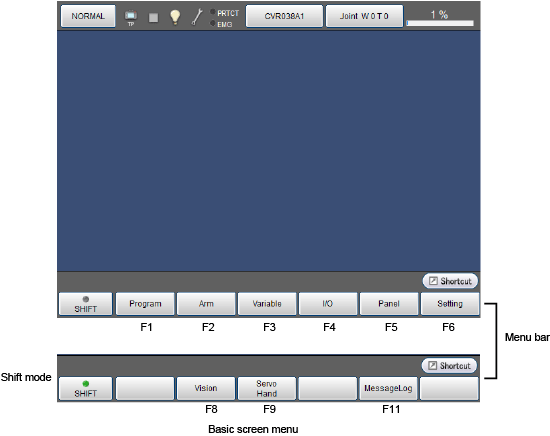
The language selection screen is displayed when turning on the COBOTTA for the first time.
For details about the way of setting, refer to "Turning ON COBOTTA".
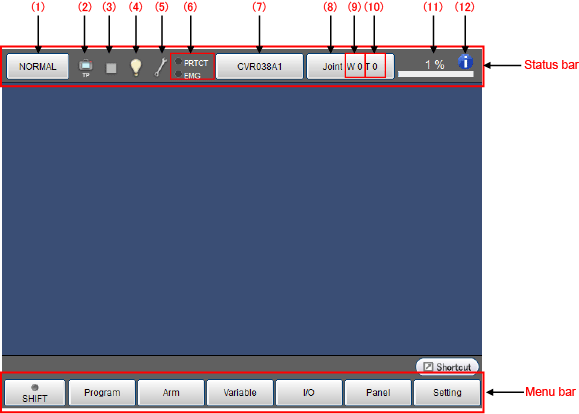
Icons
For details of icons displayed in the status bar on the top window, refer to the following list.
| No. | Name | Description | |
|---|---|---|---|
| (1) | Move mode | Normal mode | |
| Direct preparation mode, Direct mode | |||
| (2) | Executable token |
TP | |
| I/O | |||
| Ethernet | |||
| (3) | Program running | Program is under suspension. | |
| Program is executing | |||
| Supervisory task is executing | |||
| Program and supervisory task are executing | |||
| Message output (Display when PrintMsg command execution) | |||
| Vicinity of the singular point | |||
| (4) | I/O status/Arm status |
Pseudo input unused and I/O lock unused (Note)I/O lock:Limit I/O communication with external devices |
|
| Pseudo input used or I/O locked | |||
Virtual fence or Exclusive control is enabled. |
|||
| (5) | System state | Normal | |
Abnormal
|
|||
| (6) | Switch input state | EMG | Emergency stop state |
| PROTECT | Protective stop state | ||
| (7) | Robot selection button |
|
Selects and displays the robot type |
| (8) | Move mode under the manual operation |
|
Displays the move mode ([Joint], [XY], and [TOOL]) under the manual operation. |
| (9) | Work coordinate |
|
Display the selected work number. |
| (10) | Tool coordinate |
|
Displays the selected tool number. |
| (11) | Velocity button |
|
Sets and displays the external speed. |
| (12) | Inching | This icon appears while inching operation. | |
ID : 4030