
ID : 4053
Setting Connection with WINCAPSIII
For EtherNet Connection
Setting COBOTTA
Configure COBOTTA to enable it to communicate with a PC (WINCAPSIII) over Ethernet. This setting is performed through Remote TP/Virtual TP.
Set the communication permission and IP address.
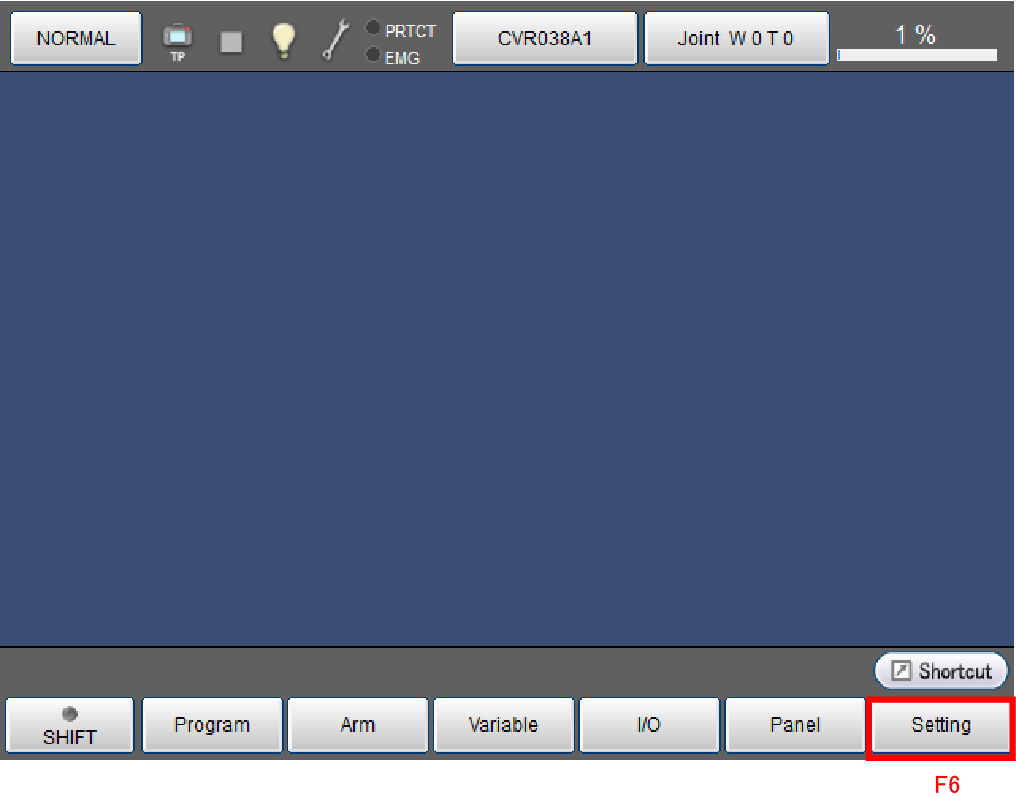
1
In the top window of Remote TP/Virtual TP, press [F6 Setting].
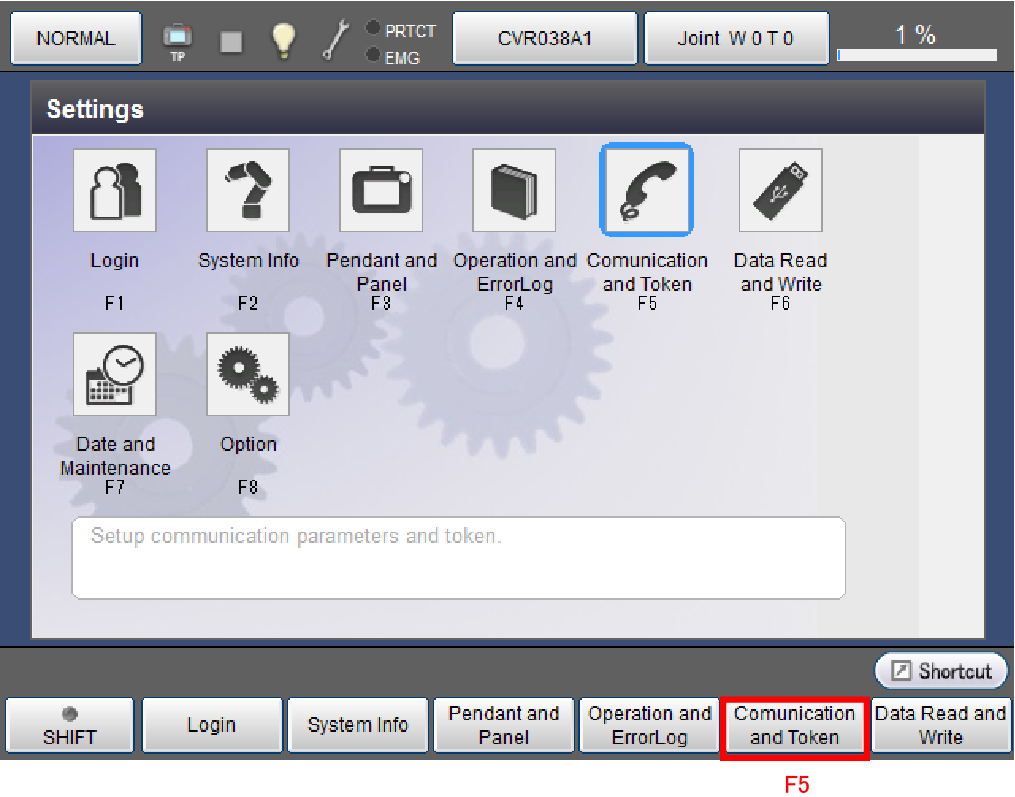
2
The "Settings (main)" window is displayed. Press [F5 Communication and Token].
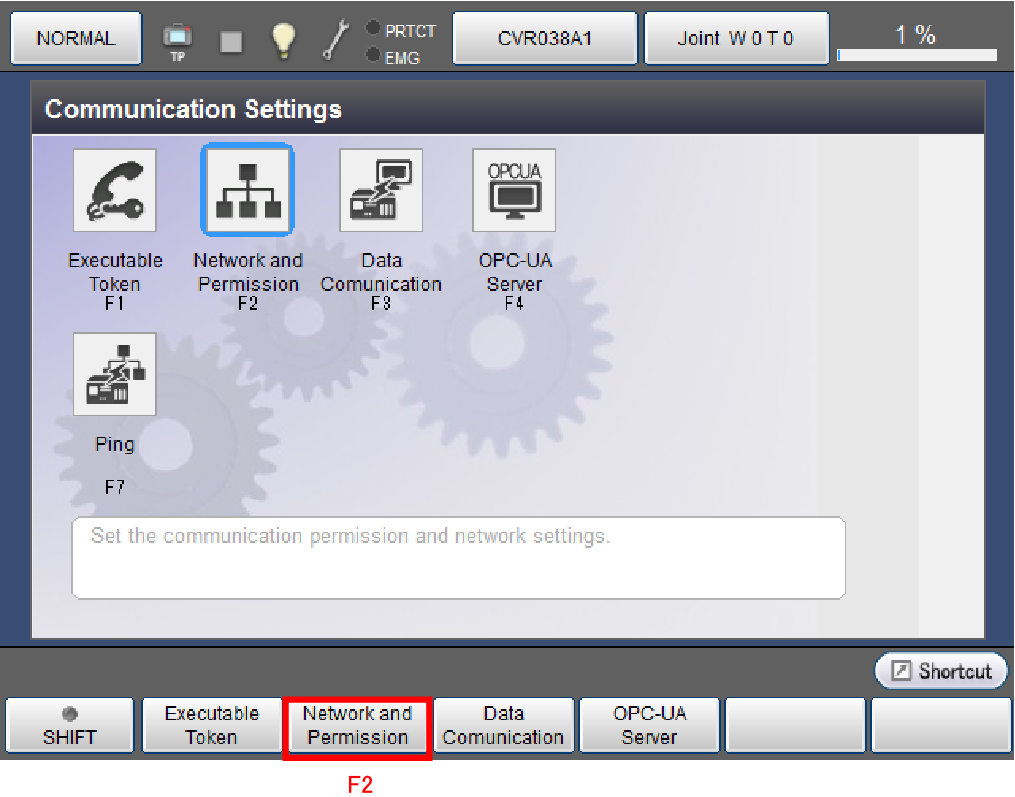
3
The Communication Settings [Menu] window is displayed. Press [F2 Network and Permission].
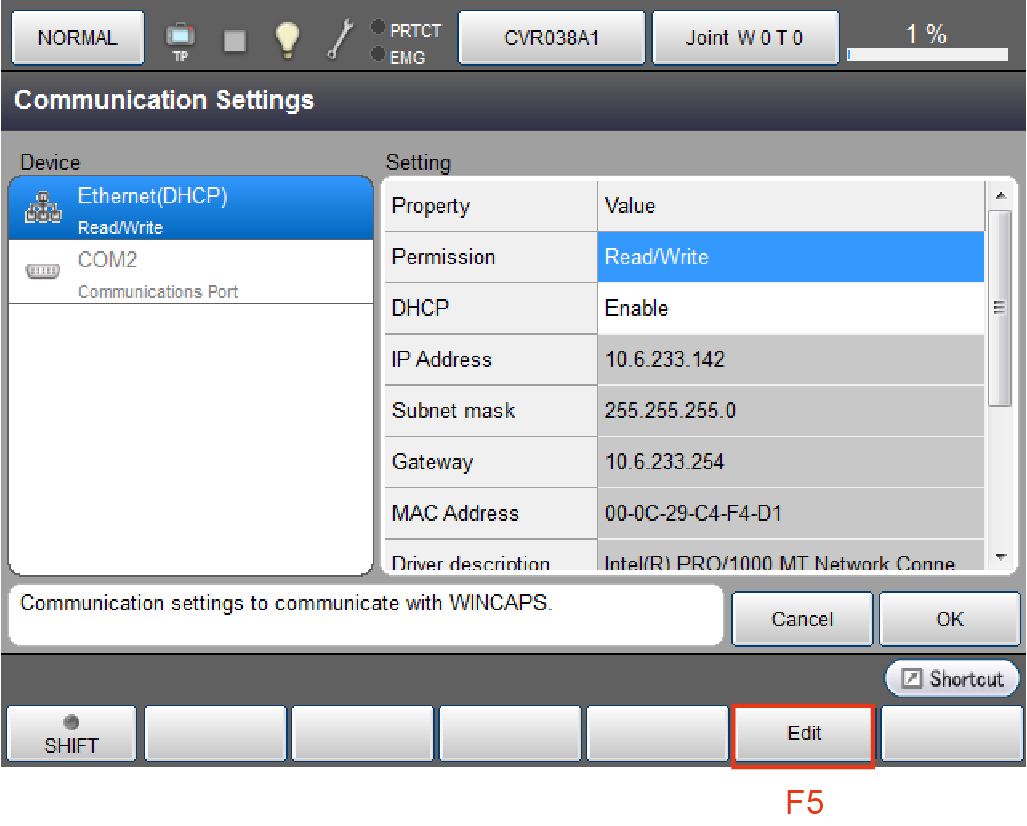
4
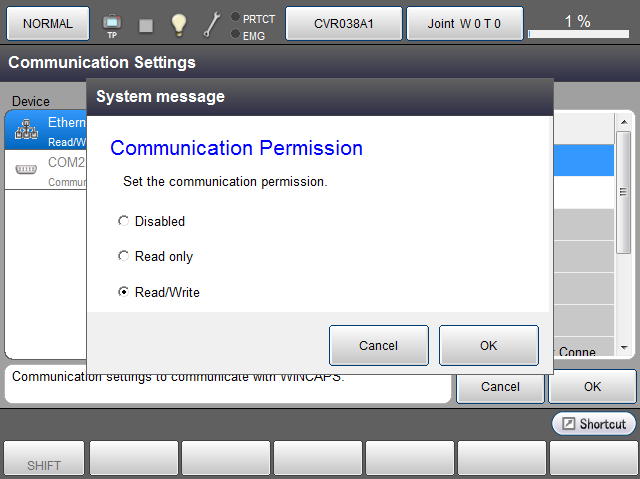
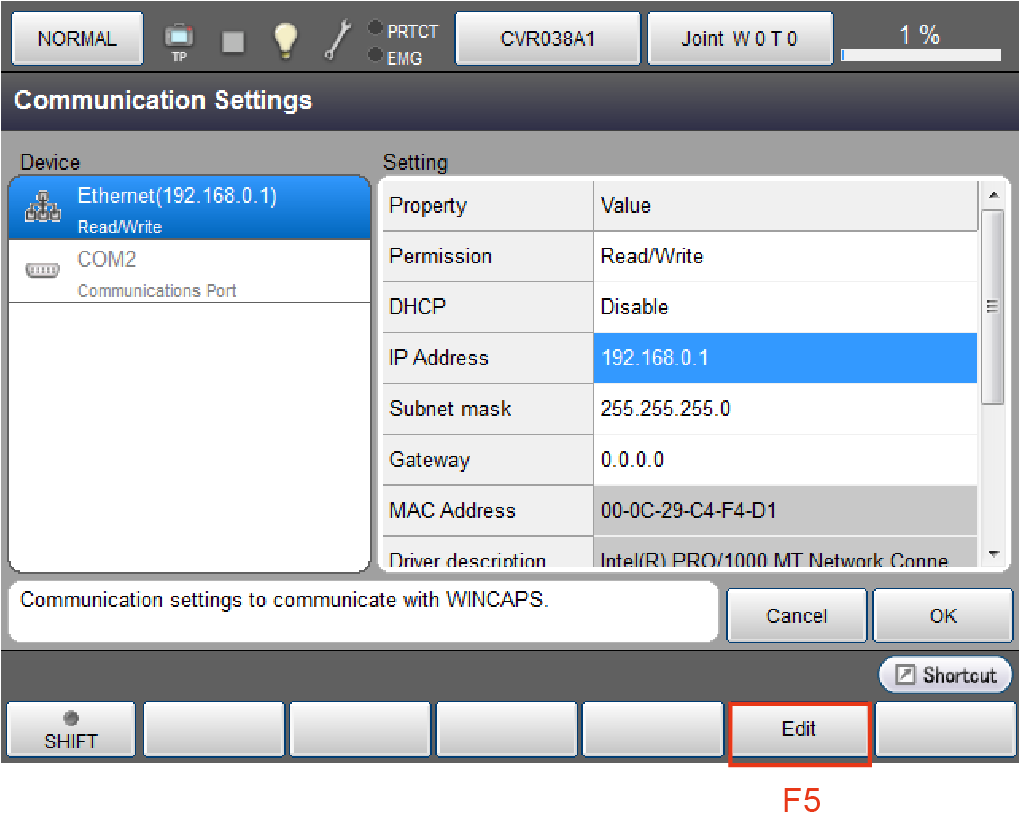
The [Communication Settings] window is displayed. Select [Permission] using cursor keys or directly touching the screen.
The selected section will be highlighted. Press [F5 Edit].
5
The system message will be displayed. Select [Read/Write].
Communication permission is defined as follows. When using EtherNet, [Read/Write] must be selected.
- Disabled: Communication port is not used.
- Read only: COBOTTA data can be read in the PC side. Data cannot be transmitted from the PC to COBOTTA.
- Read/Write: Data can be bidirectionally exchanged between the PC and COBOTTA.
With the desired option selected, press [OK].
6
The display returns to [Communication Settings] window. Select [IP Address] using cursor keys or directly touching the screen.
The selected section will be highlighted.
Press [F5 Edit].
7
Enter the address using the numerical keypad that is appearing.
With the address entered, press [OK] on the numerical keypad.
Pressing [OK] returns the display to the [Communication Setting] window.
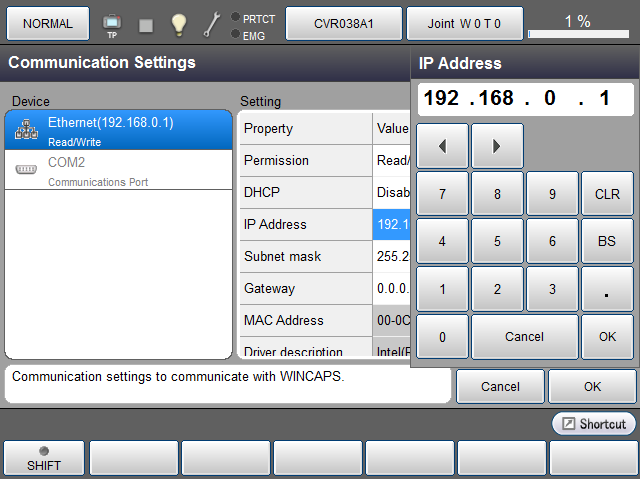
If the subnet mask must be changed, follow the procedures in STEP 6 and 7 to change it in the same manner.
8
Press [OK] on the Communication Settings screen.
The display returns to [Menu] window of Communication Settings.
9
Press [Cancel] button twice on Remote TP/Virtual TP.
The display returns to the top window.
ID : 4053