
ID : 10962
Register Auxiliary Axes in an Arm Group
To operate auxiliary axes by program, you need to set up an arm group.
Arm Group
"Arm Group" is a semaphore to control axes in a group as a single unit.
Only when a task holds an "arm group" semaphore (herein called "arm group" and expressed as "Group n"), it can control robot axes and auxiliary axes.
- Example of arm group configuration (for 6-axis robots)
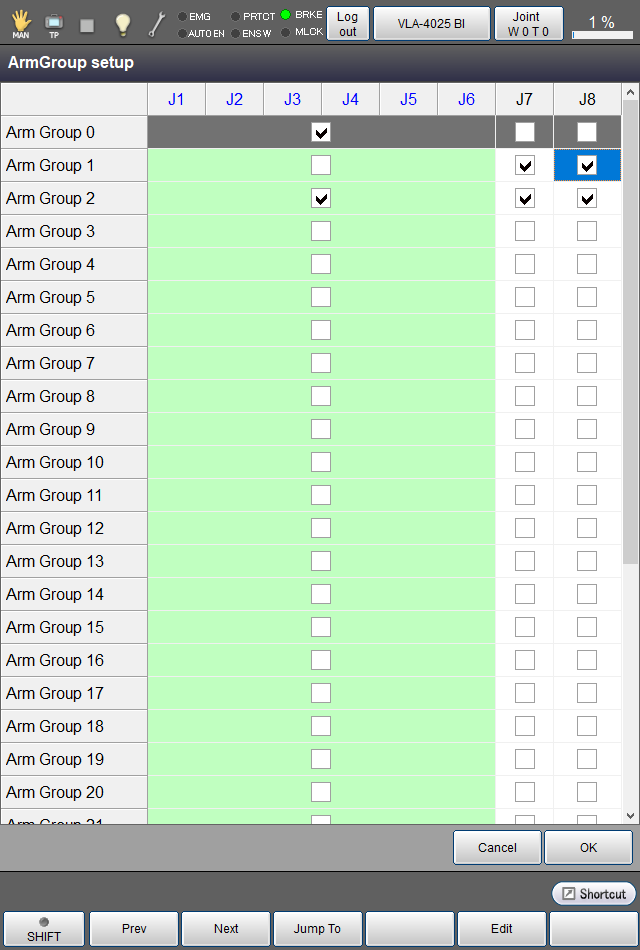
In the above example:
Arm group 0: Only robot axes involved.
Arm group 1: Only auxiliary axes (7th and 8th) involved.
Arm group 2: Robot axes and auxiliary axes (7th and 8th) involved.
By activating a task holding the "arm group" semaphore with auxiliary axes involved, you can operate the auxiliary axes.
- In the above configuration example, a task holding Group 1 can control the 7th and 8th auxiliary axes only.
- An arm group prevents more than one task from executing motion commands to the same axis at the same time.
Get an Arm Group
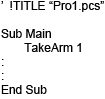
To make tasks get an arm group, give the TakeArm command an arm group number as an argument as shown below.
In this example, “Pro1” acquires the arm group 1 by TakeArm command.
Restrictions on the Application of Arm Groups
If more than one task involves axes shared in their arm groups, those tasks cannot be simultaneously executed. Tasks involving arm groups without shared axes can be simultaneously executed.
- Example
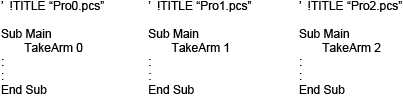
Arm Groups 0 and 1 involve no shared axis, so “Peo0” and “Pro1” can be executed simultaneously. (Robot axes and auxiliary axes can be simultaneously controlled by different programs.)
Arm Groups 0 and 2 involve shared axes (J1 to J6), so “Pro0” and “Pro2” cannot be executed simultaneously. When the later TakeArm command is executed, an error will occur.
Release the Currently Held Arm Group
Executing the GiveArm command releases the currently held arm group.
The currently held arm group will be automatically released also if a program stops due to occurrence of an error or because of normal program end.
Set Up an Arm Group
1
Operation path: Top screen - [F2 Arm] - [F12 Maintenance] - [F10 Joint Settings] - [F1 ArmGroup]
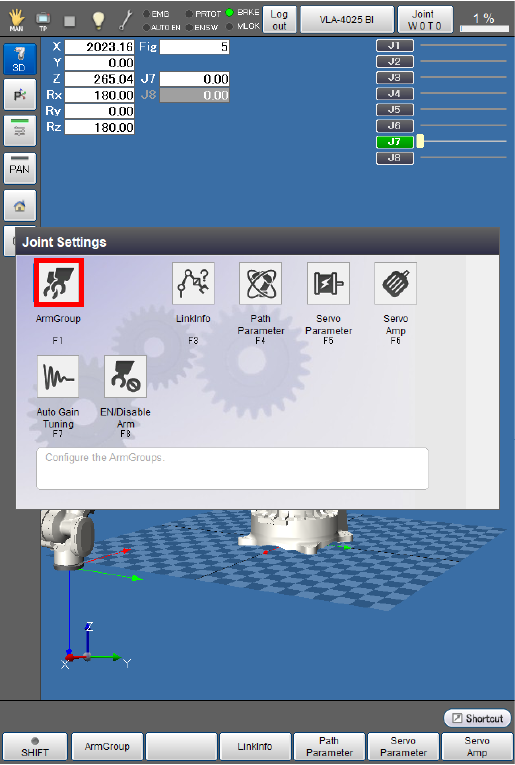
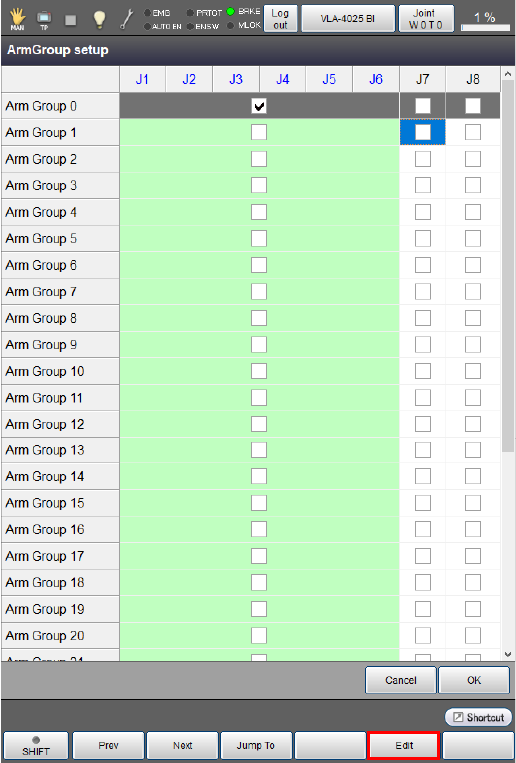
The [Arm Group setup] window appears.
2
Move the cursor to an axis to be grouped and then press [F5 Edit].
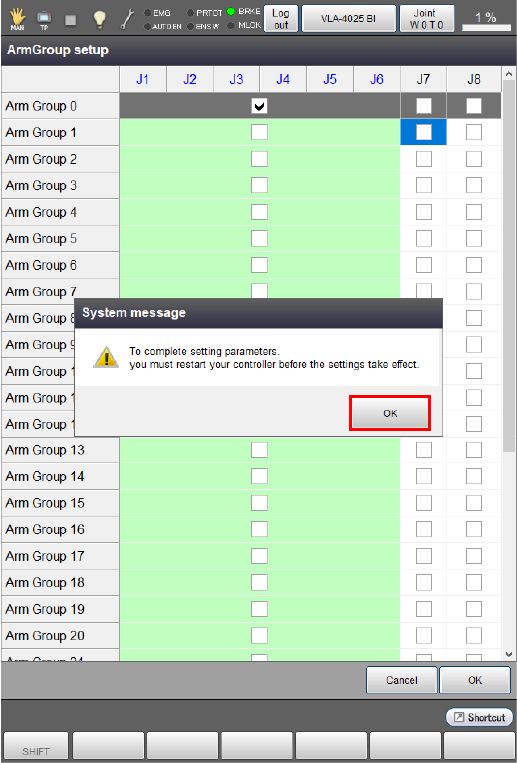
3
A system message appears to confirm whether to enable the arm group settings, then press [OK].
The setting change is not confirmed if [Cancel] is pressed.
4
After all arm group settings are completed, press [OK] on the [Arm Group setup] window.
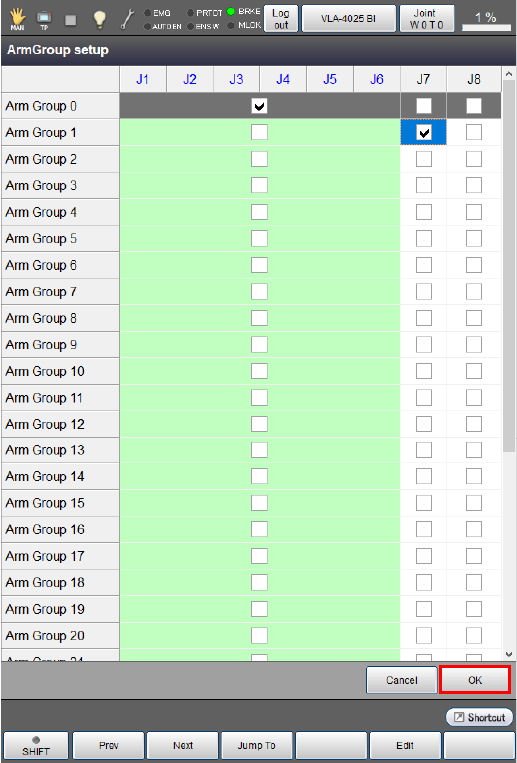
Arm group setting changes are saved and the [Joint Settings] window appears again.
Notes for setting up an arm group
- Arm Group 0 cannot be accessed.
- Robot axes are set all to either "Enabled" or "Disabled”. For example, in a 6-axis robot, all six axes are either "Enabled" or "Disabled".
-
Auxiliary axes that you want to enable in an arm group need to be set to "Enabled" in the "Joint enable/disable setting" on the [Servo Amp] setting window beforehand.
ID : 10962