
ID : 11103
How to install the controller protective box (MC9)
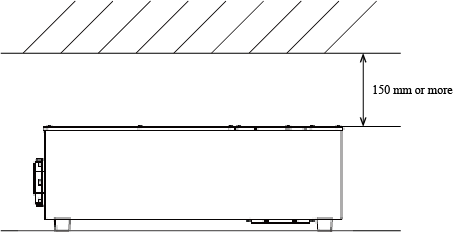
- Install the controller protective box (MC9) indoors.
- Place the controller protective box (MC9) on horizontal plane.
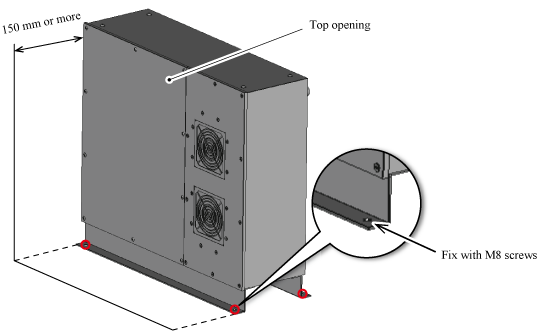
- Keep a space of at least 150 mm from the upper opening of the controller protective box (MC9).
Upright installation
For the upright installation, purchase the stand set (optional part).
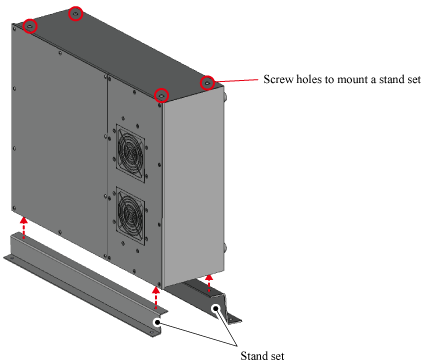
The controller protective box (MC9) has screw holes to fix the stand set. There are four screw holes for each side, so customers can choose the side to mount a stand set by customers.
- Stand set (sold separately)
| Part name | Part number |
|---|---|
| Stand set (RC8 controller protective box Light) (*1) | 410349-296* |
*1 : Part name shows "RC8 controller protective box Light" though, this option is available for the controller protective box (MC9) as well.
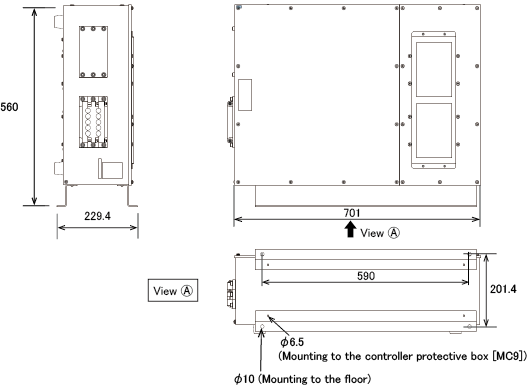
The external dimensions of the protective box when using a stand set are shown in the figure below.
Installation
1
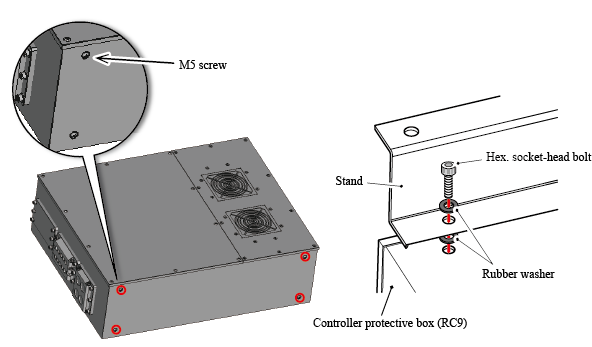
Remove four screws of the side to install the controller protective box (MC9).
Then, with the rubber washer and the hexagon socket head bolts that come with the stand set, fix the controller protective box (MC9) and the stand. Put the rubber washer on both side of the stand (refer to the figure below), fix four screw holes (φ6.5) with the hexagon socket head bolts.
Recommended torque : 3N・m
2
Place the controller protective box (MC9) fixed with the stand to the installation position. Keep a space of at least 150 mm from the top opening of the controller protective box (MC9), same as the horizontal installation.
Put M8 screws for fixing through the screw holes (φ10), secure with four screws to the floor.
Screws to secure to the floor are not provided. Please prepare the screws by customers.
ID : 11103