
ID : 11240
Robot Controller Setting
Using WICNAPSIII, specify the parameters for the robot controller.
1
Using WINCAPSIII, receive the “I/O” data of the robot controller. If the I/O data has already been received, proceed to the next step.
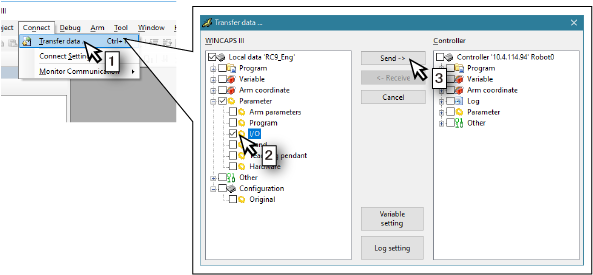
For how to receive the robot controller data using WINCAPSIII, refer to "Data Transfer". To show the "I/O" data, open "Parameter" in the controller data list on the [Transfer data] window (see the image below).

2
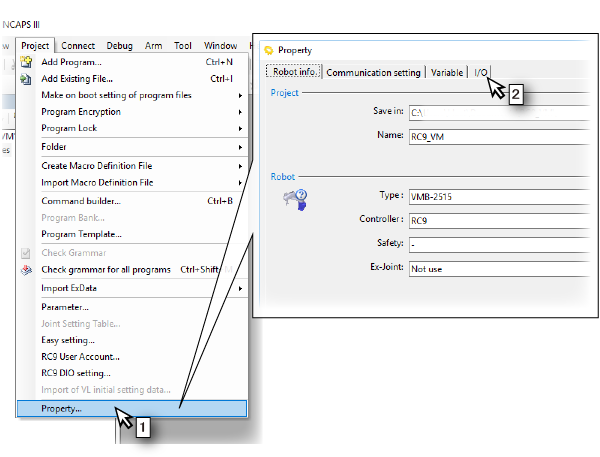
Open the parameter setting window.
- In the [Project] menu, select [Property].
- Click the [I/O] tab on the [Property] window.
3
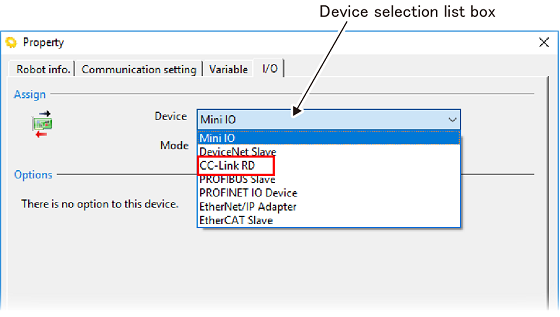
If you have added the CC-Link slave terminal to the existing robot controller, you need to change [Device].
Select “CC-Link RD” in [Device selection list box].
4
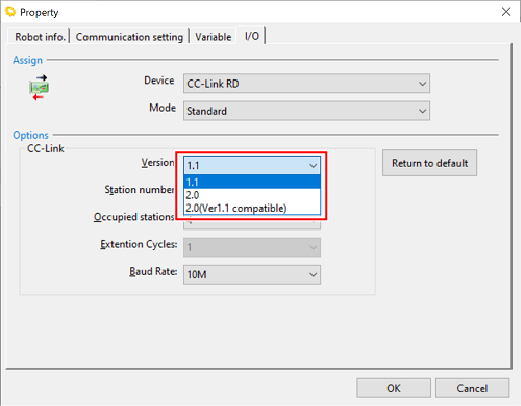
Select a CC-Link version.
5
Specify [Station number], [Occupied stations], [Extension Cycles], and [Baud Rate].
For the CC-Link Ver. 1.1 and Ver. 2.0 (Ver.1.1 compatible), the extension cycles cannot be specified.

6
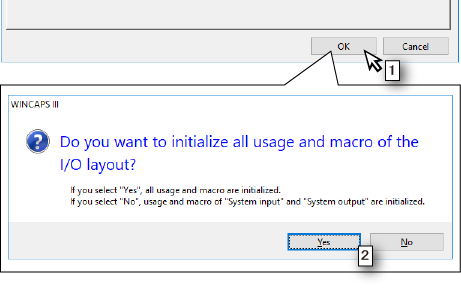
- Click the [OK] button.
- A window asking whether to initialize the I/O allocation appears. Click either [Yes] or [No].
7
Send the specified parameters to the robot controller.
- Select [Transfer data] from the [Connect] menu.
- Open [Parameter] in the [WINCAPSIII] pane and check [I/O].
- Click the [Send] button.
8
- The [Login RC9] window appears. Select a user account with user level "Programmer" or higher registered in the robot controller.
- Enter a password.
- Click the [Log in] button.
- A window indicating that the data transfer has been complete appears. Click the [OK] button.
- Restart the robot controller.

This completes the robot controller setting.
ID : 11240