
ID : 1876
Button
This part has two events: CLICKED and RELEASED.
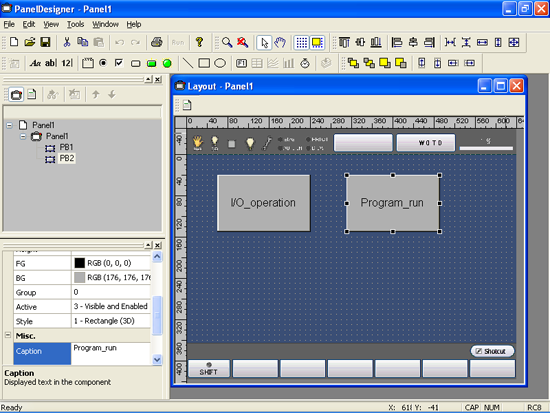
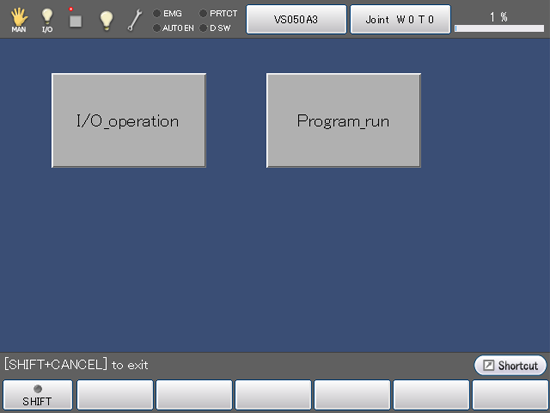
The following example illustrates the procedure for creating two buttons: one (labeled "I/O operation") that turns I/O variable #24 on as long as it is pressed and another (labeled "Program_run") that runs a program (Sample pro).
Button Example
1
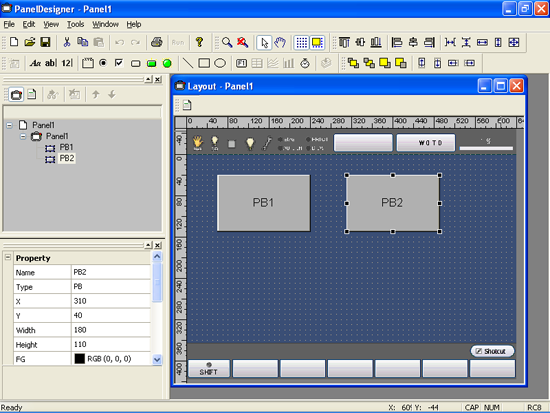
Create a panel layout with two buttons.
The buttons can go anywhere within the boundaries of the teach pendant screen.
All parts, not just buttons, have a unique name providing read/write accesses to part properties from the part itself as well as other parts on the same TP panel. The editor uses as its default Button plus a number, but the developer is free to change names. The following example simply uses the default names: "PB1" and "PB2."
2
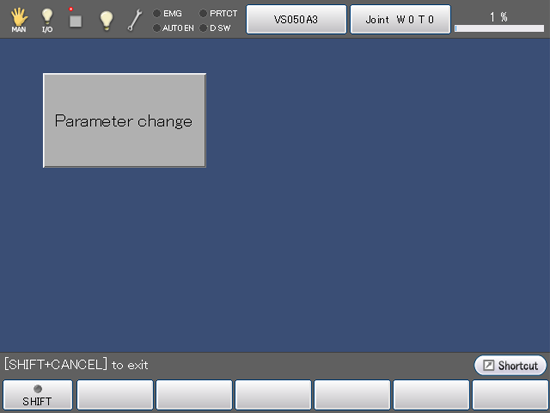
Label the buttons by changing their caption properties.
3
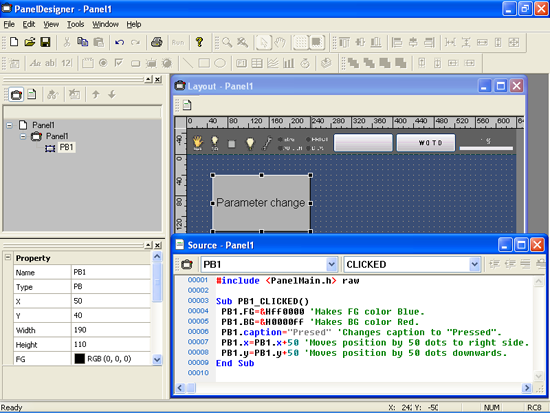
Adding action source code
A button has separate action source code blocks for the events CLICKED and RELEASED. The following example shows how to add action source code for these two events.
Double-clicking the button labeled "I/O operation" opens an empty Source Code Edit window.
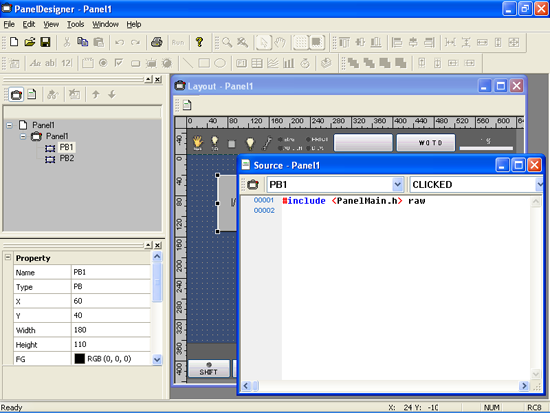
4
Start by adding action source code to turn I/O variable #24 on when the button is pressed. Selecting the combination PB1 and CLICKED from the Part and Event list boxes at the top of the Source Code Edit window automatically generates the corresponding 3-line action source code block skeleton on the editor screen.
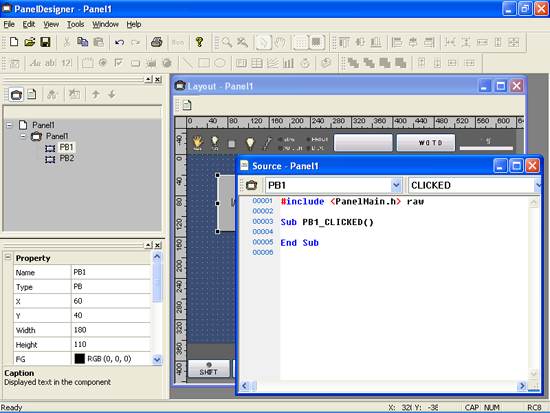
5
Flesh out the skeleton with action source code.

6
Similarly add action source code to turn I/O variable #24 off when PB1 is released (RELEASED) and to run a program (Sample pro) when PB2 is pressed (CLICKED).

7
When complete the programming save it.
8
Send the program to the controller by WINCAPSIII.
9
Changing button properties
Color, position, and other button properties support read/write access from the part itself as well as other parts on the same TP panel using the standard dot notation: part_name.property.
The following example changes the foreground color (.FG), background color (.BG), display text (.Caption), horizontal position (.X), and vertical position (.Y).
Start by loading the editor, adding a button, and opening the corresponding Source Code Edit window as above.

10
Type in the source code as shown below.
11
Save the program then send it to the controller by WINCAPSIII same as before.
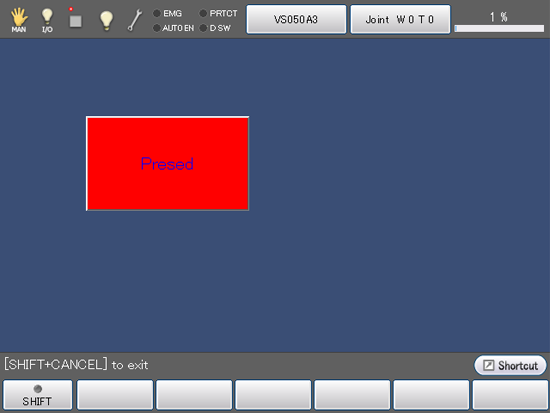
TP Panel Screen with Button Pressed
ID : 1876