ID : 49
Securing the Robot Unit
1
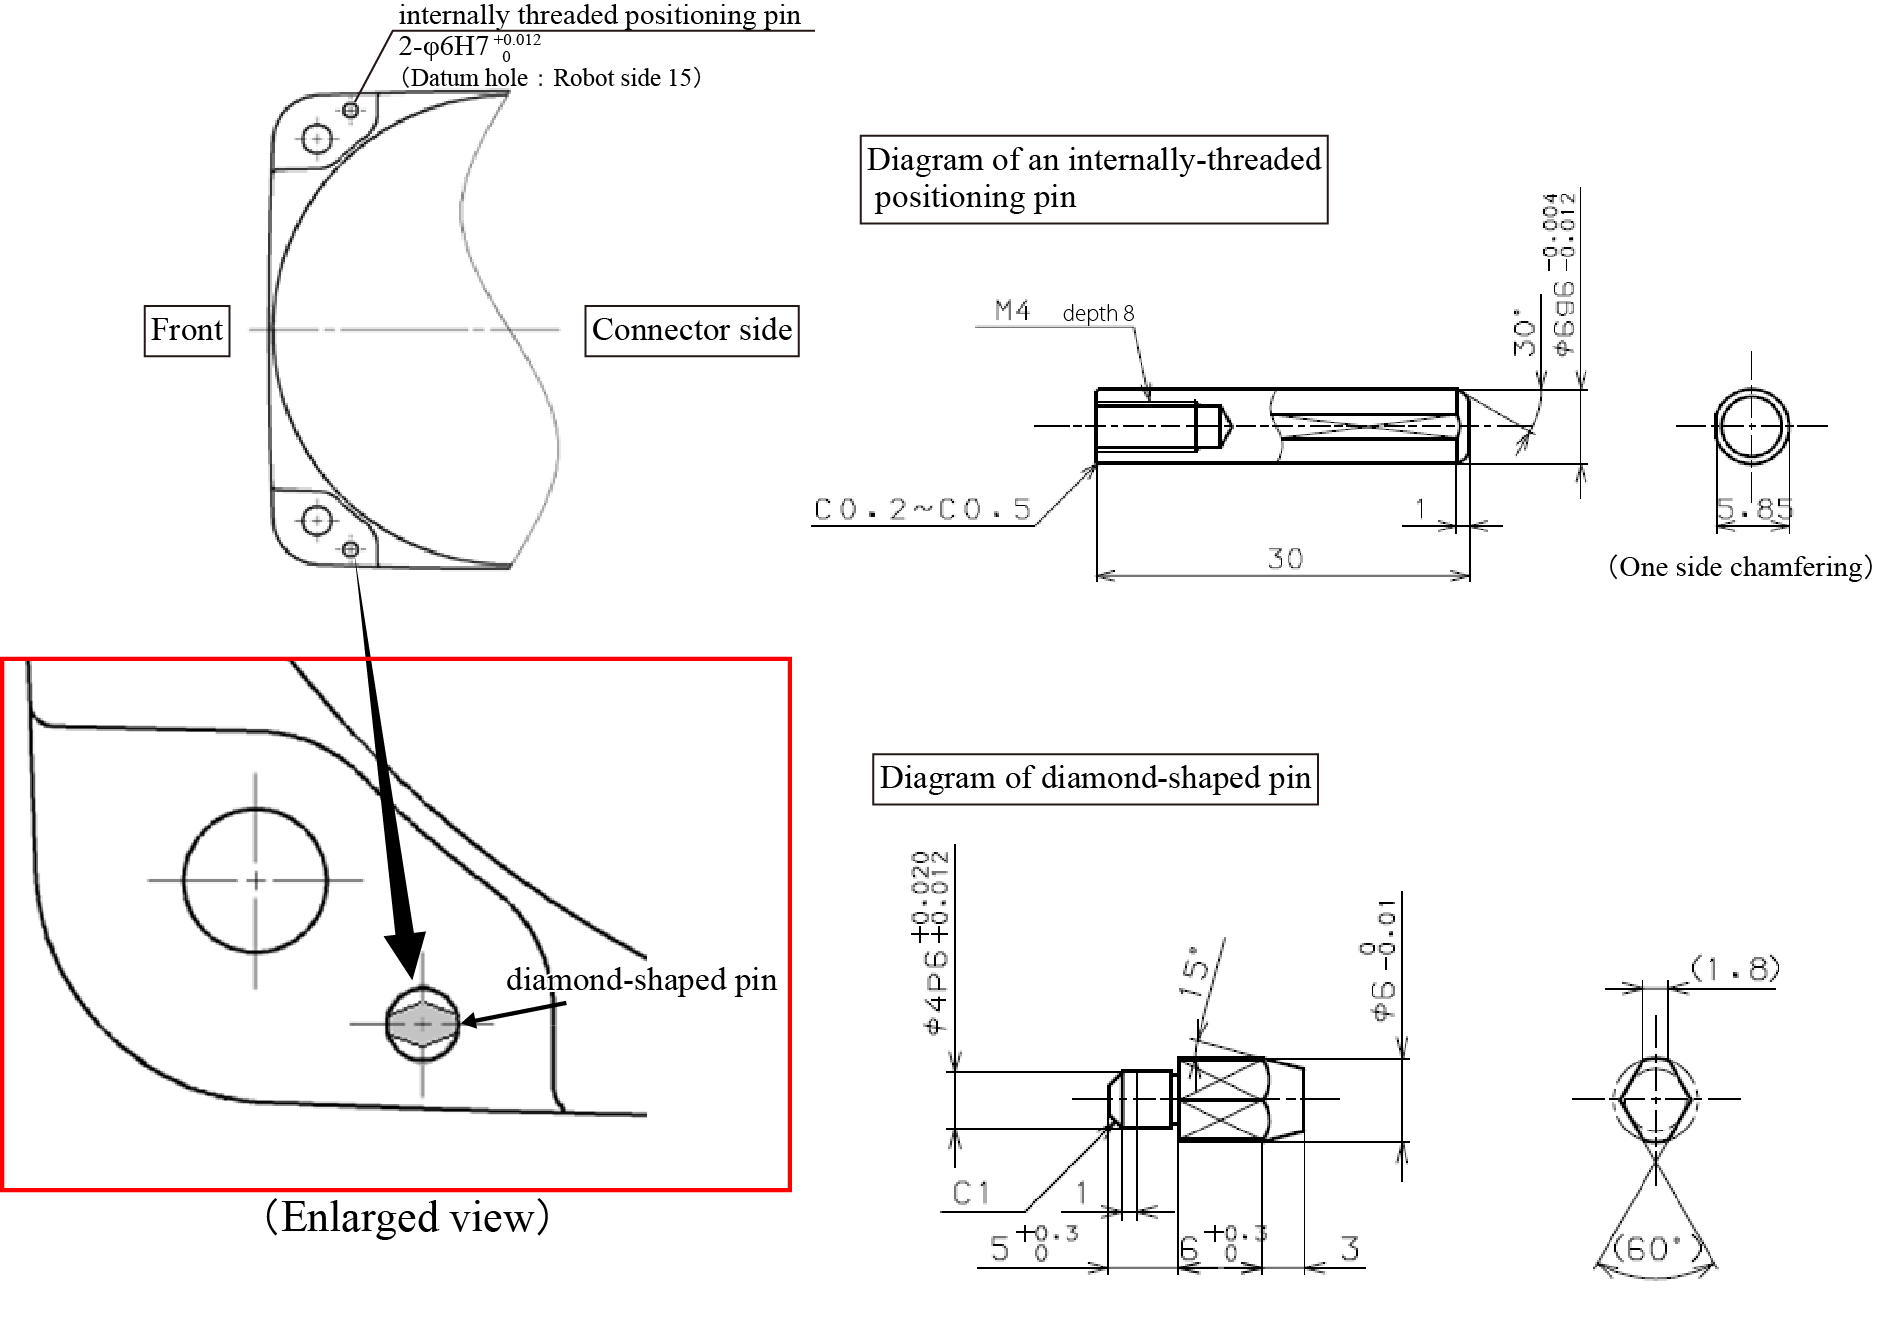
Check that the robot mount has four fixing bolt holes, two dowel pin holes (a diamond-shaped pin hole with φ4H7 hole-depth 6 and an internally threaded positioning pin hole with φ6H7 hole-depth 15) and cabling space in accordance to the external dimensions of the robot unit. Refer to "Reference Drawings".

2
Drive the diamond-shaped pin into the φ4H7 hole so that it orients as shown above (enlarged view).
3
Drive the internally threaded positioning pin into the φ6H7 hole.
Be sure to drive the dowel pins. It can minimize positional deviations that may be caused by the removal/installation of the robot unit for maintenance or the vibration during operation.
4
Set the robot unit into place on the robot mount.
5
Secure the robot unit to the mount with four bolts and plain washers.
| Fixing bolt | Tightening torque | |
|---|---|---|
| VS-050 / 060 | M8 × 30 mm (strength class: 12.9) | 35 +/- 7 Nm |
| VS-068 / 087 | M10 × 30 mm (strength class: 12.9) | 70 +/- 14 Nm |
ID : 49

