
ID : 5459
Replacing the Encoder Backup Battery
There are two models of the board to which encoder backup batteries are connected: the new model and the old model. You can distinguish between the two models by checking the number of encoder backup battery connectors on the board.
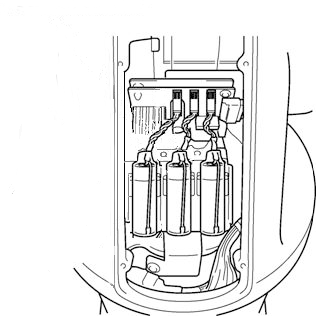
New Model
The new model has three connectors that can be connected to encoder backup batteries.
All the three connectors are connected to encoder backup batteries by factory default.
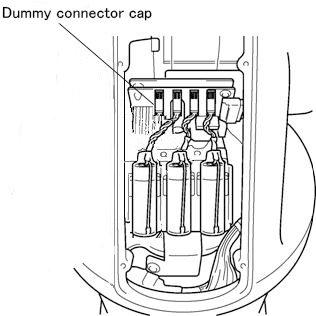
Old Model
The old model has four connectors that can be connected to encoder backup batteries.
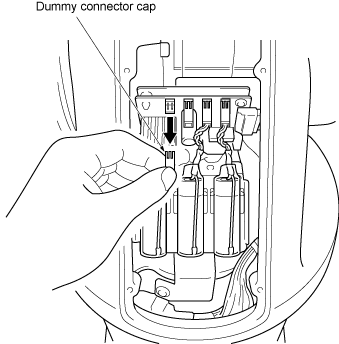
Three connectors are connected to encoder backup batteries while the remaining connector is covered with a dummy connector cap by factory default.
How to Replace Encoder Backup Batteries
Some of the steps for replacing the batteries differ between the new model and the old model.
This section describes only the replacement steps that differ between the two models respectively.
The images describing the replacement steps below might differ from the images of the actual board. Replace the batteries by following the steps appropriately for the actual board.
1
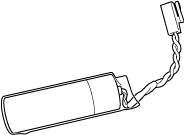
Prepare a new set of 3 backup batteries for replacement.
2
Turn the controller power OFF.
3
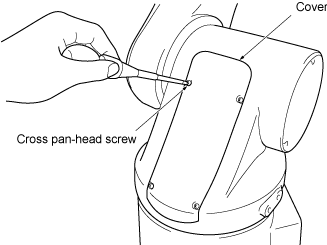
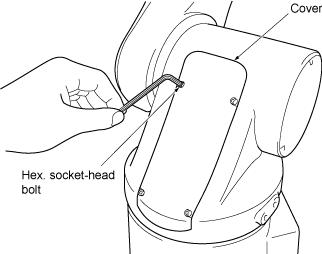
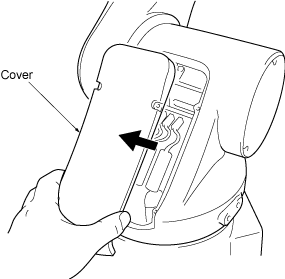
Remove the cover from the robot unit.
- Standard type
- Dust-proof & splash-proof type
4
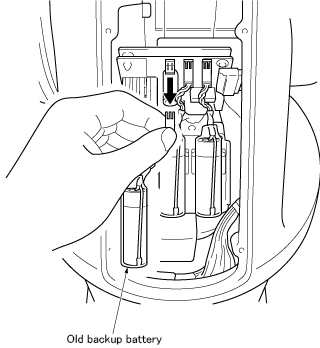
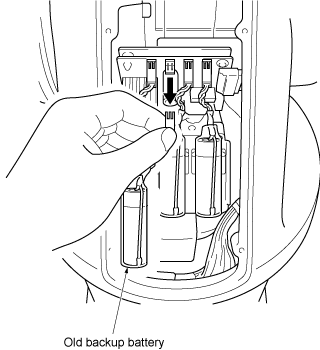
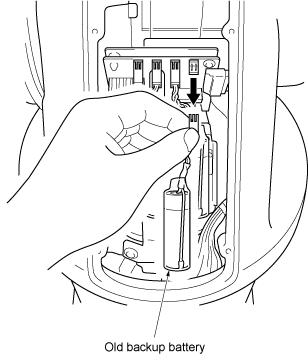
Disconnect the first old encoder backup battery.
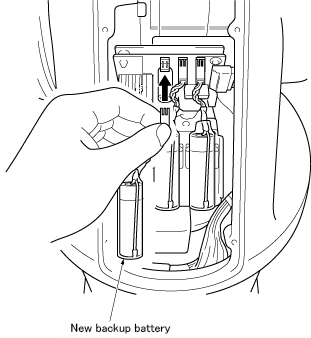
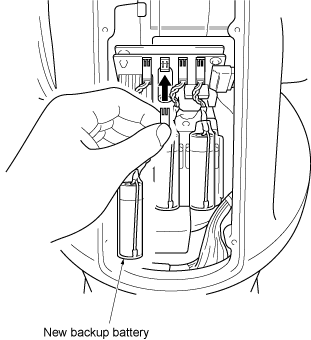
Connect a new battery (1st one) to the connector from which you have disconnected the old encoder backup battery.
In replacing the encoder backup batteries, be sure to replace the batteries one by one in stead of disconnecting all the old batteries at once. Disconnecting all the old encoder backup batteries first may delete the positional data stored in the encoder.
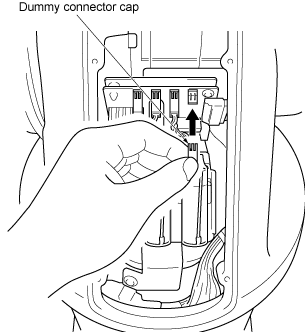
Remove the dummy connector cap from the battery board.
Connect a new battery (1st one) to the pin from which you have disconnected the dummy connector cap in Step 4.

Do not disconnect old backup batteries before connecting a new one to the pin from which the dummy connector cap is removed. If you do so, the encoder positional data may be lost.
5
Disconnect the old backup battery that is right next to the new battery connected in Step 5, and then connect a new battery (2nd one).
6
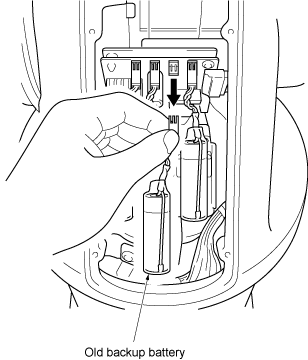
Disconnect the old backup battery that is right next to the new battery connected in Step 6, and then connect a new battery (3rd one).

Be sure to replace all of three batteries with new ones at one time. Otherwise, the battery service life will become short.
7
Disconnect the last old battery and connect the dummy connector cap disconnected in Step 4.
8
Install the cover to the robot unit.

- Standard type
Tightening torque:Cross pan-head screw: 0.59 Nm (Standard type) - Dust-proof & splash-proof type
Hex. socket-head bolt: 2.0 Nm (Dust-proof, splash-proof type)
ID : 5459