
ID : 9980
Setting Robot Installation Condition
The optimum operating conditions differ depending on the robot installation location.
By factory default, the robot is set to floor-mount. If you change the installation condition, you need to change the installation settings.
Changing Robot Installation Condition
With Smart TP, change the installation condition setting.
Operation path : [F2 Arm] - [F6 Aux] - [F1 Config]
1
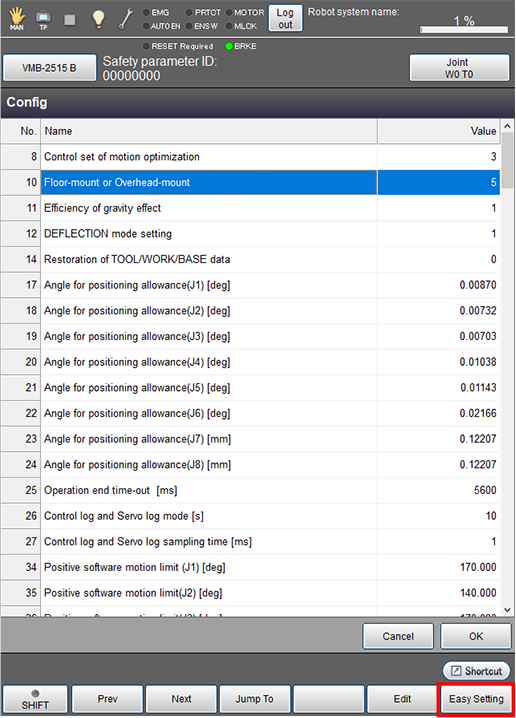
Press [F1 Config] to display the following [Config] screen.
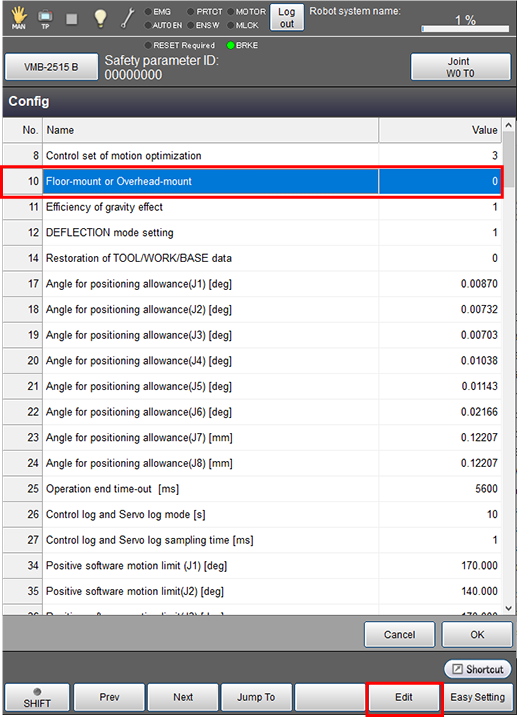
Select [Floor-mount or Overhead-mount], and press [Edit].
2
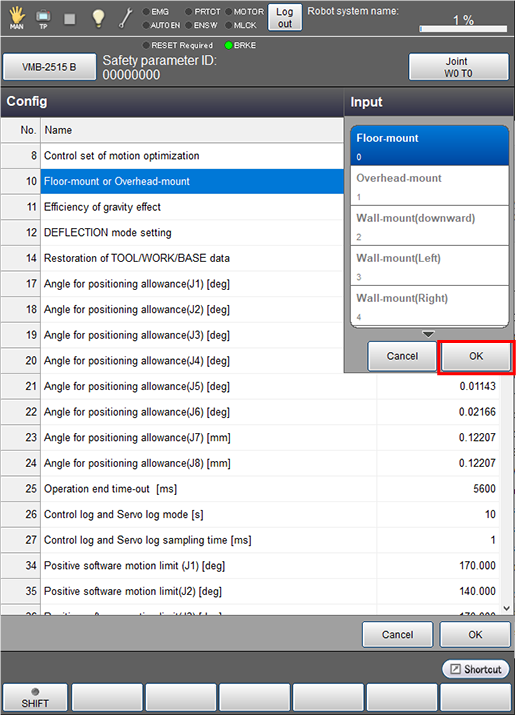
The [Input] window is displayed. Select an installation condition, and press [OK].
3
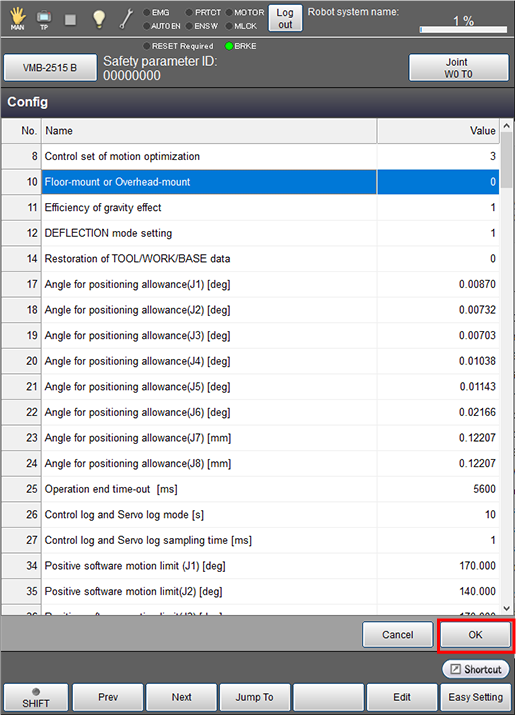
Confirm that the value is changed in the [Config] window, and press [OK].
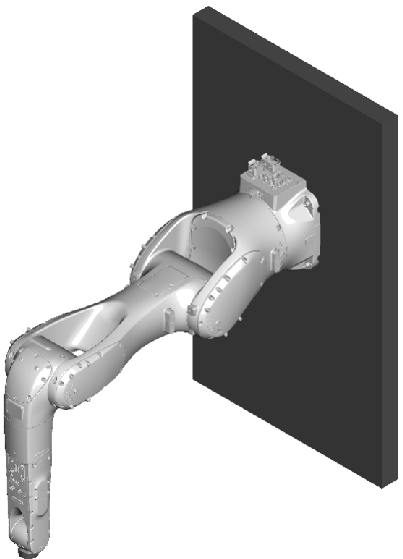
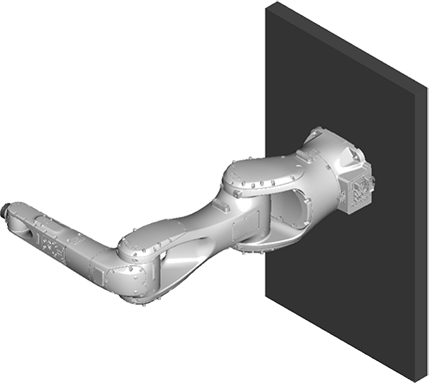
When mounting the robot as shown below, select [2: Wall-mount (downward)], [3: Wall-mount (Left)], or [4: Wall-mount (Right)].
| 2: Wall-mount (downward) | Tilted by 90° around the Y axis of the Base coordinate system.
|
|---|---|
| 3: Wall-mount (Left) | Tilted by 90° around the X axis of the Base coordinate system.
|
| 4: Wall-mount (Right) | Tilted by -90° around the X axis of the Base coordinate system.
|

4
You need to configure the setting differently depending on the installation orientation you select.
- Selecting [5: User definition]
- Selecting Either [2: Wall-mount (downward)], [3: Wall-mount (Left)], or [4: Wall-mount (Right)]
Selecting [5: User definition]
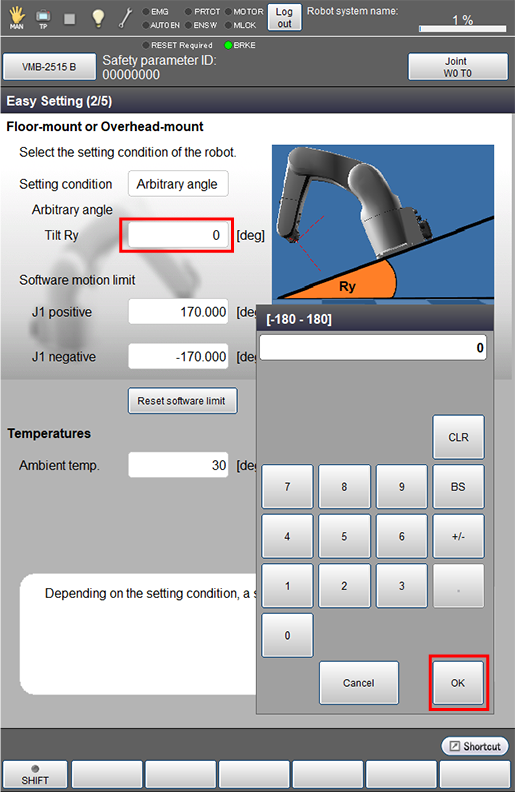
If you select [5: User definition], enter an installation angle in the [Tilt Ry] field.
The installation angle is an angle at which the robot is tilted around the Y axis of the Base coordinate system relative to the level surface.
5
Operation path: [F2 Arm] - [F6 Aux] - [F1 Config]
Pressing [F1 Config] will display the following [Config] screen. Press [Easy Setting] on the screen.
6
Press [Next].
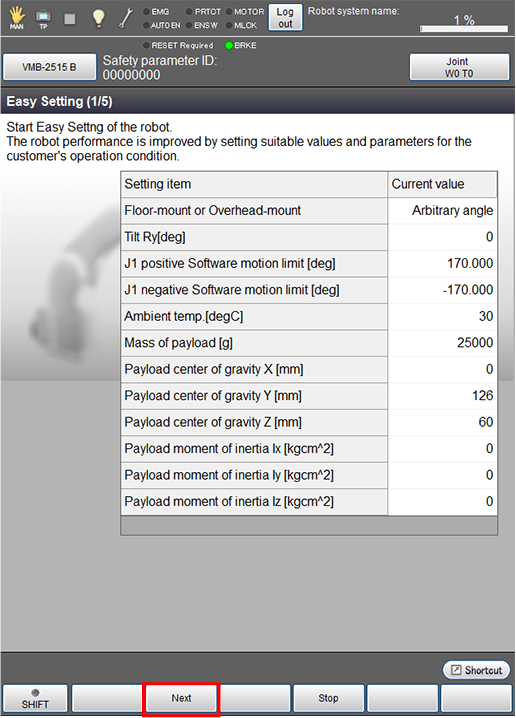
7
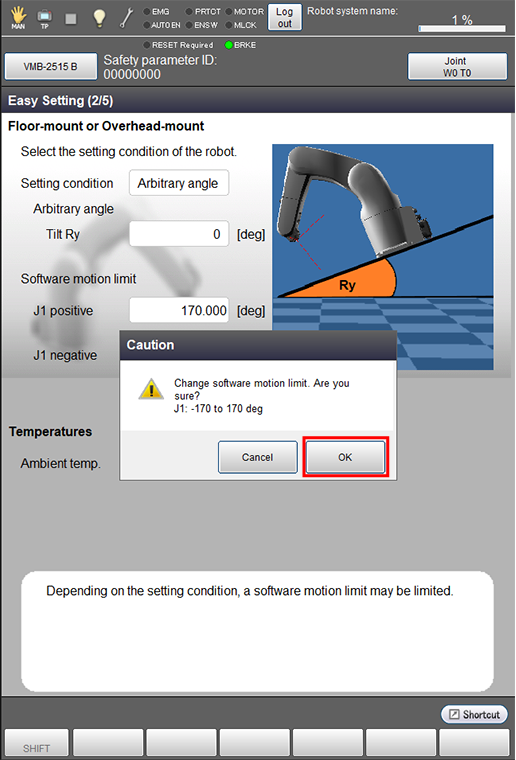
Enter a value in the [Tilt Ry] field and press [OK].
8
Depending on the value you entered in [Tilt Ry], the motion range of the 1st axis of the robot needs to be limited. In this case, the following message will appear, and press [OK].
This completes the procedure you need to follow when selecting [5: User definition].
Selecting Either [2: Wall-mount (downward)], [3: Wall-mount (Left)], or [4: Wall-mount (Right)]
5
When selecting either [2: Wall-mount (downward)], [3: Wall-mount (Left)], or [4: Wall-mount (Right)], you may need to limit the motion range of the 1st axis of the robot depending on the angle of the installation surface (an angle at which the robot is tilted around the Y axis of the Base coordinate system relative to the level surface).
Referring to "1st-axis Mechanical End Change", limit the 1st axis motion range.
When selecting [3: Wall-mount (Left)] or [4: Wall-mount (Right)], as the robot is actually tilted around the X axis of the Base coordinate system, you need to convert the angle around the X axis to the one around the Y axis of the Base coordinate system. For both [3: Wall-mount (Left)] and [4: Wall-mount (Right)], the robot is to be considered tilted by 90° around the Y axis of the Base coordinate system.
- For [3: Wall-mount (Left)], subtract 90° from a specific motion range listed in the table listing the 1st axis motion range relative to the angle of the installation surface.
(For example, for the VMB-2515 robot whose 1st axis motion range is ±34° when tilted by 90°, 90° subtracted from its motion range is -56° to -124°.) - For [4: Wall-mount (Right)], add 90° to a specific motion range listed in the table listing the 1st axis motion range relative to the angle of the installation surface.
(For example, for the VMB-2515 robot whose 1st axis motion range is ±34° when tilted by 90°, 90° added to its motion range is 56° to 124°.)
This completes the procedure you need to follow when selecting [2: Wall-mount (downward)], [3: Wall-mount (Left)], or [4: Wall-mount (Right)].
ID : 9980