
ID : 2849
Creating a Project
There are two ways of performing if a user operates the robot prepared by him/herself with Kinematics configuration; one is to make a new project of WINCAPSIII with Kinematics configuration tool, and the other is to edit an existing project.
Kinematics configuration tool is automatically installed when WINCAPSIII is installed.
Procedure
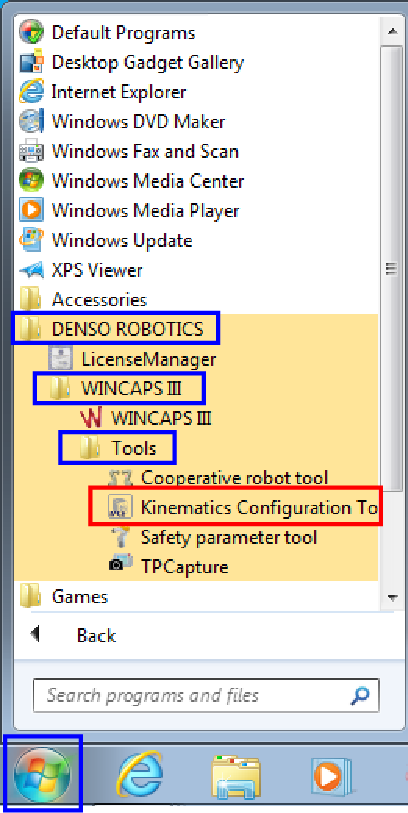
1
Start up Kinematics configuration tool.
Operation path: PC [Start ] button - [All Programs] - [DENSO ROBOTICS] - [WINCAPSIII] - [Tools] - [Kinematics Configuration Tool].
2
For creating a project newly, choose [Create a new project], set [Name] and [Save in] and then press [Next].
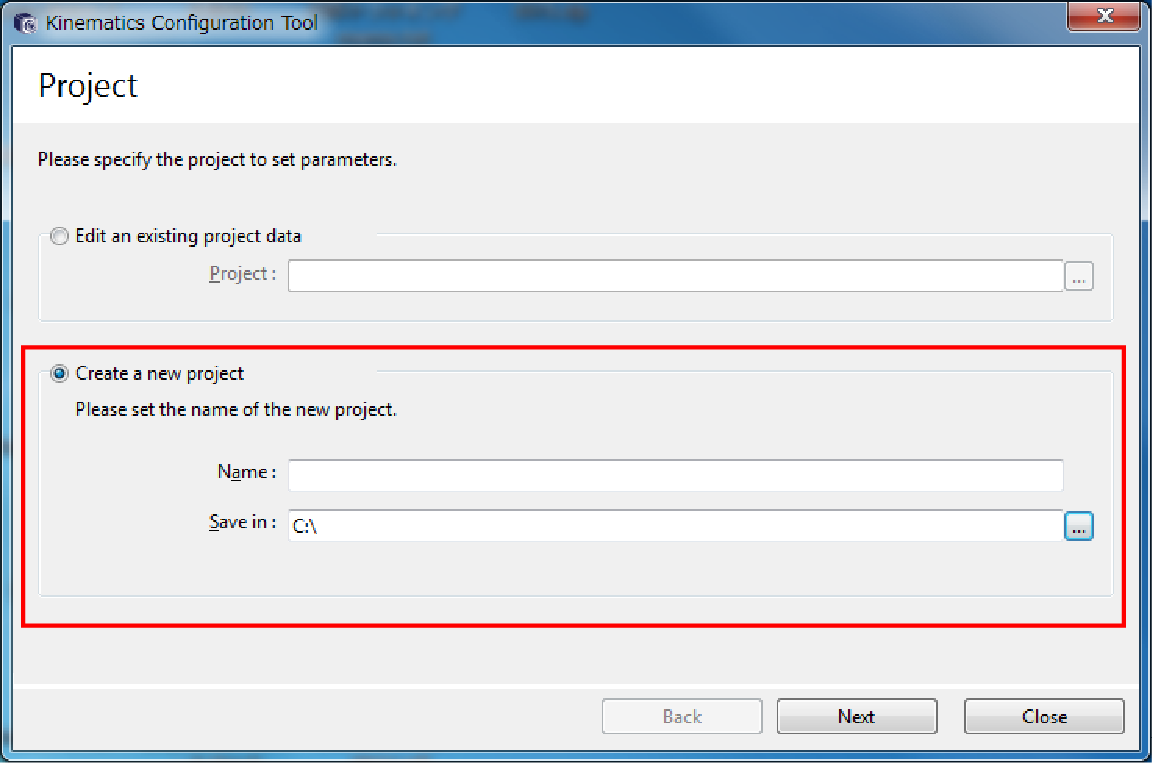
If you use Kinematics configuration tool after [Setting Each Axis], receive the controller project to WINCAPSIII, and save it; then, choose [Edit an existing project data] at the step of Kinematics Configuration Tool.
3
Select the controller type and press [Next].
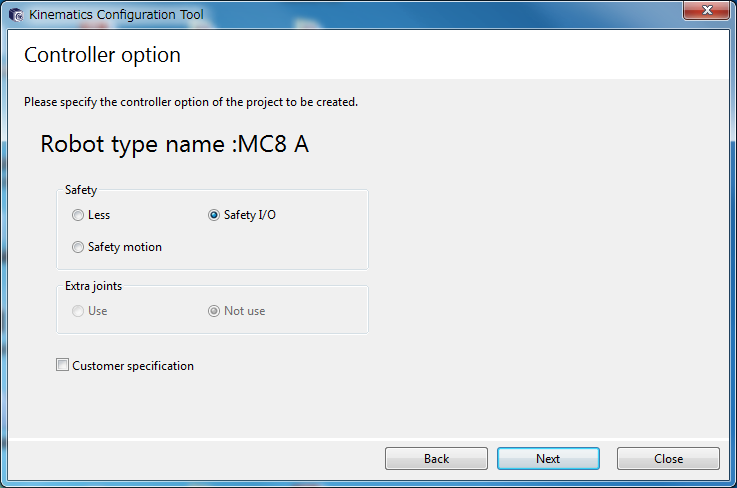
If you have selected [Edit an existing project data], this window will be skipped.
4
Select the robot type which you want to operate and press [Next].
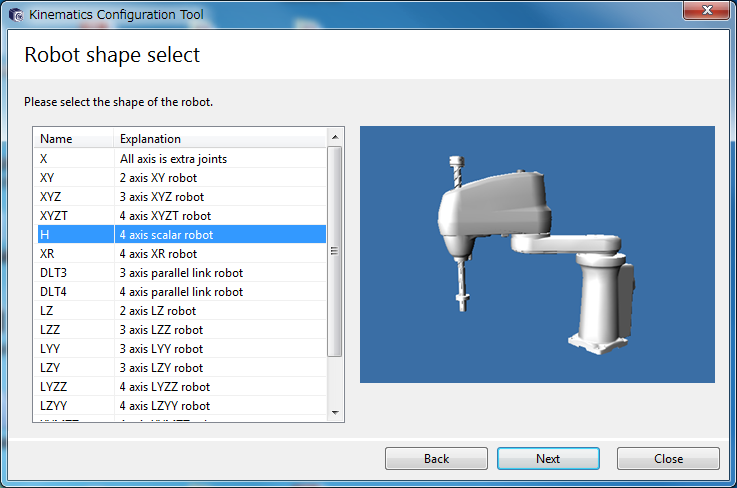
For more information about the robot types available, see "Robot Type".
5
Set arm length depending on the robot type you selected, and press [Next].

- The values of arm length to be set are limited. About every particular item of arm length, refer to "Arm Parameter Settings".
- When Ball Screw Spline is used to the linear motion axis on 4-axis robot, or when the 5th-axis motion interferes with the 6th-axis motion under 6-axis robot use, additional parameter settings are required. For details, refer to "Additional Setting of 4-axis or 6-axis Robot".
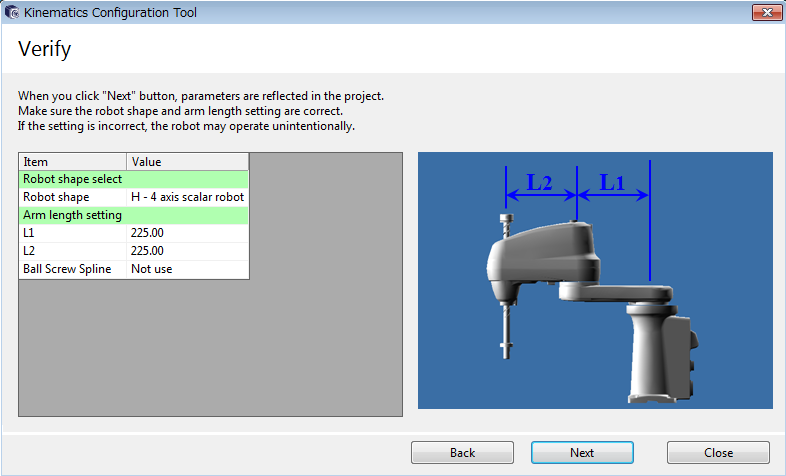
6
Confirm your settings on the screen and press [Next].
If the setting is incorrect, the robot may operate unintentionally.
7
Press [Complete] to finish creating the project.
If you check on "Open the project with WINCAPSIII", after pressing [Complete], WINCAPSIII will boot.

ID : 2849
- Related Information
- Arm Length Setting
- Additional Setting of 4-axis or 6-axis Robot