
ID : 18052
Activating Studio 5000 and PLC Parameters Setting
1
Check that both the PLC and the robot controller are turned off.
As the following figure shows, connect an EtherNet/IP port embedded in PLC and an EtherNet/IP port of robot controller with a LAN cable through a switching hub, and then connect a PLC and a computer with a USB cable.
Turn on both the PLC and robot controller.

2
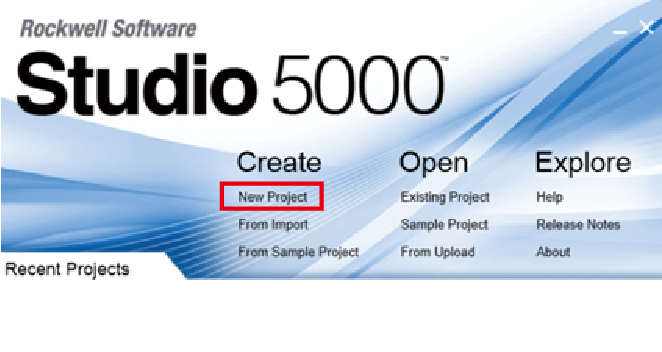
Start "Studio 5000". Click [New Project] to create a new project.
At this time, if the window appears for license confirmation, choose [Start].
3
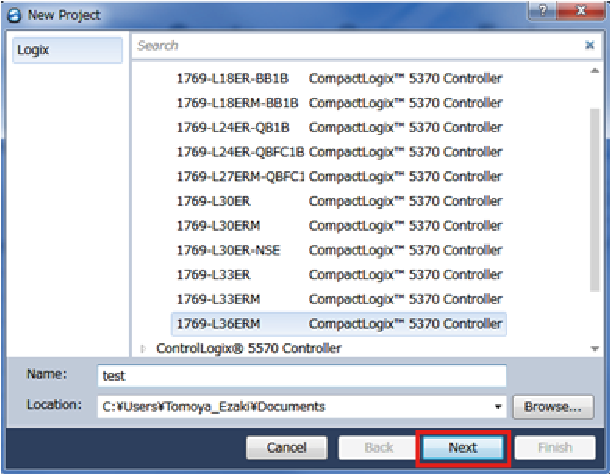
[New Project] window appears.
From the controller list, select a PLC to use, and then click [Next].
4
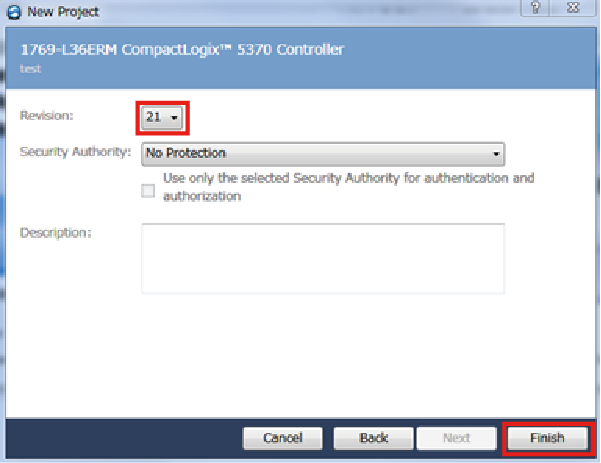
From the pull down list of [Revision], select a revision number, and then click [Finish].
5
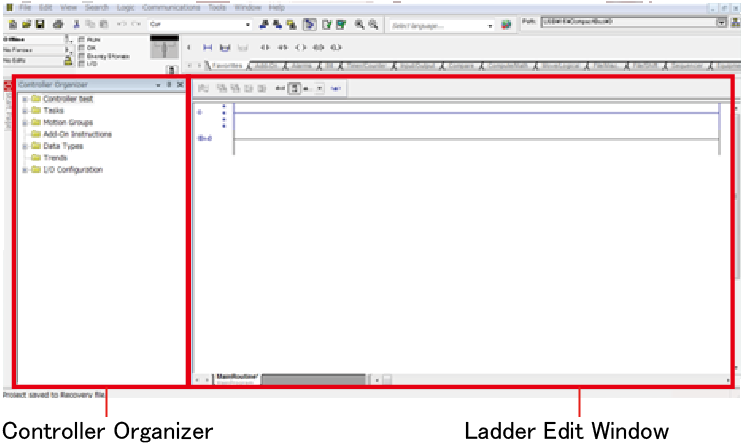
Project window appears. The left pane is called [Controller Organizer], and the center pane is called [Ladder Edit Window]. Delete "Rung 0" on the [Ladder Edit Window] in order to write this project into the PLC with this status.
6
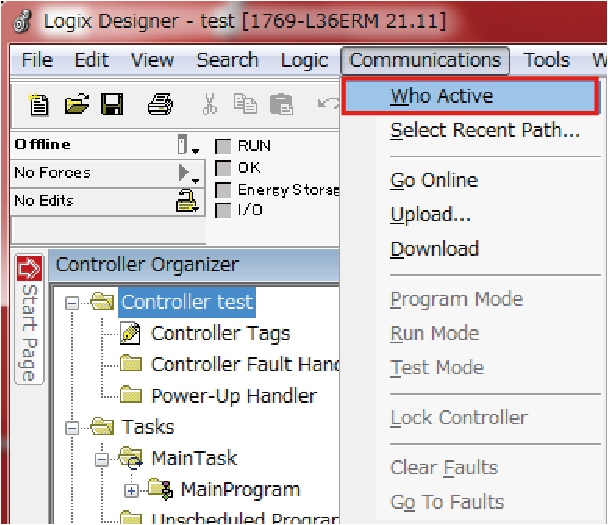
On the menu bar, click [Communications], and then click [Who Active].
7
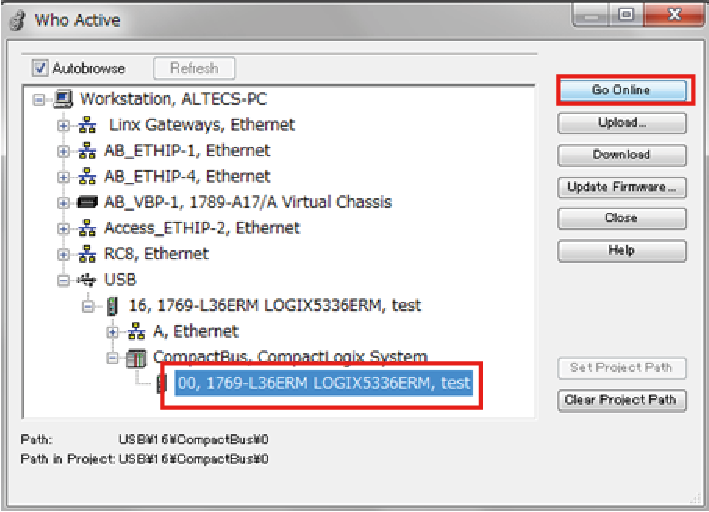
On the [Who Active] window, click a PLC that is connected with a USB cable, and then click [Go Online].
8
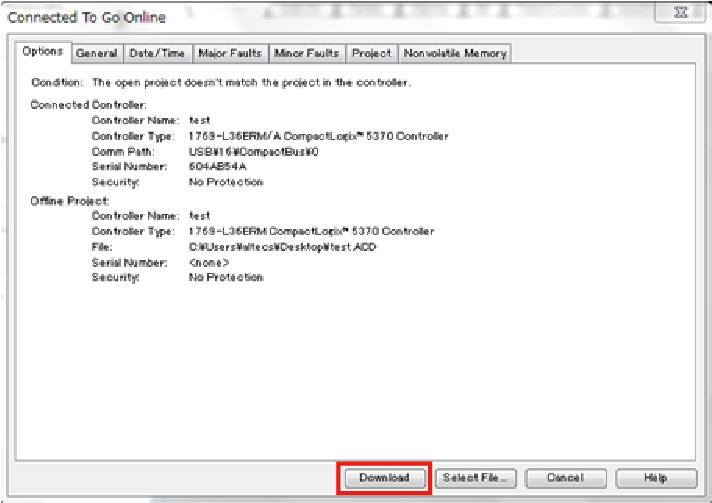
In the [Connected To Go Online] window, click [Download].
9
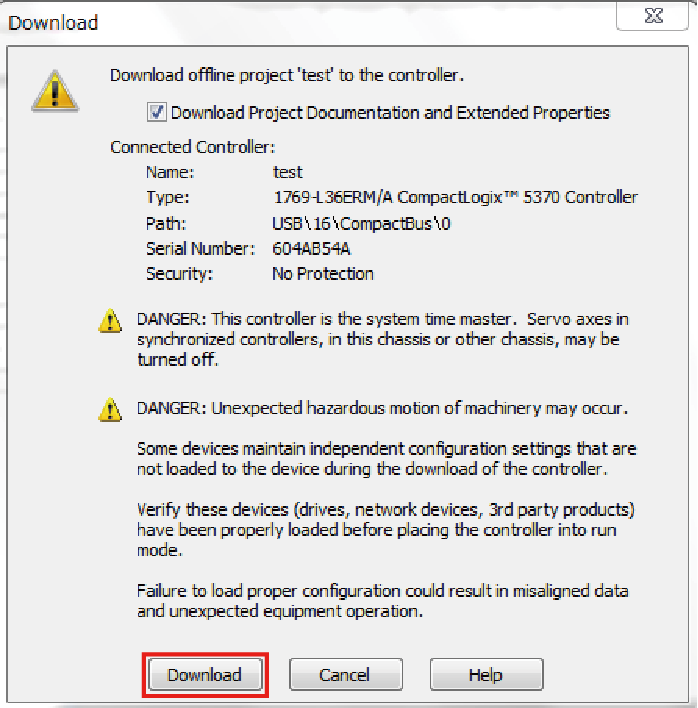
Once the confirmation message appears, click [Download] again to start data writing to PLC.
10
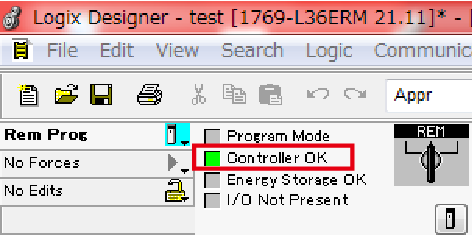
Check that the project is online.
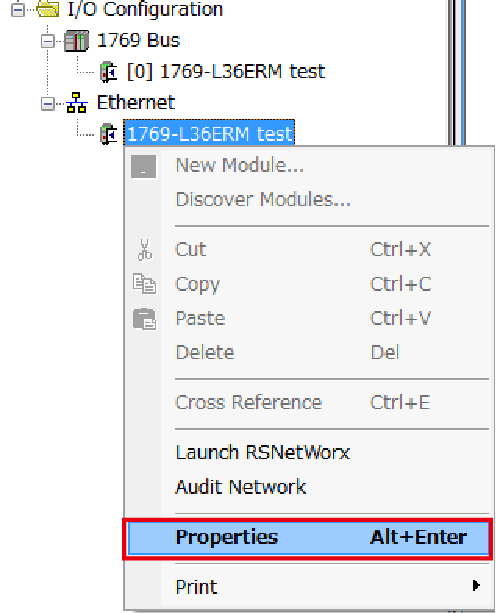
11
On the [Controller Organizer] pane, right click [PLC], and then select [Properties].
12
[Controller Properties] window appears.
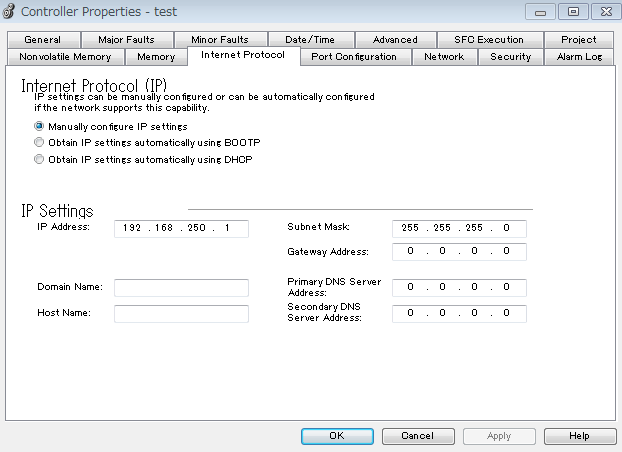
13
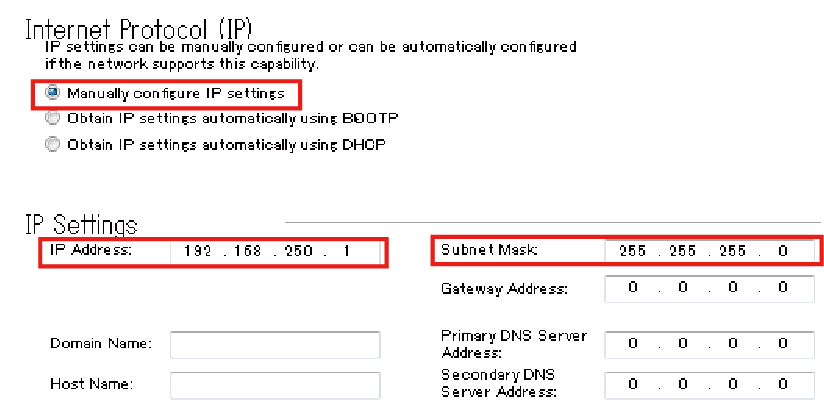
Select [Internet Protocol] tab, and then do the following setting.
- Select "Manually configure IP setting"
- IP address : 192.168.250.1
- Subnet mask : 255.255.255.0
Set the following parameters, and then click [OK] to confirm the setting.
ID : 18052