
ID : 4659
Replacing the Encoder Backup Battery
There are two models of the board to which encoder backup batteries are connected: the new model and the old model. You can distinguish between the two models by checking the number of encoder backup battery connectors on the board.
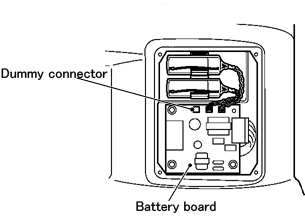
New Model
The new model has three connectors that can be connected to encoder backup batteries.
The one that is not connected to an encoder backup battery by factory default is a dummy connector.
The dummy connector will not be used.
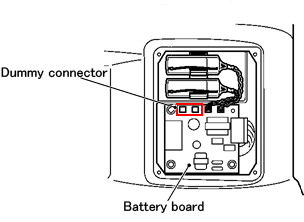
Old Model
The old model has four connectors that can be connected to encoder backup batteries.
The connectors that are not connected to encoder backup batteries by factory default are dummy connectors.
The dummy connector will not be used.
How to Replace Encoder Backup Batteries
Although the new model and the old model have different numbers of dummy connectors, they require the same procedure for replacing encoder backup batteries as their dummy connectors will not be used.
The type of the board shown in the images below might differ from the one you have, but replace the batteries by following this procedure.
1
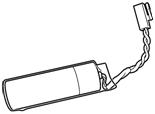
Prepare two new backup batteries for replacement.
2
Turn the controller power OFF.
3
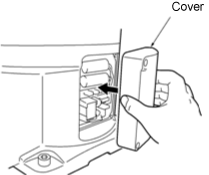
Remove the cover from the robot unit.
Four hex. socket-head bolts (M3x8)
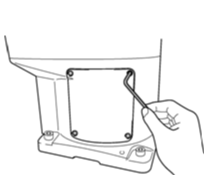
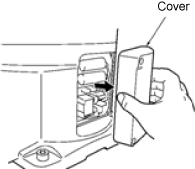
On the dust- & splash-proof type, the cover has a packing for sealing. Take care not to lose it.
4
Disconnect the old battery (1st one) from the battery board and then remove it from the holder.
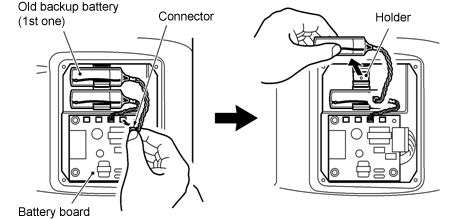
5
Connect a new battery (1st one) to the battery board from which you have disconnected the old one in Step 4, and then load it into the holder.

Do not disconnect both of the current batteries at the same time. Doing so will lose the encoder positional data.
6
Disconnect the remaining old battery (2nd one) from the battery board and then remove it from the holder.
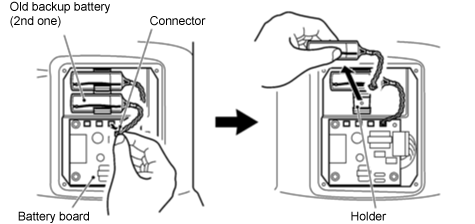
7
Connect a new battery (2nd one) to the battery board from which you have disconnected the old one in Step 6, and then load it into the holder.
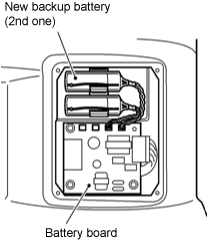
Be sure to replace both of two batteries with new ones at one time. Otherwise, the battery service life will become short.
8
Install the cover to the robot unit.
On the dust- & splash-proof type, the cover has a packing for sealing. Take care not to lose or pinch it.
Hex. socket-head bolt (M3x8): 1.6±0.3 N•m
ID : 4659