
ID : 5069
Setting Procedures of Path Points
This section describes how to set path points with the teach pendant.
Setting procedures
1
Operation path : [F2 Arm] - [F6 Aux] - [F6 PathPoint]
[Path Points Setting] window appears. Press [Path No.] then select the path number to be set and then press [OK].
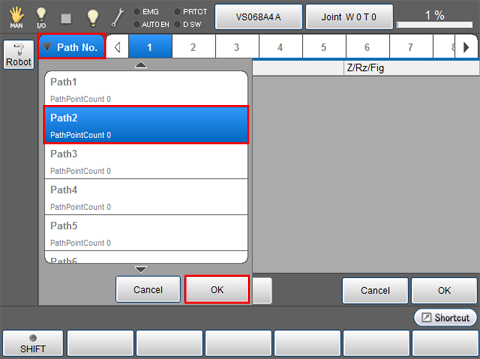
Selected path number is highlighted.
2
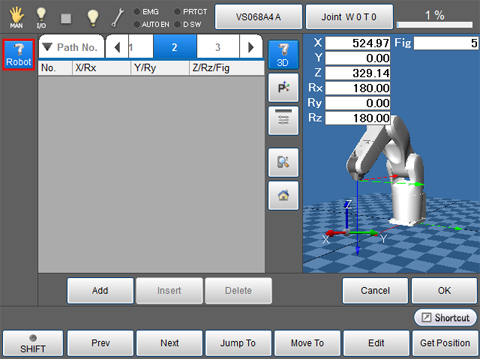
Press [Robot] to display the current position of the robot on the right side of the window.
If a stored data exists in the working memory, the stored data is displayed.
3
Move the robot until the target position, then press [Add] to retrieve the current position.
- If the position registered in path point is changed, an asterisk appears on the right side of the each path number.
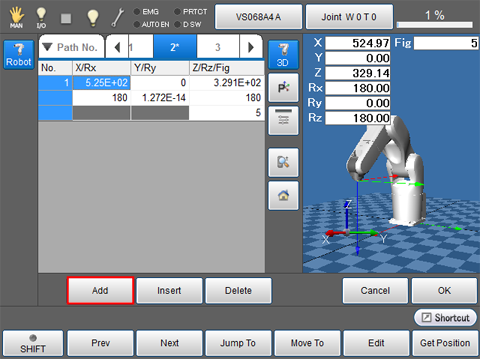
The current position of the robot is retrieved.
4
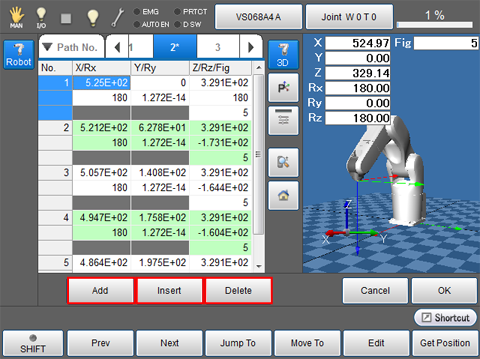
Repeat STEP3 to register all the path points to be required.
Use [Add], [Insert] and [Delete] button if needed.
- [Add] : Enter a path point data in the next to the selected path point data.
- [Insert] : Insert a path point data in front of the the selected path point.
- [Delete] : Delete the selected path point data.
- In order to use [Move To], [Edit], [GetPosition], [Copy] and [Paste] button, go to [Path Point Setting] screen then press each buttons.
- Maximum size of registrable path points data is 5000.
5
Once all the path point data settings completed, press [OK].
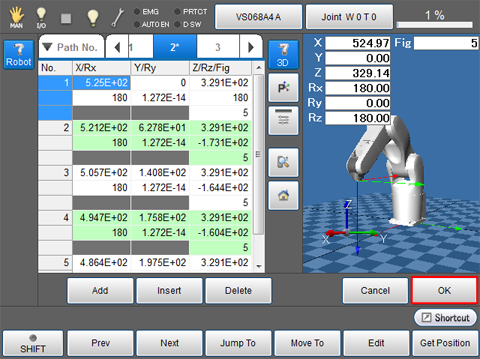
Registered path point data are saved. The window turns to the [Arm Auxiliary] window.
- A data which has asterisk in the path number is saved in both working memory and data storage memory.
-
If a path point is added by PacScript command, this data is stored in the working memory.
You can check the stored data in [Path point setting] window.
However, the stored data cannot be saved in the data storage memory unless the data is edited in [Path point setting] window.
Once the data is edited, an asterisk appears on the path number.
For details, refer to [Path pint setting functions].
ID : 5069