ID : 6129
Setting Connection with WINCAPSIII
For EtherNet Connection
Setting Robot Controller
Set robot controller to enable the communication between PC (WINCAPSIII) and robot controller through the Ethernet.This setting is done by teach pendant.
Set communication permission and IP address.
1
Press [F6 Setting] on the basic screen of tech pendant.
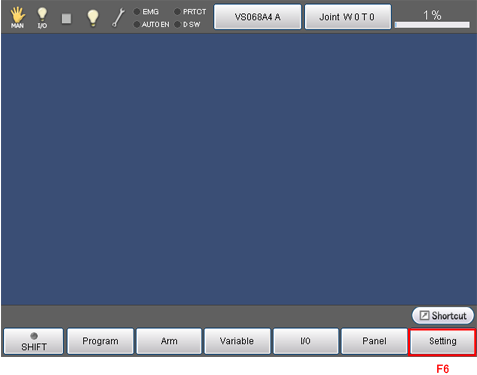
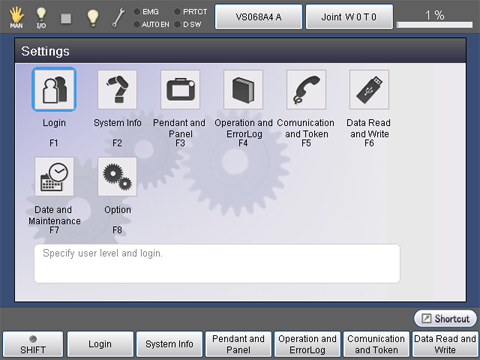
[Settings (main)] window will be displayed.
2
Press [F5 Communication and Token].
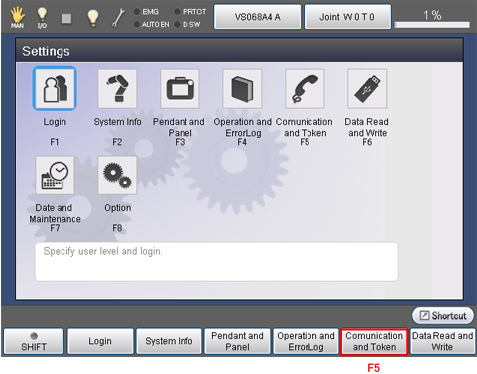
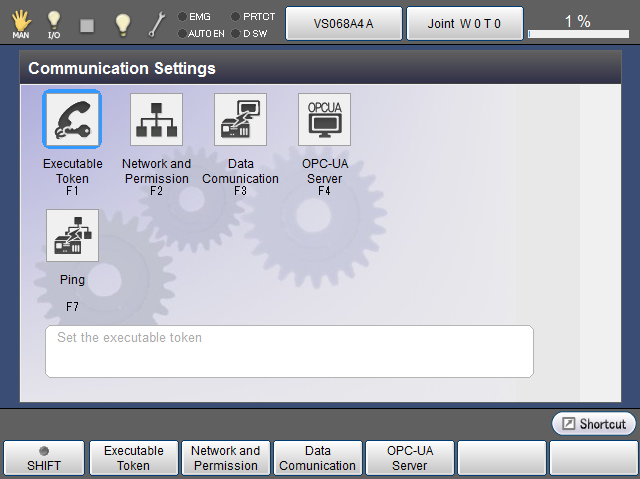
[Menu] window of Communication Settings will be displayed.
3
Press [F2 Network and Permission].
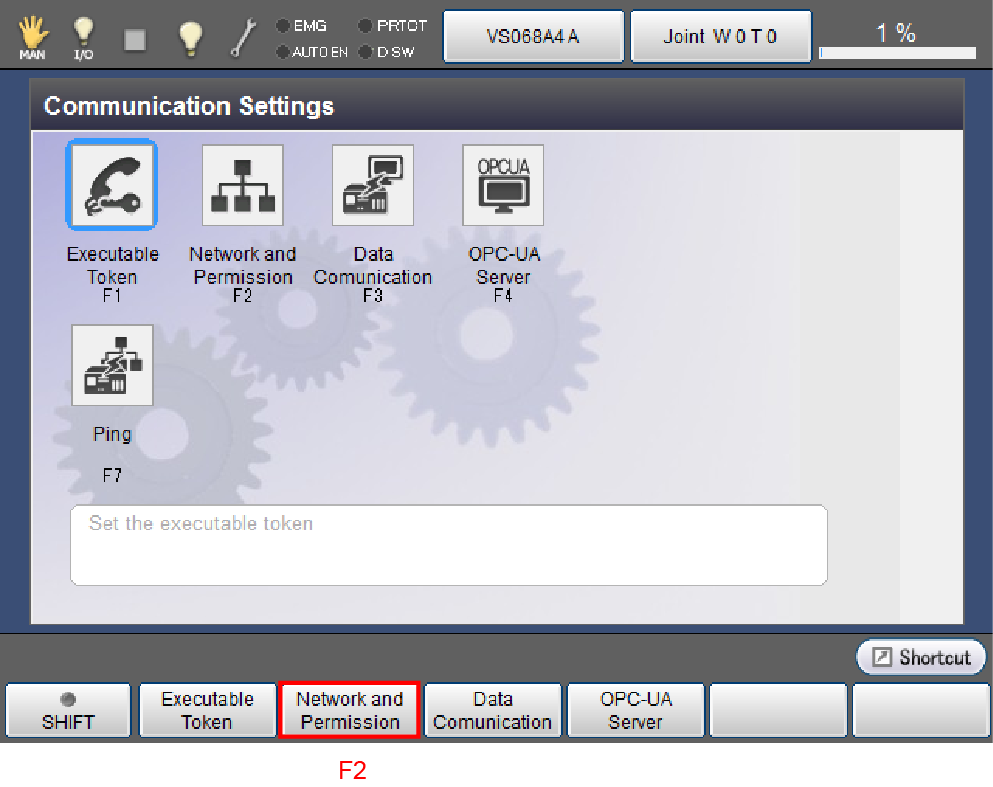
[Communication Settings] window will be displayed.
4
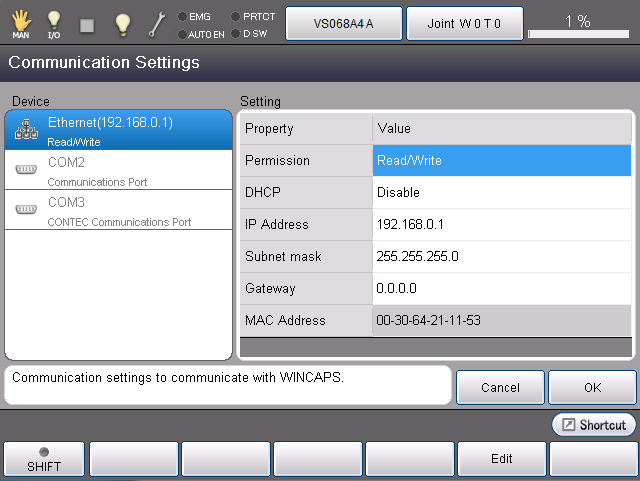
Select [Permission] by using cursor key or jog dial, or by directly touching the screen.
This can be also selected by directly touching the screen.
The selected section will be highlighted.
5
Press [F5 Edit].
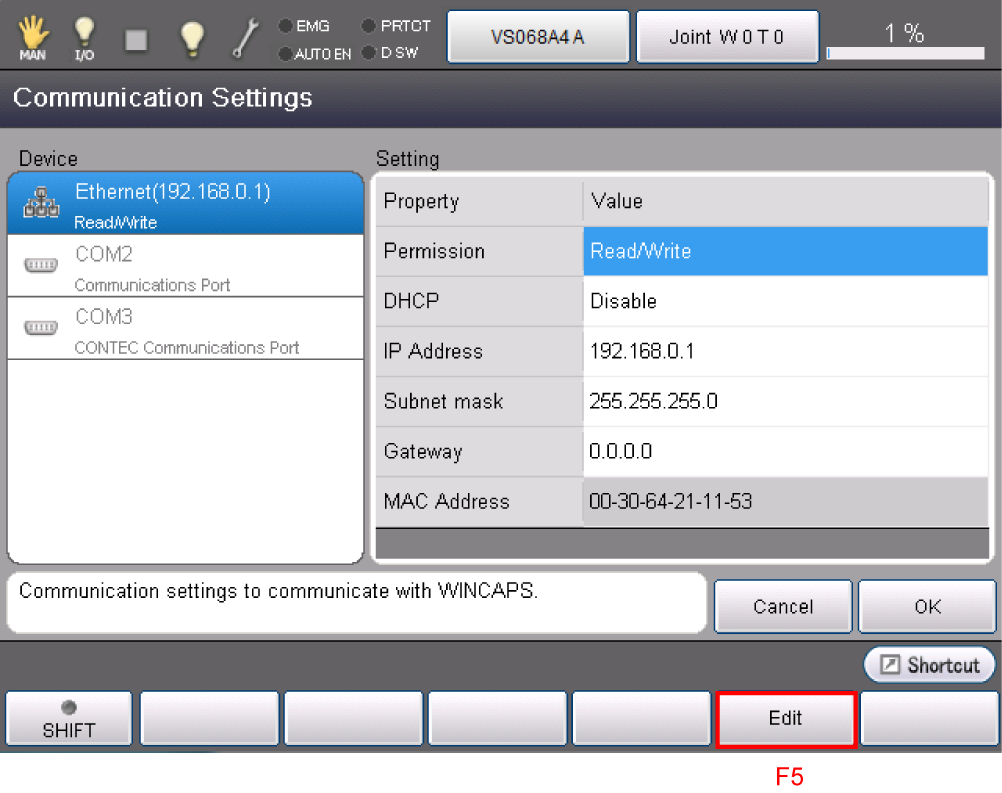
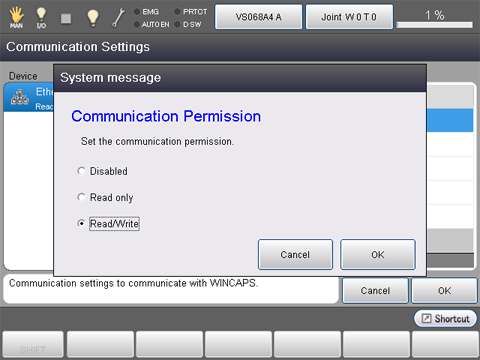
The following system message will be displayed.
6
Select [Read/Write].
Communication permission is defined as follows.
To use Ethernet, it is necessary to select [Read/Write].
- Disabled : Communication port is not used.
- Read only : Data of robot controller can be read in PC.Data cannot be sent from PC to robot controller.
- Read/Write : Data can be bidirectionally exchangeable between PC and robot controller.
Select, and then press [OK].
The display will be back to [Communication Settings] window.
7
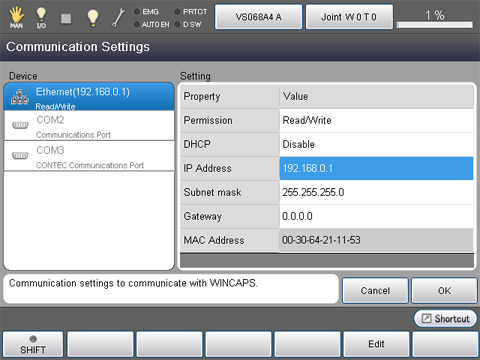
Select [IP Address] by using cursor key or jog dial, or by directly touching the screen.
The selected section will be highlighted.
8
Press [F5 Edit].
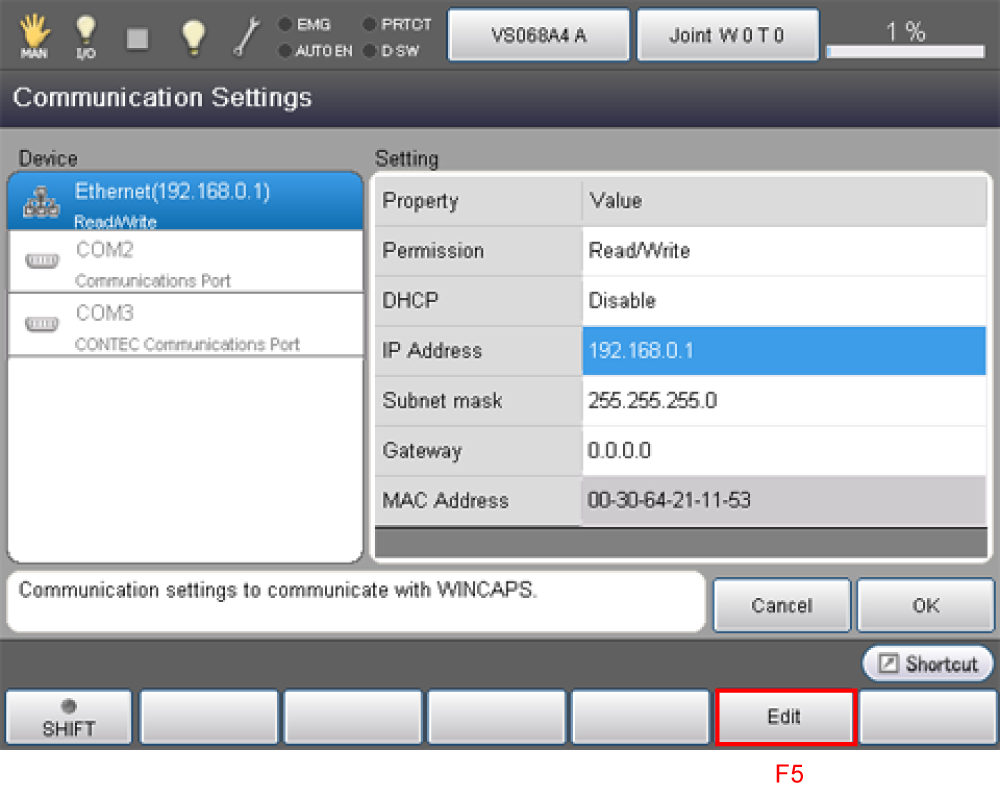
Numeric keypad as shown in the next step will be displayed.
9
Enter address using numeric keypad.
Press [OK] on the numeric keypad after finishing entering the address.
Press [OK] to go back to [Communication Settings] window.
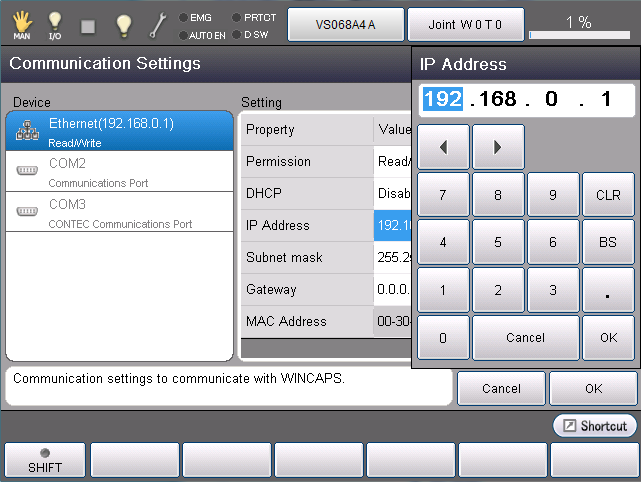
If subnet mask is also required to be changed, follow the operation procedure (STEP 7 to STEP 9) to change it.
10
Press [OK] on Communication Settings screen.
Display will be back to [Menu] window of Communication Settings.
11
Press [Cancel] button twice on the tech pendant.
Display will be back to the basic screen.
You can use multiple Ethernet IP address by adding a LAN adopter listed in "RECOMMENDED BOARD LIST".
Note that communication may fail if IP addresses in the same network are used.
- Incorrect IP address assignment
LAN1:192.168.0.1
LAN2:192.168.0.2 - Revised IP address assignment
LAN1:192.168.0.1
LAN2:192.168.1.2
ID : 6129

