
ID : 10829
Robot Controller Setting
Using WICNAPSIII, specify the parameters for the robot controller.
1
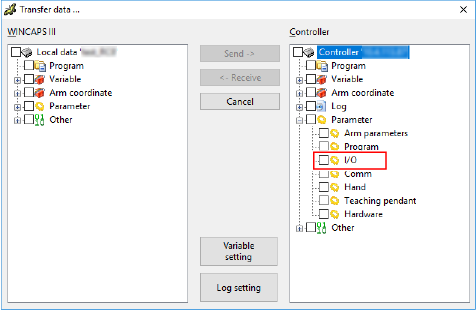
Using WINCAPSIII, receive the "I/O" data of the robot controller. If the I/O data has already been received, proceed to the next step.
For how to receive the robot controller data using WINCAPSIII, refer to "Data Transfer". To show the "I/O" data, open "Parameter" in the controller data list on the [Transfer data] window (see the image below).
2
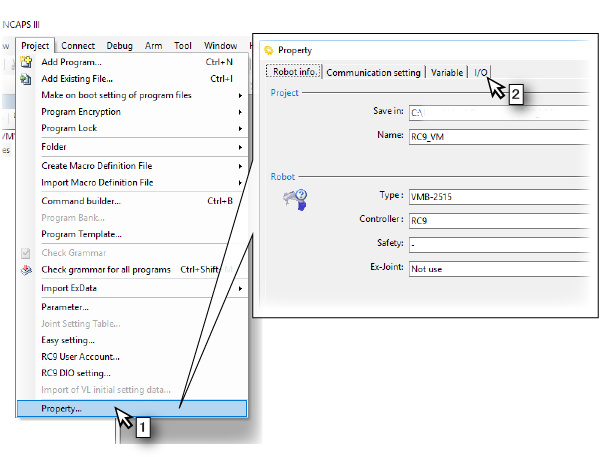
Open the parameter setting window.
- In the [Project] menu, select [Property].
- Click the [I/O] tab on the [Property] window.
3
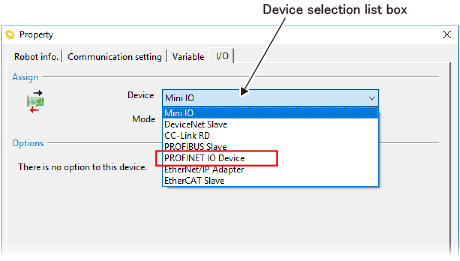
If you have added the PROFINET RT device terminal to the existing robot controller, you need to change [Device].
Select "PROFINET IO Device" in [Device selection list box].
4
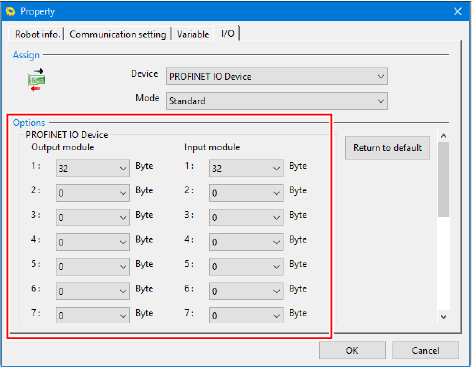
Allocate I/O to the input module and the output module respectively. This will determine the maximum number of user I/O. For details, refer to "Specifications and I/O Allocation".
Up to 960 Bytes in total can be set for the input and output modules respectively.
If the range is set to "256" or "256 (endian)", the corresponding device variable will be DWORD type. In addition, if the range is set to "256 (endian)", the endianness of the DWORD type device variable will be reversed.
| Input/Output Module | Range (byte) | Default (byte) |
|---|---|---|
| 1 | "32", "64", "256", or "256 (endian)" | 32 |
| 2 to 15 | "0", "32", "64", "256", or "256 (endian)" | 0 |
5
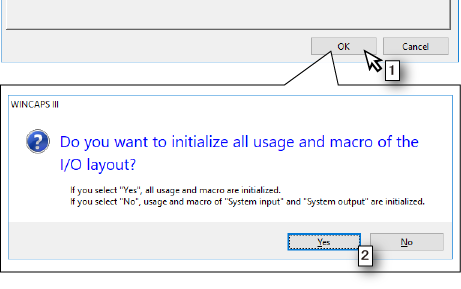
- Click the [OK] button.
- A window asking whether to initialize the I/O allocation appears. Click either [Yes] or [No].
6
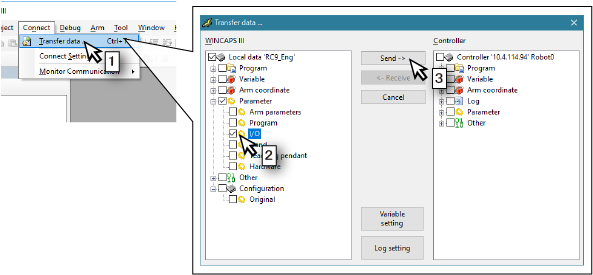
Send the specified setting to the robot controller.
- Select [Transfer data] from the [Connect] menu.
- Open [Parameter] in the [WINCAPSIII] pane and check [I/O].
- Click the [Send] button.
7
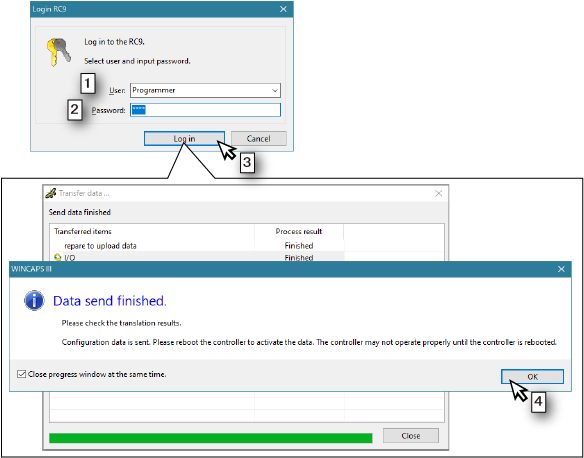
- The [Login RC9] window appears. Among user accounts registered in the robot controller, select one that is granted user permission for either "Programming", "Maintenance", or "Risk Management".
- Enter a password.
- Click the [Log in] button.
- A window indicating that the data transfer has been complete appears. Click the [OK] button.
- Restart the robot controller
ID : 10829