
ID : 11078
How to Specify Robot Joints
You can specify robot joints through the smart TP or WINCAPSIII. Follow the procedure below.
- All axes that are not registered as robot joints are regarded as auxiliary axes.
- Modifying the robot joint configuration initializes the arm group and link information settings.
Setting through the Smart TP
1
Operation path: Top screen - [F2 Arm] - [F12 Maintenance] - [F10 Joint Settings] - [F12 Robot Axis Range]
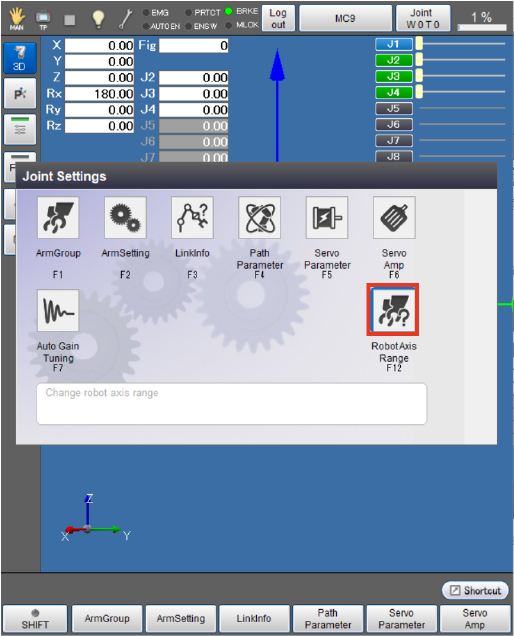
The [Robot axis range] window appears.
2
Select axes to be set as robot joints, then press [OK].

Setting through WINCAPSIII
1
Operation path: [Project] - [Joint Setting Table]
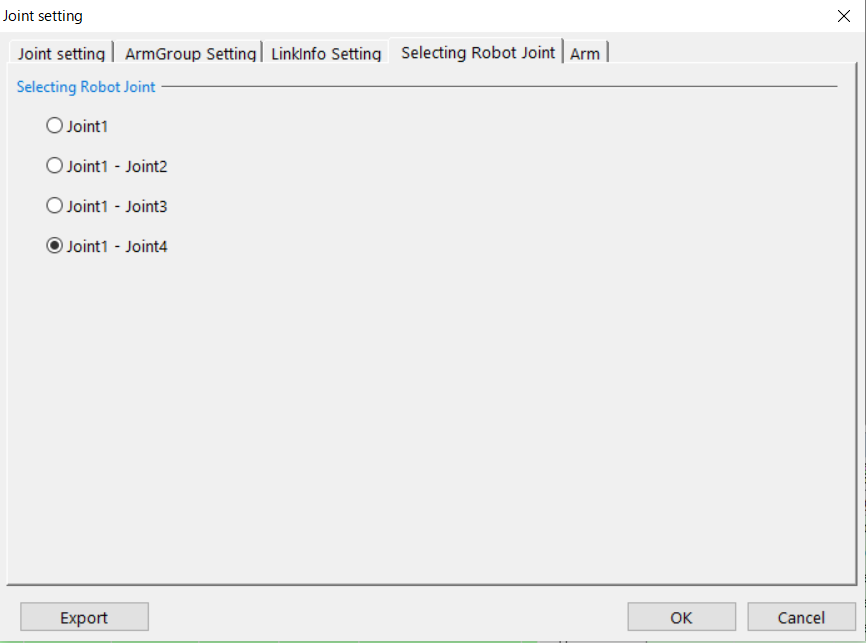
The [Joint Setting] window appears.
Select the [Selecting Robot Joint] tab.
Select axes to be set as robot joints, then press [OK].
2
Select [Connect] - [Transfer data] to display the [Transfer data] window.
In WINCAPSIII, select [Parameter] - [Arm parameters] to transfer the data to the controller.
ID : 11078