
ID : 11092
Configuration of MC9 Series
To connect MC9 series to the RC8 series controller, you need to create an MC9 project in which the same robot type and the same settings are specified as the intended robot.
1
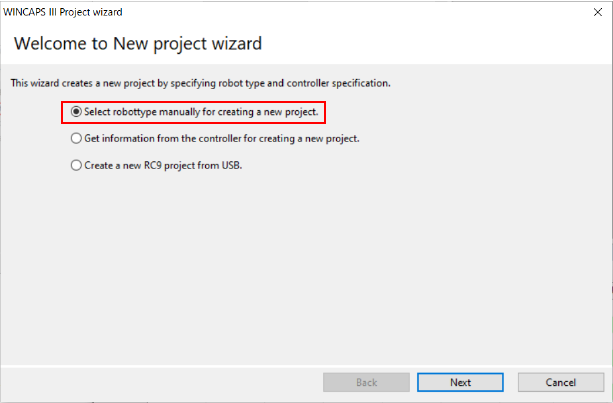
Open WINCAPSIII and open [WINCAPSIII Project wizard].
Select [Select robot type manually for creating a new project.] and press [Next].
Operation path: [File] - [New Project]
2
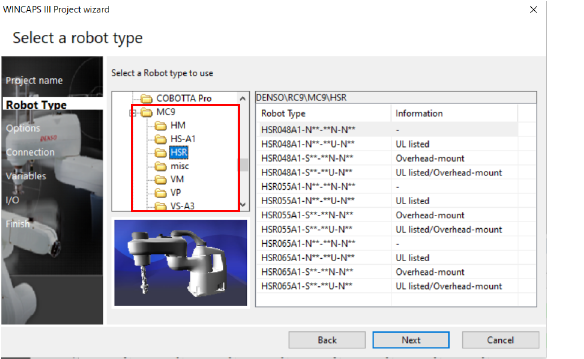
Follow the instructions of the wizard to specify each item according to the intended robot.
In "Select robot type manually for creating a new project.", specify the following six items.
- Project name
- Robot type
- Robot controller options
- Connection method
- Variables
- I/O port
In the robot type selection window, select the same robot type as the robot to be connected to MC9 series from the robots listed in the [MC9] folder below [RC9], and press [Next].
Lastly, the [Finish] window will appear. Ensure the settings of the project are correct. Select “Action after creating a project” and press the [Finish] button.
For details, refer to "Creating a New Project".
3
If you use the auxiliary axis function, perform this STEP to configure the axes.
If you do not use the function, proceed to STEP 4.
Open [Joint setting] in the [Project] tab.
Operation path: [Project] tab - [Joint setting] - [Joint setting] tab
Adjust the following parameter values for all axes that you intend to use as auxiliary axes.
- Set [Axis characteristics] to either [0:Enable ] or [2: Enable encoder only] depending on the state of the auxiliary axes.
- Set [Servo amplifier maker] to [4:DensoWave].
- Set [Servo amplifier model] to [4:RC8].
- Set [Servo amplifier connection order] to [1:1st].
Configure axes with the same axis numbers as the axes registered as auxiliary axes in the RC8 series robot controller.
Configuring a non-registered axis will cause an error.

For details of the parameters, refer to “Servo Amp Parameter Setting”.
After completing the setting, press [OK] to save the project.
4
To send the MC9 project to MC9 series, permit [Change MC9 robot] in MC9 series.
This operation can be executed using Smart TP or Mini-Pendant.
4-a Using Smart TP
Turn on MC9 series that is to be connected to the RC8 series controller and log in to an account granted user permission for "Maintenance".
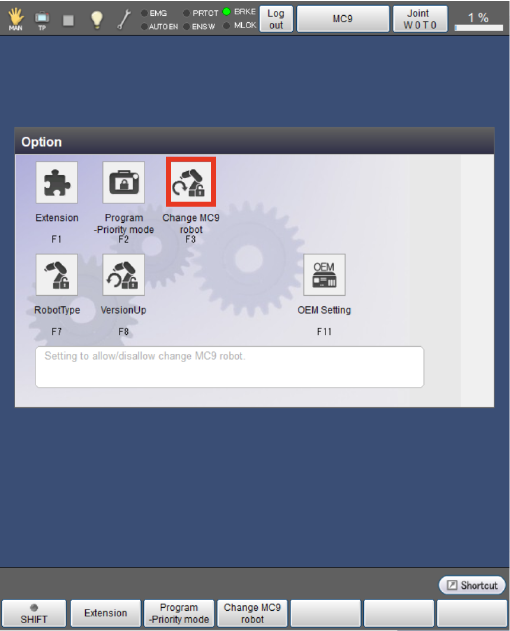
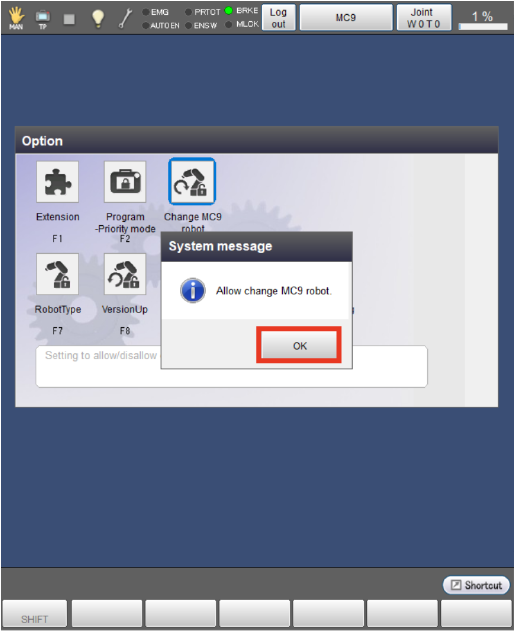
Press [Change MC9 robot] in the [Option] window.
Operation path: [Top Screen] - [F6: Setting] - [F8: Option] - [F3: Change MC9 robot]
Press [OK] to display the message to permit the change.
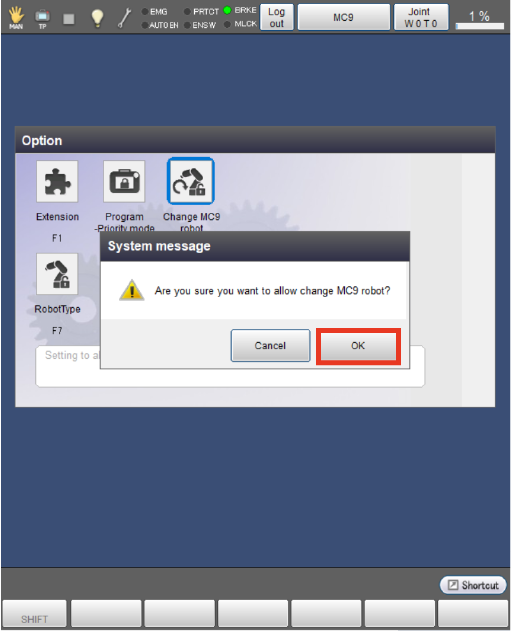
Pressing [OK] will display the following system message.
4-b Using Mini-Pendant.
Turn on MC9 series that is to be connected to the RC8 series controller and log in to an account granted user permission for "Maintenance".
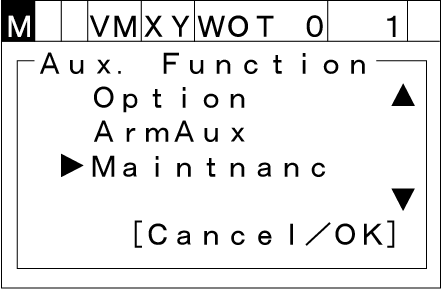
Press the [AUX] key to display the [Aux. Function] window.
In the displayed window, select [Maintenance] with the up and down keys.
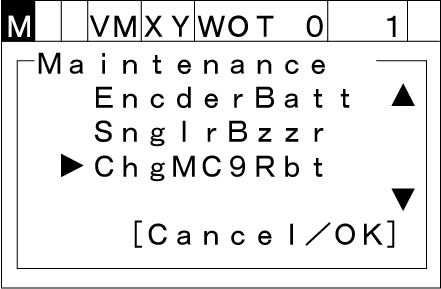
In the displayed [Maintenance] window, select [ChgMC9Rbt] with the up and down keys.
Pressing [OK] will display the following system message.
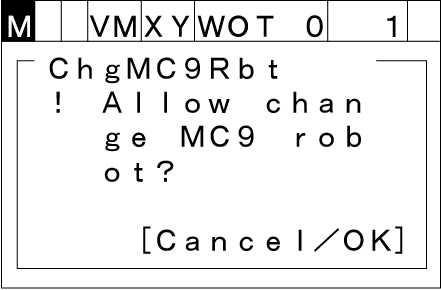
Press [OK]. The following message will appear if the setting is complete.
Press [OK] to close the message.

5
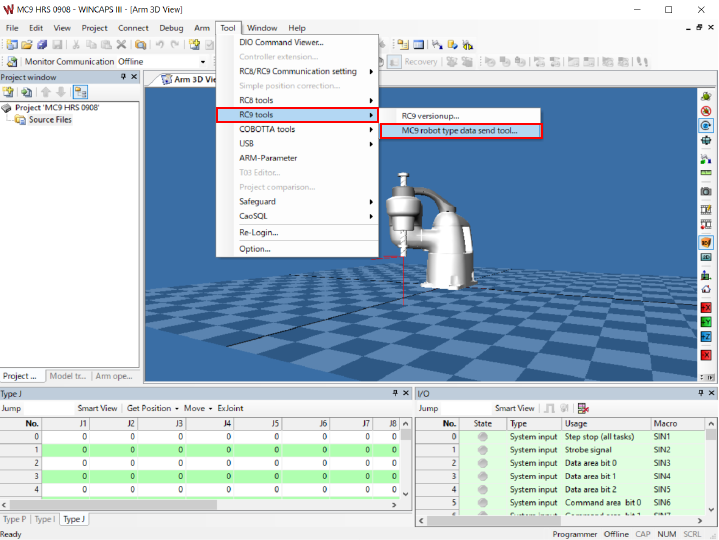
Start WINCAPSIII and select [RC9 tools] in the [Tool] tab, then use [MC9 robot type data send tool] to transfer the data to MC9 series.
Operation path: [Tool] - [RC9 tools] - [MC9 robot type data send tool]
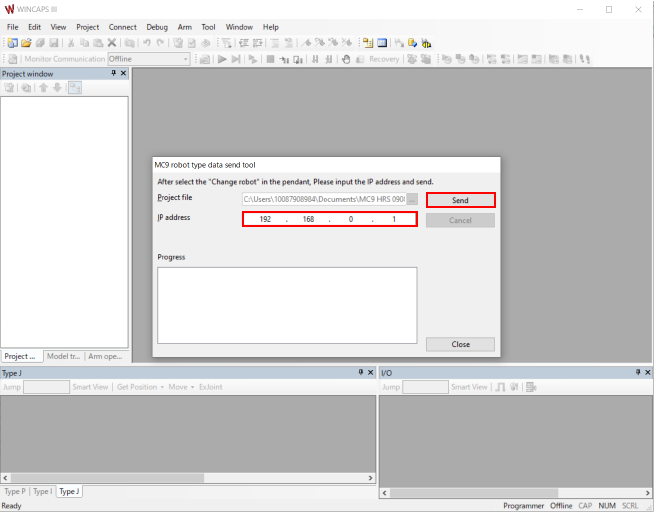
After the data transfer, follow the instructions displayed on the screen.
ID : 11092