
ID : 2952
Installation of EtherCAT Master Board (Selective Extended Joint)
A EtherCAT master board (selective extended joint) is built in an expansion slot of a robot controller.
A robot controller equips two expansion slots. Connect the EtherCAT master board to the connector with the slot, which is for PCI board. For about the way of connection, refer to "Installing Expansion Board ".
- When turn the controller power ON after this installation, "Shutdown since driver installation of the new device was completed." is displayed on the teach pendant. Press "OK" to shutdown the robot controller, then turn the motor power ON when "It is now safe to turn off your computer" appears.
- For safety reason and to prevent damage to the devices, disconnect the power cable of the controller or shut down the power supply to the controller from the facilities before disconnecting or connecting cables.
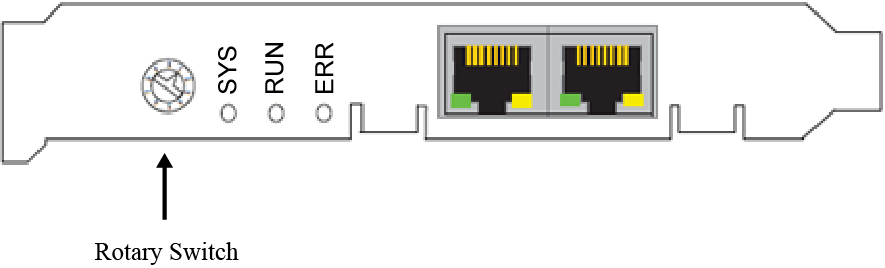
Mounting Field bus board (EtherNet/IP Adapter board, EtherACT slave board etc.) on PCle slot is possible. Change the terminal number of rotary switch on EtherCAT master board (selective extended joint) to except 0.
Change the parameter to the value which you set with a rotary switch, referring the following ways.
EtherCAT Master Board ID
| EtherCAT Master Board ID | Available range | Defalt setting |
|---|---|---|
| Value | 0 to 9 | 1 |
Change with a Teach Pendant
1
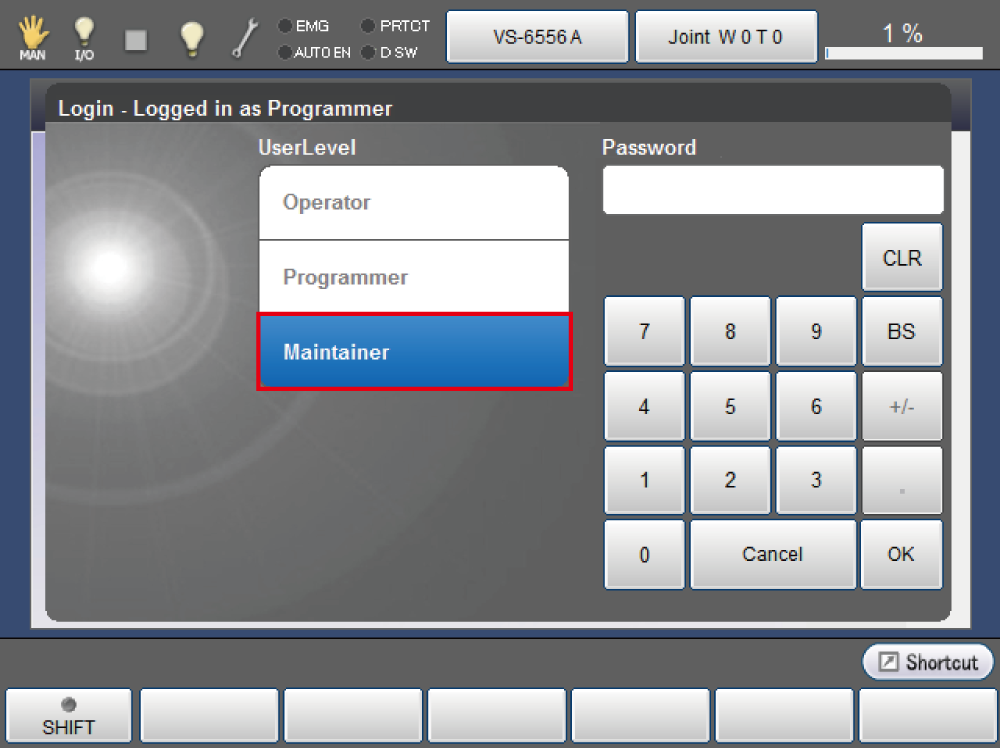
From the top screen - [F6 Setting] - [F1 Login]
User Level is "Maintainer".
2
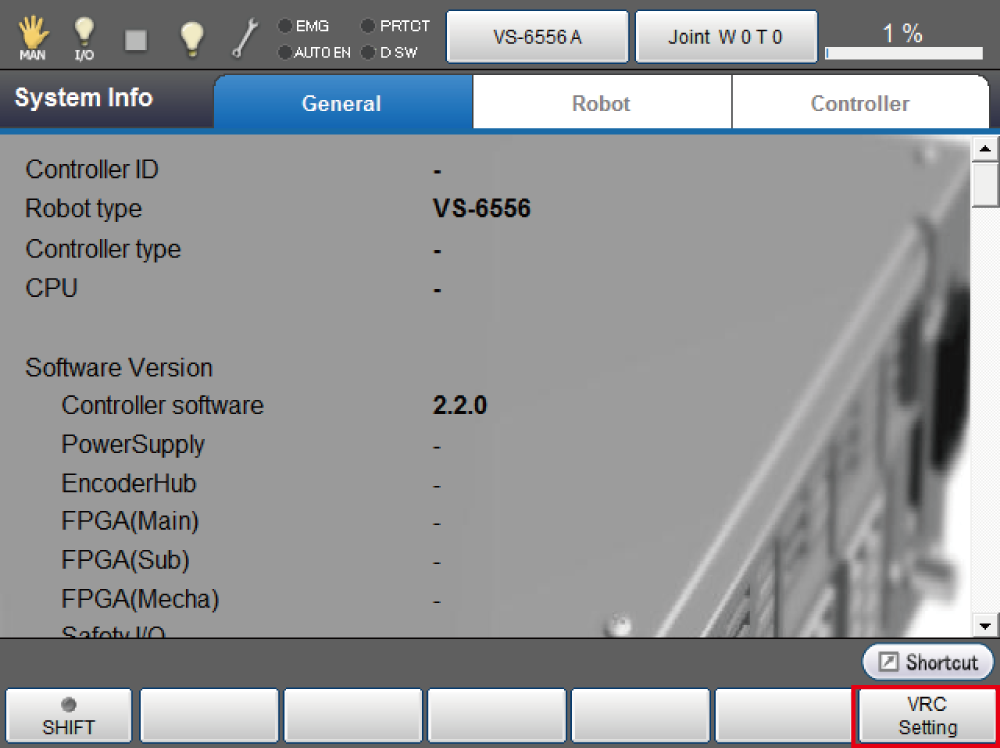
From the top screen - [F6 Setting] - [F2 System Info] - [F6 VRC Setting]
3
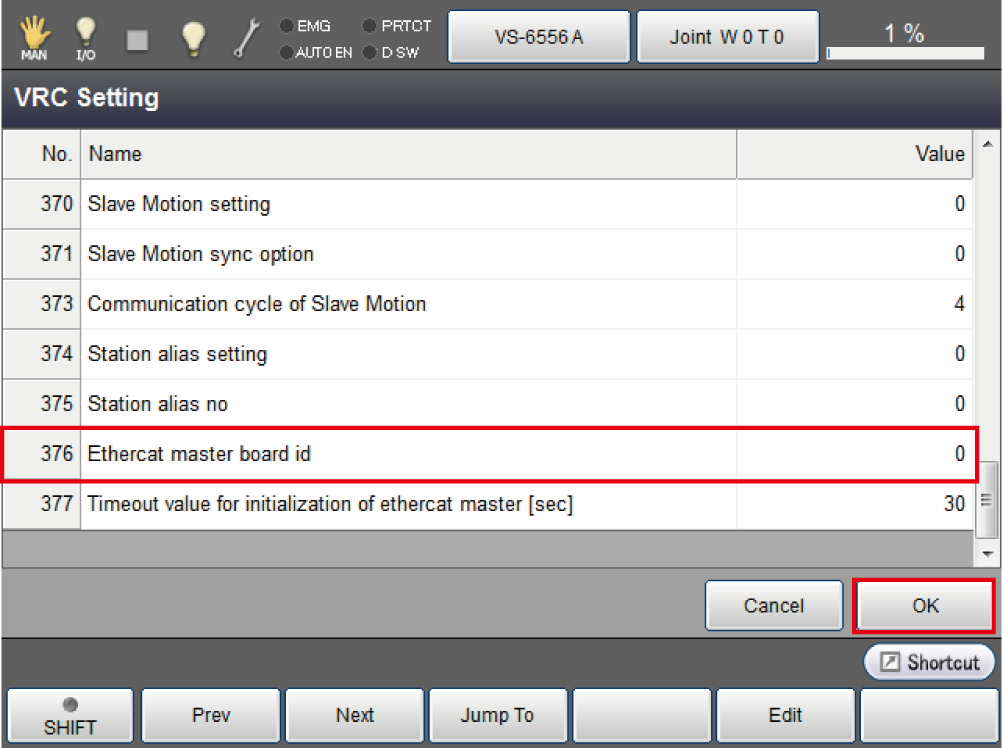
Enter the value which you set to the rotary switch to "376: Ethercat master board id"
4
Reboot the robot controller
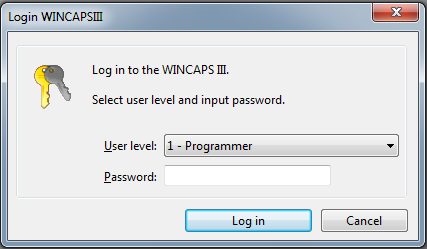
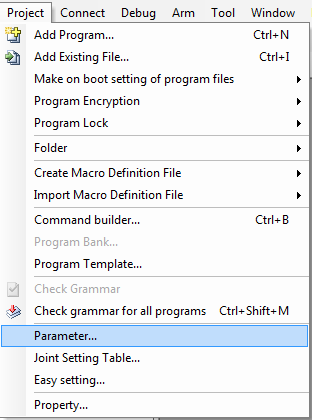
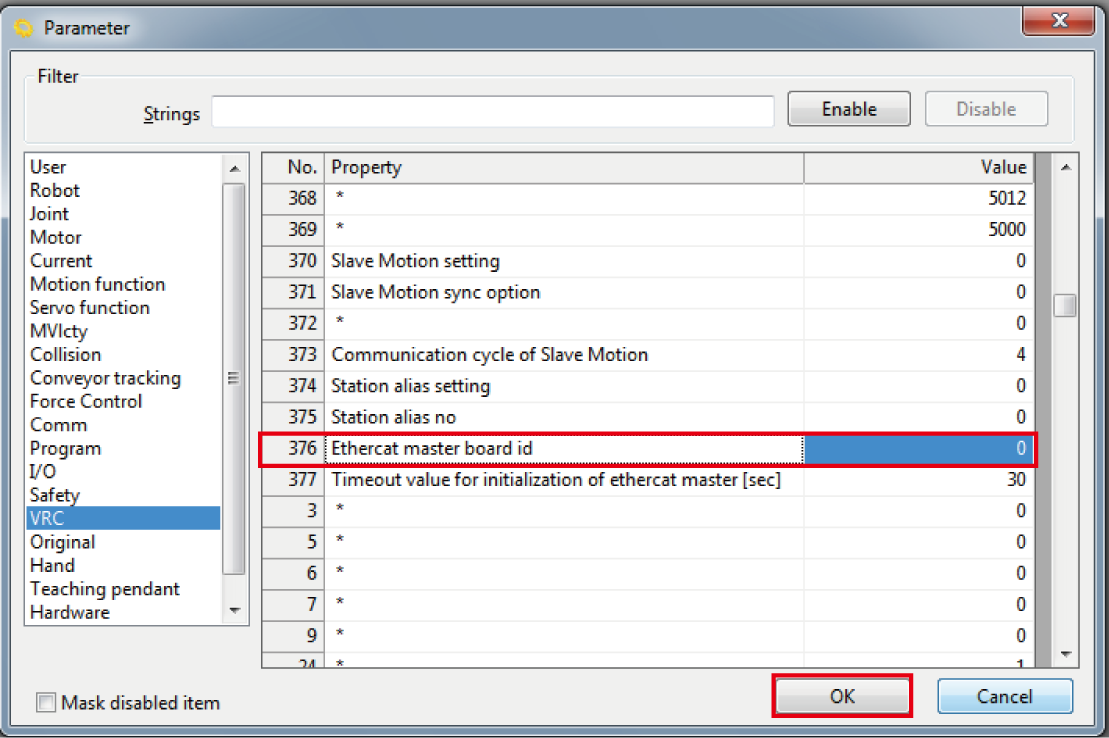
Change with WINCAPSIII
1
Login as "1-Programmer", User level.
2
[Project] - [Parameter]
3
Enter the value which you set to the rotary switch to [VRC] - "376: Ethercat master board id"
4
After transferring the project data to the robot controller, reboot the robot controller.
ID : 2952