
ID : 5218
Running the Robot Manually
It allows robot operation from teach pendant and mini-pendant, or automatic robot run by turning on the robot controller.
Turning ON Robot Controller
To operate the robot, it is necessary to turn on the robot controller.
The robot controller controls and supplies all power needed for the operation of robot.
Operation procedures
Checking that it is safe to proceed
- Check that the robot is installed correctly.
- Check that there is no one within the robot's restricted space.
1
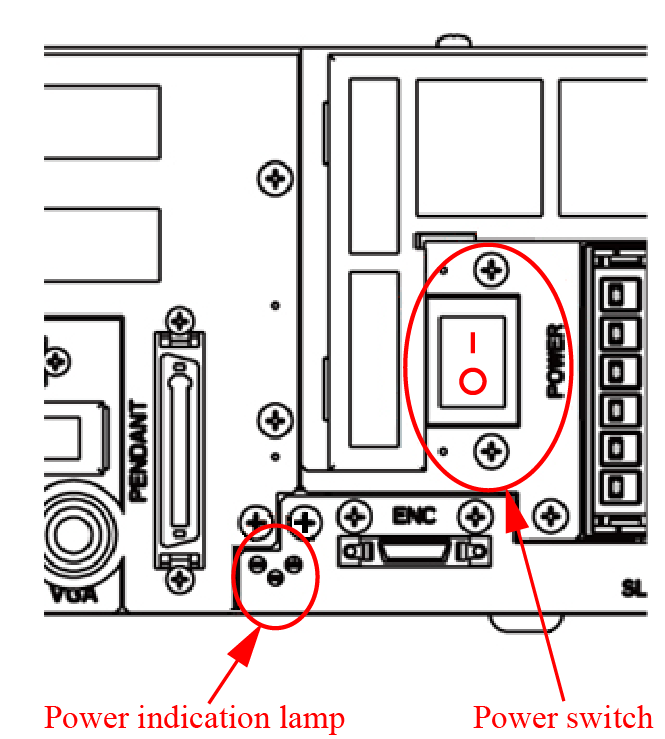
Press "│" display side of power switch of the controller shown in the figure below until it clicks.
Power lamp (the leftmost of three pilot lamps) turns on. The other two pilot lamps, "Automatic mode" and "Error", briefly flash immediately after turning on.
Language setting display appears for the first time only. For details, please refer to "Display Language Setting for Pendant".
2
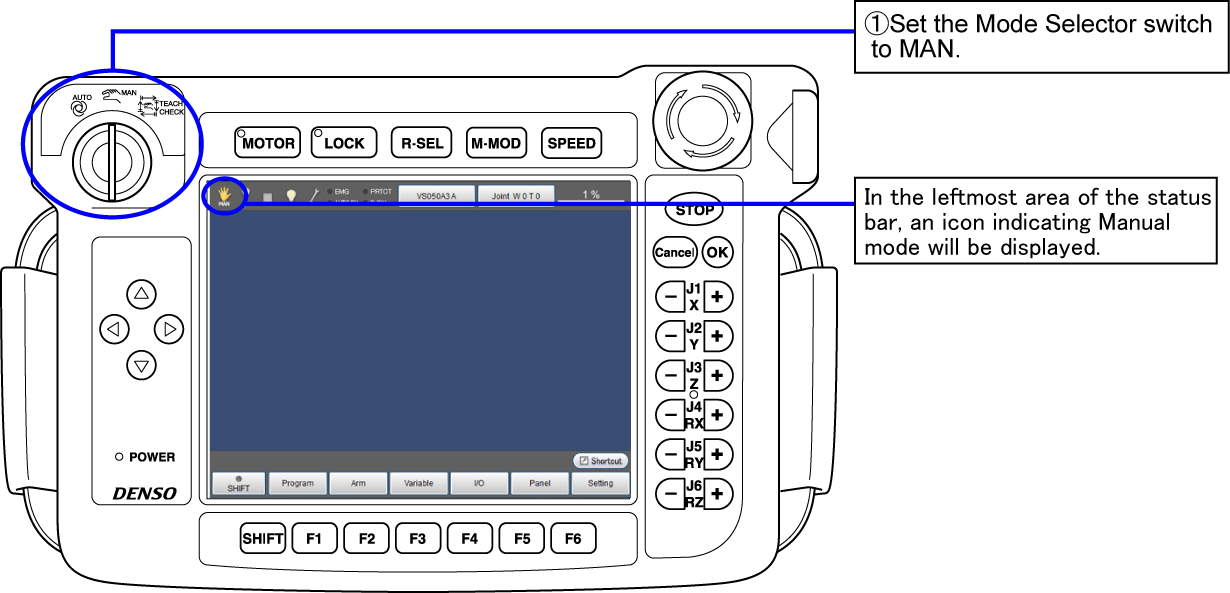
Set the mode selector switch to the MANUAL position.
3
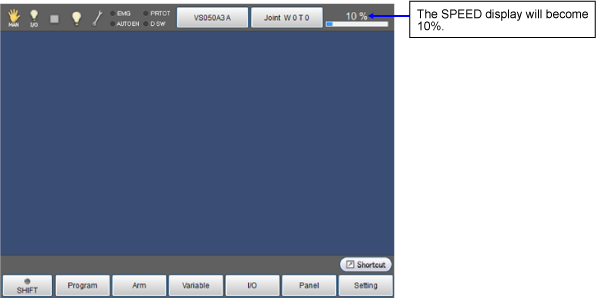
Set the speed and acceleration.
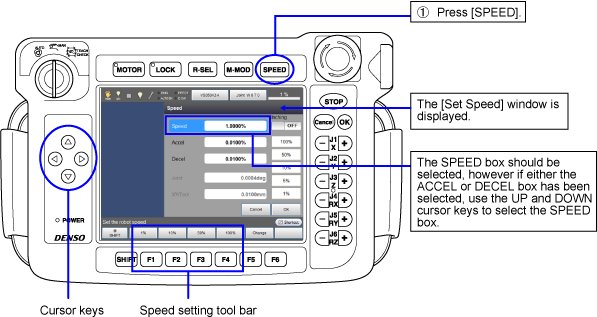
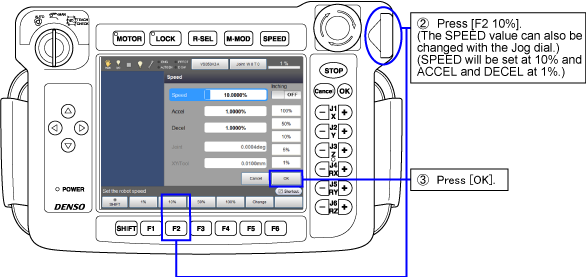
At the beginning, leave these settings as they are, as you will be running the robot slowly to ensure safety. The settings can be changed later on, after you have become accustomed to running the robot with the teach pendant.
4
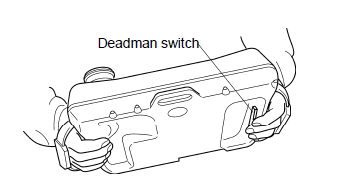
Press the dead man switches.

5
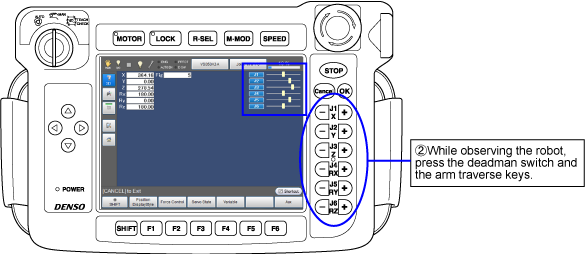
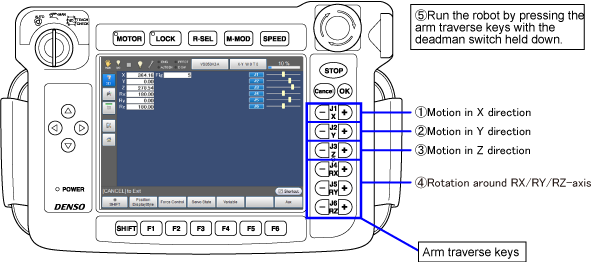
Move each arm of the robot manually.
When this operation is performed, the robot arm will move. Any workers should leave the robot’s restricted space.
The current position can be checked by the teach pendant. To display the current position on the screen, press [F2 Arm]. This is optional, so you can operate robot arms without displaying current position.

The arm corresponding with the operation of the J1 to J4 (4-axis robot) or J1 to J6 (6-axis robot) arm traverse keys will move.
Current position against full stroke length of each axis are displayed.
6
Select Manual mode to run the robot manually.
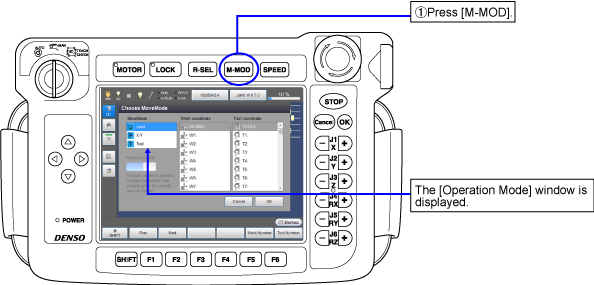
In this section, running the robot in X-Y mode.
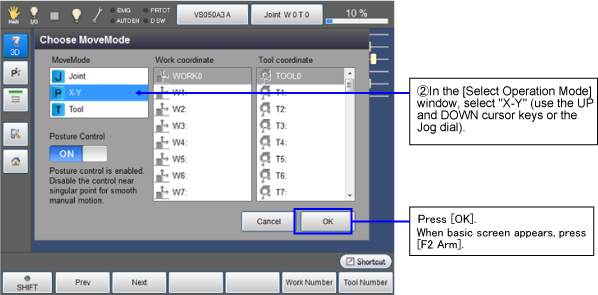
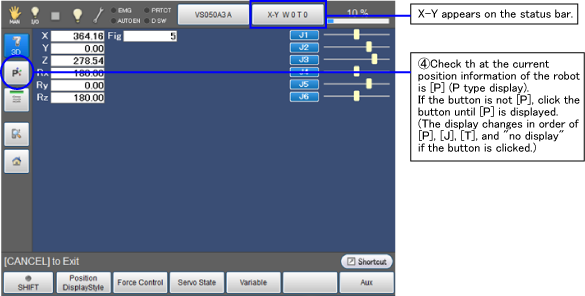
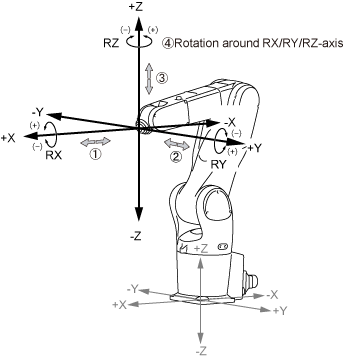
[Motion of the X-Y mode]
ID : 5218