
ID : 5319
Configuring Robot Joints
To configure the robot joint, use the teach pendant or in WINCAPSIII with the following procedures.
- Joints not configured as robot joints are regarded as extended-joints.
- Modifying the robot joint configuration initializes the arm group and link information settings.
Configuring Using the Teach Pendant
1
Access : Top screen- [F2 Arm] - [F2 Maintenance] - [F10 Joint Settings] - [F12 Robot Axis Range]
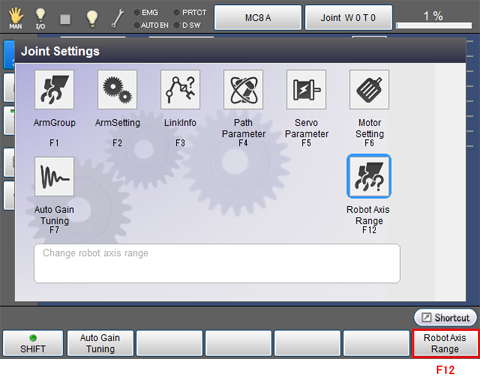
"Robot axis range screen" appears.
2
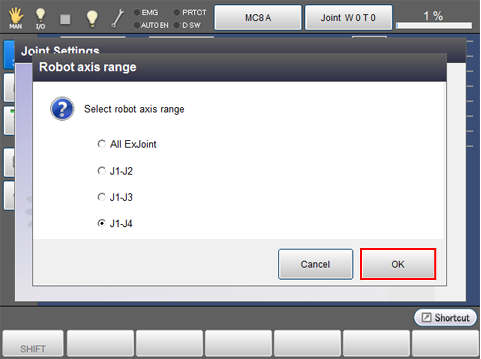
Select axis range to set as a robot axis, then press [OK].
Configuring Using WINCAPSIII
1
Access : Project | Joint Setting Table (This display is the Joint Setting window)
"Joint setting" window appears.
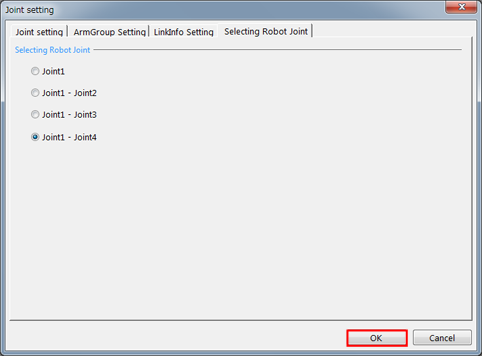
Choose the Selecting Robot Joint tab.
Select joints to be configured as robot joints and press OK.
2
Choose Connect | Transfer data to display the Transfer data window.
In the WINCAPSIII pane, select Parameters | Arm parameters and then press Send to transfer the data to the robot controller.
ID : 5319