
ID : 7983
Connection with the Rockwell Automation PLC
Connecting the PLC manufactured by Rockwell Automation and the COBOTTA through EtherNet/IP may require special settings. If the COBOTTA cannot connect with the PLC, try the setting shown below.
This example shows how to set the size of input/output areas to 500 bytes each from the Rockwell Automation PLC.
Setting for the COBOTTA-Side
Setting with WINCAPSIII
Set the input value on the COBOTTA-side by four byte lower value than that of the PLC-side.
To change the input size, use WINCAPSIII.
1
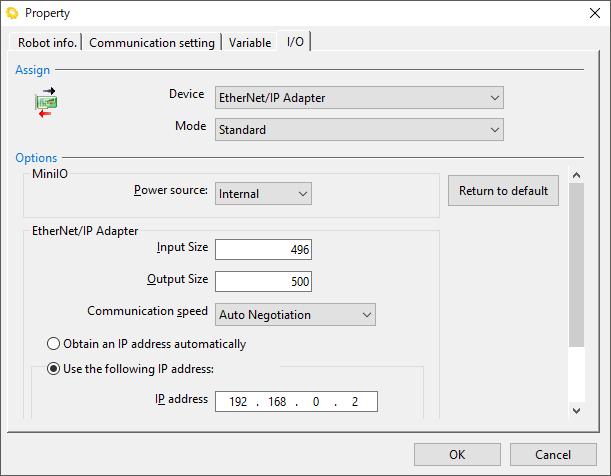
Select [Project] [Property] from the WINCAPSIII menu, then set the input size to "496", which is four byte lower than that of PLC-side.
Operation path : [Menu] - [Project] - [Property] - [I/O]
2
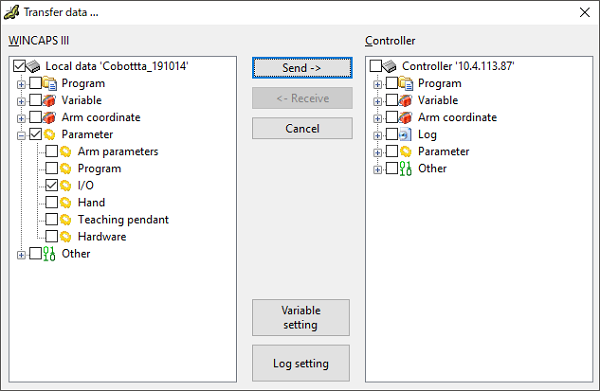
Once the setting is complete, select [I/O] check box to transfer projects to COBOTTA.
Operation path : [Menu] - [Connect] - [Transfer data...]
Setting with the Remote TP/Virtual TP
1
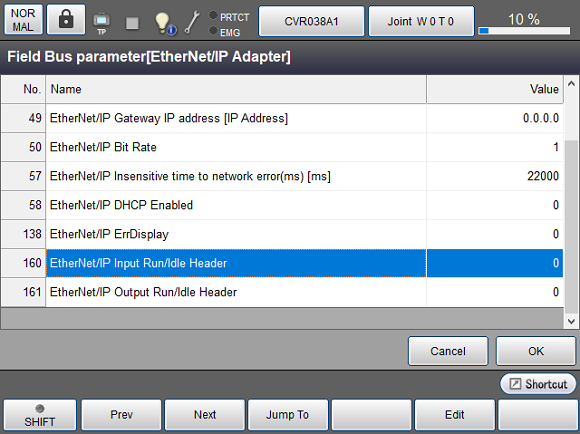
Change the field bus parameter setting with Remote TP/Virtual TP.
Operation path : Top window - [F4 I/O] - [F6 Aux] - [F4 Field Bus parameter]
2
Select [160 : EtherNet/IP Input Run/Idle Header] then click [F4 Edit].
3
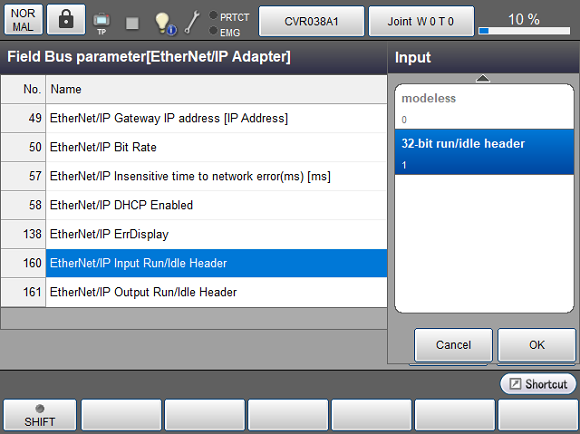
Select [32-bit run/idle header] then click [OK].
4
Click [OK].
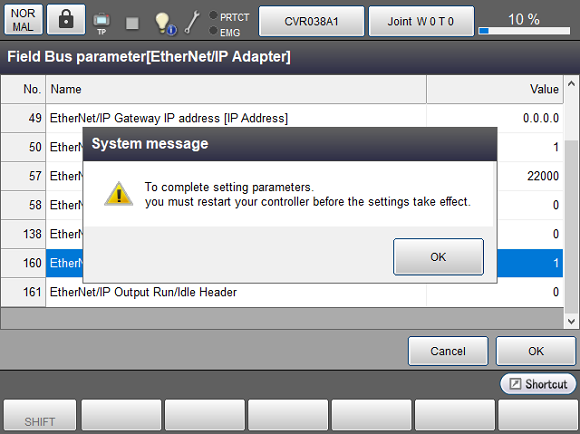
5
Once the following message appears, reboot the COBOTTA.
Setting for the Rockwell Automation PLC-side
1
With the Rockwell Automation PLC, set the parameters of [Input], [Output] and [Configuration] in the COBOTTA as shown below. For [IP address], set the IP address of the COBOTTA.
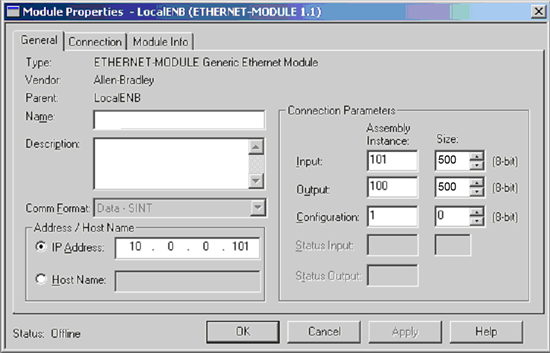
While input size was set to "496 bytes" in the COBOTTA side, input size in the PLC side is set to "500 bytes". Some PLCs use 32-bit units to set the input/output size, but this example uses 8-bit units. If 32-bit units is used, enter "125".
2
Apply this setting to the PLC to check whether the connection establishes.
This completes the setting process.
ID : 7983