
ID : 3394
Pylon5 Setting
This section explains the setting of Basler GigE camera.
Set IP address, ID and a trigger mode with the pylon IP Configurator.
Use a camera in the trigger mode.
If the trigger mode is off, you will fail to connect the computer to the camera.
How to Install
1
From the Basler website, download the Pylon 5.0.12 Camera Software Suite for Windows.
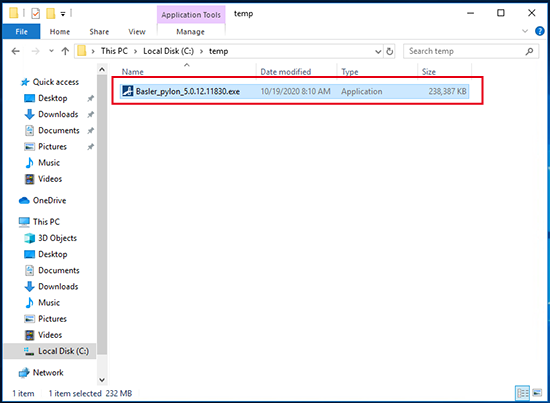
2
Double-click the Basler_pylon_5.0.12.11830.exe.
3
When the following window appears, select the "I agree” check box, and then click the "Next” button.
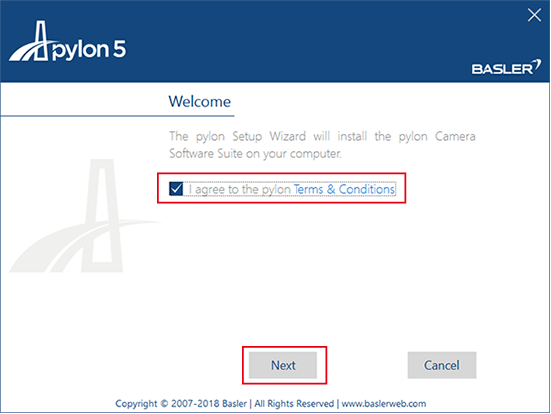
In all of the following steps, installation will stop when you click the “Cancel” button.
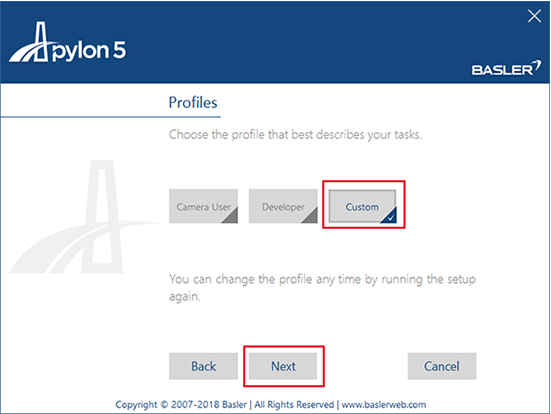
4
Select "Custom", and then click the "Next” button.
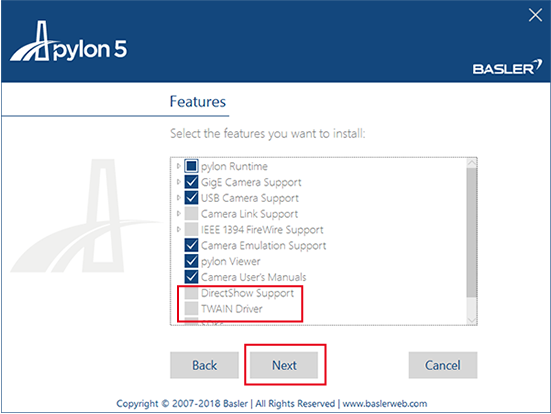
5
From the Features setting area, deselect "DirectShow Support", "TWAIN Drive", and "Firmware Updater”. Click the "Next” button.
6
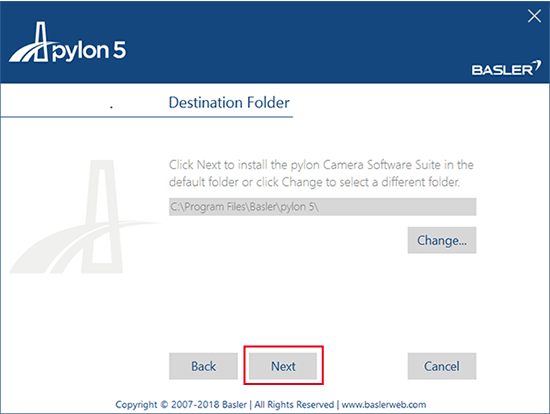
Check the installation destination, and then click the "Next” button.
To change the installation destination, click the "Change” button.
7
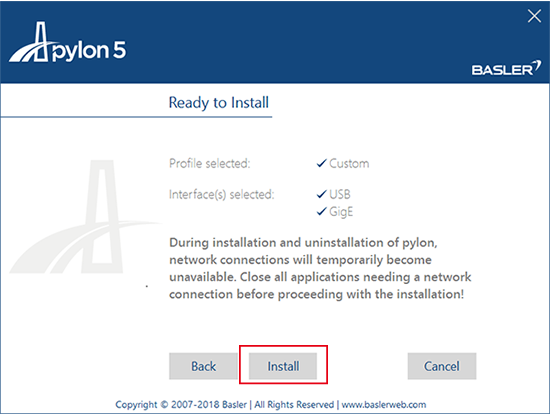
Click the "Install” button. Installation starts.
Settings of IP Address and ID
1
Start the pylon IP Configurator.
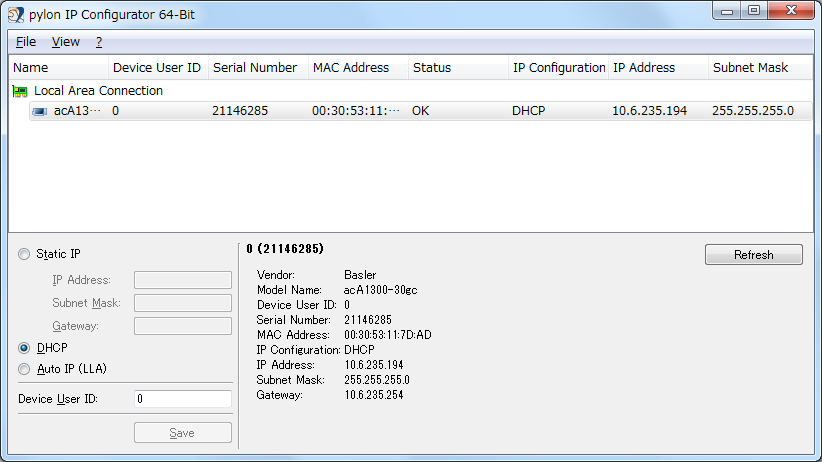
2
Select a camera of which you intend to set IP address and ID.
3
Enter "IP Address", "Subnet Mask", "Gateway", and "Device User ID", and then click [Save].
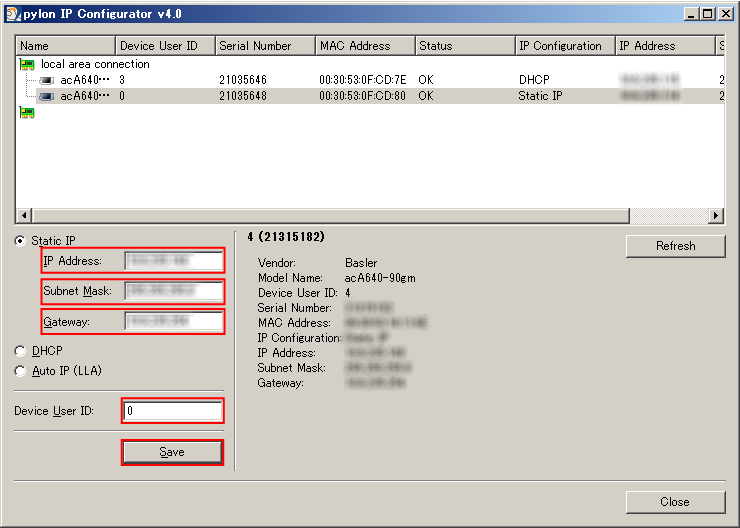
Device User ID ranges from 0 to 4.
User IDs 0 to 4 correspond to IDs 201 to 205 of the controller image storage area.
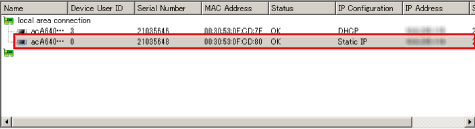
Do not use duplicate IDs when multiple cameras are used.
Trigger Mode Setting
1
Start the pylon Viewer.
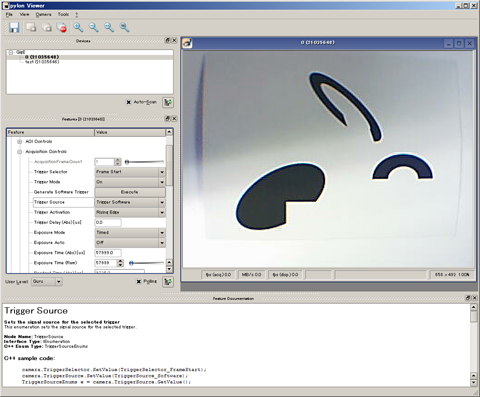
2
Set the "User Level" to Expert or higher.
3
In the "Feature" tab, select "Acquisition Controls", and then click + to open the menu.
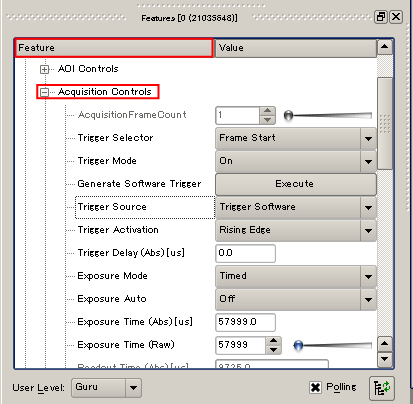
4
Set "Trigger Mode" to "On".
Set "Trigger Source" according to the mode used.
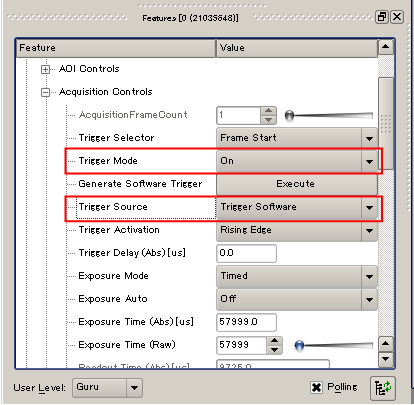
| Item name | Description |
|---|---|
| Trigger Software | Software trigger |
| Line* | External trigger (hardware trigger) |
Setting [Trigger Mode] to [Off] may cause the following problems.
- Your computer fails to connect to the camera.
- Excessive load is applied to the robot controller CPU or the network.
5
Set other usage conditions (e.g. shutter, speed and gain).
6
Select a set of items of which you want to save the settings with Configuration Set Selector.
To save the conditions being set, click the "Execute" button under User Set Save.
The setting will be cancelled unless the "Execute" button is clicked.
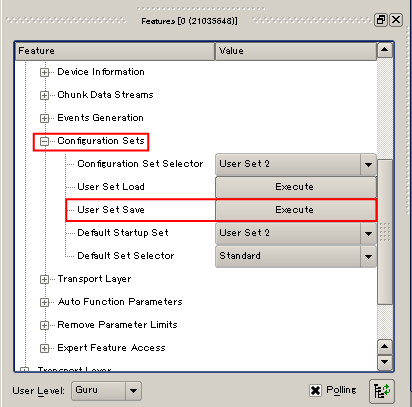
When the power of the camera is turned ON, it starts with the set of settings selected in "Default Startup Set” (in this example, "User Set 2").
Pylon Provider Setting
This section describes the setting for connecting a Basler camera using ORiN or RCVision on a computer on which Pylon5 has been installed.
1
Start a command prompt with administrator privileges and execute the following command:
regsvr32 "C:\ORiN2\CAO\ProviderLib\Basler\Pylon5\GigE\Bin\CaoProvPylon5GigE.dll"
2
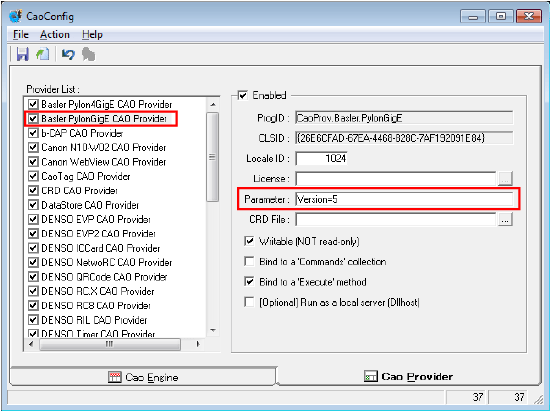
From the Start menu, start "CaoConfig" and select [Cao Provider] tab - [Provider List] - [Basler PylonGigE CAO Provider].
At the Provider's Parameter, enter "Version=5". From the [File] menu, select [Save] to save the settings.
Operation path: Start menu - [ORiN 2] - [CAO] - CaoConfig
Making the Robot Controller Recognize the Camera
To make a robot controller recognize a camera automatically, before you turn on the robot controller, turn on the power supply of the camera. If the robot controller has been started when the camera starts, the robot controller cannot recognize the camera automatically.
When the camera cannot be recognized automatically for any reason (such as the robot controller has been started), make the robot controller recognize the camera manually. The following describes the operation procedures.
- In the Built-in vision menu, press [F6 Disconnect], close the Built-in vision function.
- [F6 Disconnect] is changed to [F6 Connect]. Press [F6 Connect] to recognize a camera.
For details, refer to "Displaying and Operating the Built-in Vision".
If Camera Images Cannot Be Obtained
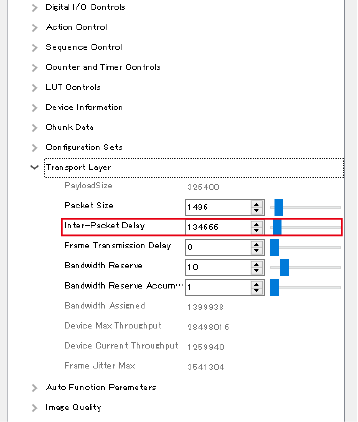
If the images taken by Basler’s GigE camera cannot be obtained using Built-in Vision or other functions, you may be able to fix the problem by using pylon Viewer to set “Inter-Packet Delay” to a higher value than the current value.
In adjusting the parameter setting, do not set the “Inter-Packet Delay” value too high.
Setting “Inter-Packet Delay” to a higher value may slow the transfer of data from the camera and lower the frame rate.
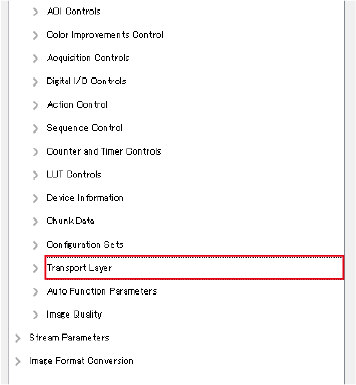
1
Select “Transport Layer” in “Feature” to open a menu.
2
You will find “Inter-Packet Delay” among displayed parameters. Set this parameter to a higher value than the current value.
ID : 3394