
ID : 10966
Operate Auxiliary Axes Manually
This section describes items relating to auxiliary axes. For other details, refer to the “Manual Mode”.
Using the Smart TP
1
Switch the operation mode to Manual mode and then turn on the motor.
For how to switch the operation modes, refer to “Switching Between Operation Modes”.
2
Press [F2 Arm] on the top screen.
The “Current Robot Position” window appears as shown below.
The position of an auxiliary axis appears only if the axis has been enabled in "Joint enable/disable setting".
If not, set [Joint enable/disable setting] to [Enabled] on the [Servo Parameter] setting window.
Operation path : [F2 Arm] - [F12 Maintenance] - [F10 Joint Settings] - [F5 Servo Parameter]
For details, refer to “Servo Parameter Setting”.
- You can operate auxiliary axes manually without displaying this window.
-
The enabling switch linkage function allows the motor to automatically turn on when the enabling switch is pressed. For details, refer to “The Setting of the Enabling Switch Linkage Function”.
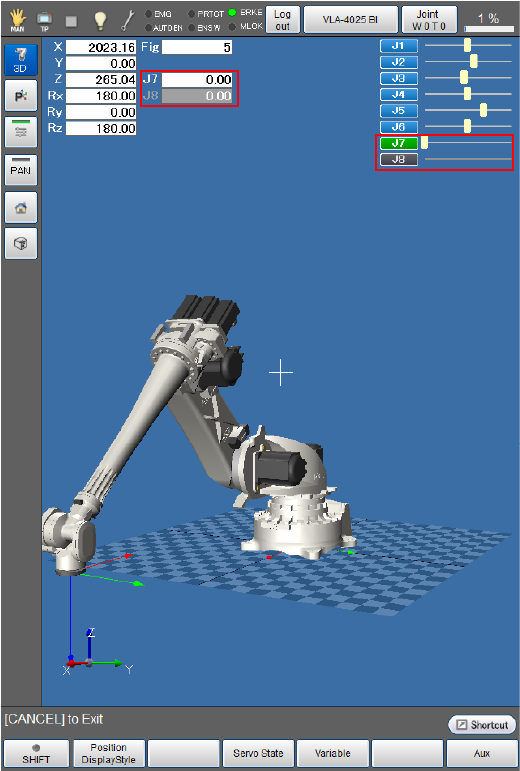
In the image above, the sections marked in red represent the current position of the auxiliary axes.
In this example, Axis 7 is enabled while Axis 8 is disabled.
5
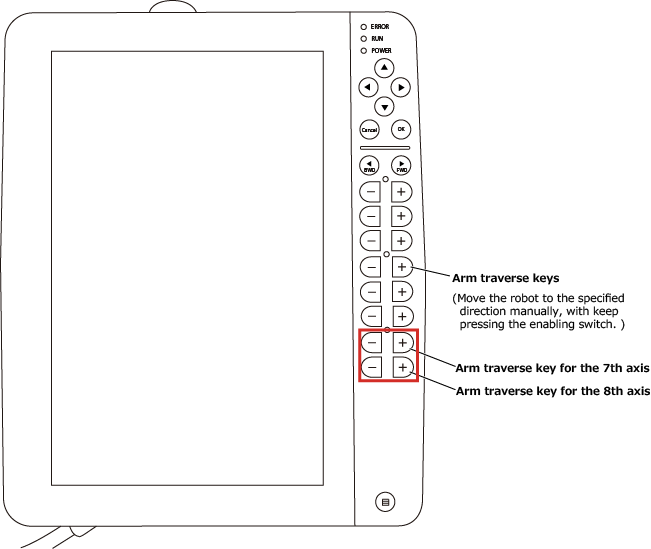
To move an auxiliary axis, press any of the arm traverse keys for the target axis while holding down the enabling switch.
ID : 10966