
ID : 7290
CALSET at the Starting Up
The following section describes how to perform CALSET with TP App. For information about how to perform CALSET other than TP App, refer to "Motion Preparation at Startup".
How to Perform CALSET with TP App
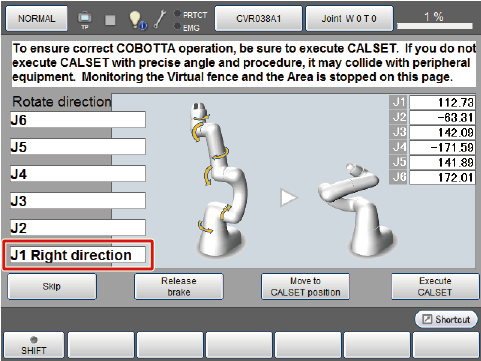
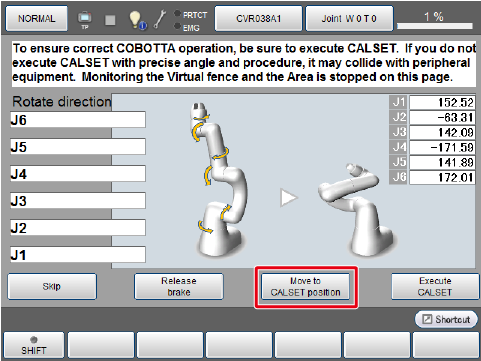
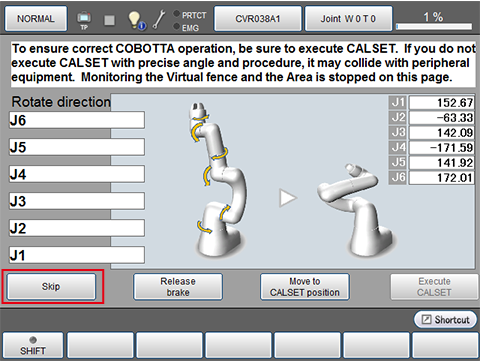
At the COBOTTA’s start up, the following window for CALSET is displayed in the TP App.
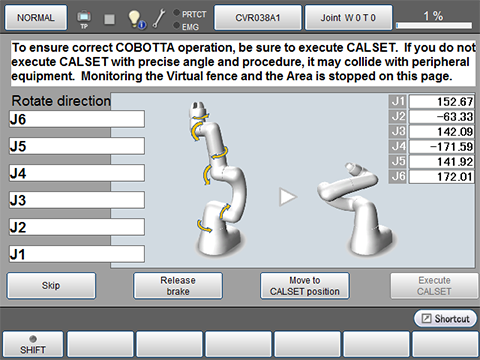
Perform CALSET by following the instructions displayed on the teach pendant.Note that there are two ways to perform CALSET. You will use different window buttons depending on the way of CALSET.
Before performing CALSET, move the COBOTTA to the CALSET position (mechanical end of each axis). The difference between two ways of CALSET is how the COBOTTA is moved to the CALSET position; Automatic CALSET positioning and Manual CALSET positioning.
The following links show the CALSET positioning procedures.
- For manual CALSET positioning, see "the linked page" .
- For automatic CALSET positioning, see "the linked page" .
You can close the CALSET request window without performing CALSET. For information about closing the window, see "Skipping CALSET"
- If CALSET is not performed, accuracy may be reduced.
- Note that the start-up window which you have configured by TP panel function is not displayed automatically because the CALSET window is displayed at the start-up.
Manual CALSET Positioning Procedure
1
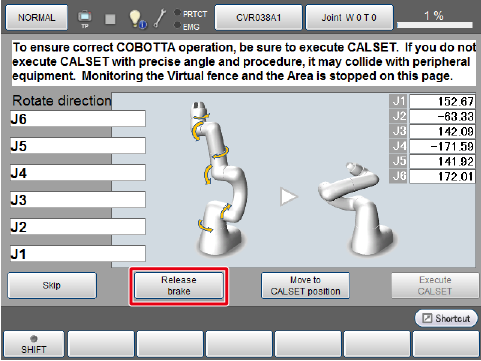
Press the [Brake Release] button.
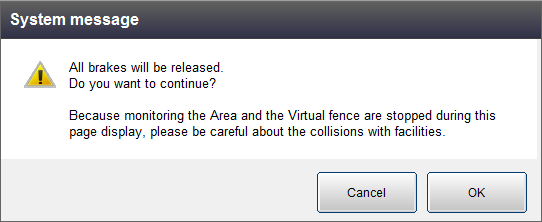
2
Once the following brake release message appears, press [OK].
3
Move the COBOTTA arm to the direction where the dialog window instructs until all axes reach to the mechanical ends.
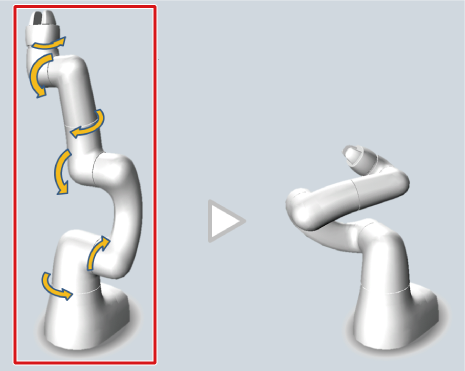
If the arm goes to the right direction, [Right direction] is displayed. If the arm goes to the wrong direction, [Reverse direction] is displayed. The motion direction message will disappear once the arm stops.
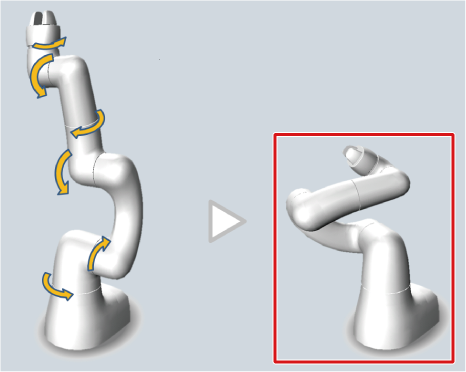
Once all axes have reached to the mechanical ends, the COBOTTA will adopt the following pose. Also, the value of each axis will be close to the following values. However, the value may not be exactly the same because of individual differences.
| Axis | Value[deg] |
|---|---|
| J1 | 152.50000 |
| J2 | -62.88000 |
| J3 | 142.10000 |
| J4 | -176.50000 |
| J5 | 141.20000 |
| J6 | 177.00000 |
4
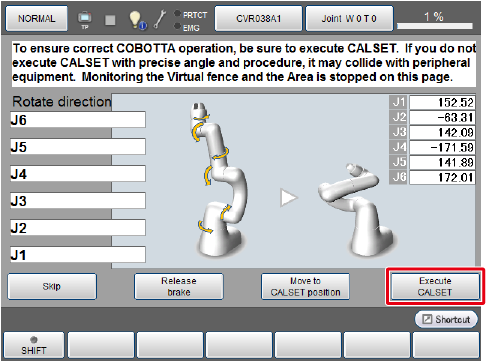
Check if COBOTTA adopts correct CALSET pose, and then press [Execute CALSET].
5
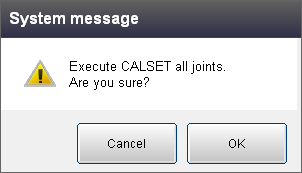
Once the following system message (Execute CALSET all joints) appears, press [OK].
DO NOT press [Execute CALSET] and [OK] with wrong CALSET pose.
Doing so, CALSET will be performed with incorrect position information, leading to unexpected COBOTTA motion and/or to collide with peripheral equipment.
6
Once the CALSET completes, the initial window appears.
Automatic CALSET Positioning Procedure
- Avoid collision with peripheral devices.
- Set the payload accurately.
If the payload is not set, error "0x8440451* : J*:Excessive position error" may occur, or the appropriate CALSET position may not be achieved, leading to reduction in accuracy.
In this case, set the payload settings (No.1 to No.7) in "Config" and then restart, or execute CALSET from other than the TP App. - Do not apply external force during an automatic CALSET positioning procedure. This may reduce accuracy.
1
If there are any obstacles around or on your COBOTTA, remove them beforehand. Place an emergency stop box within the reach of your hands so that you can stop COBOTTA anytime.
2
Press the [Move to CALSET poshition] button.
3
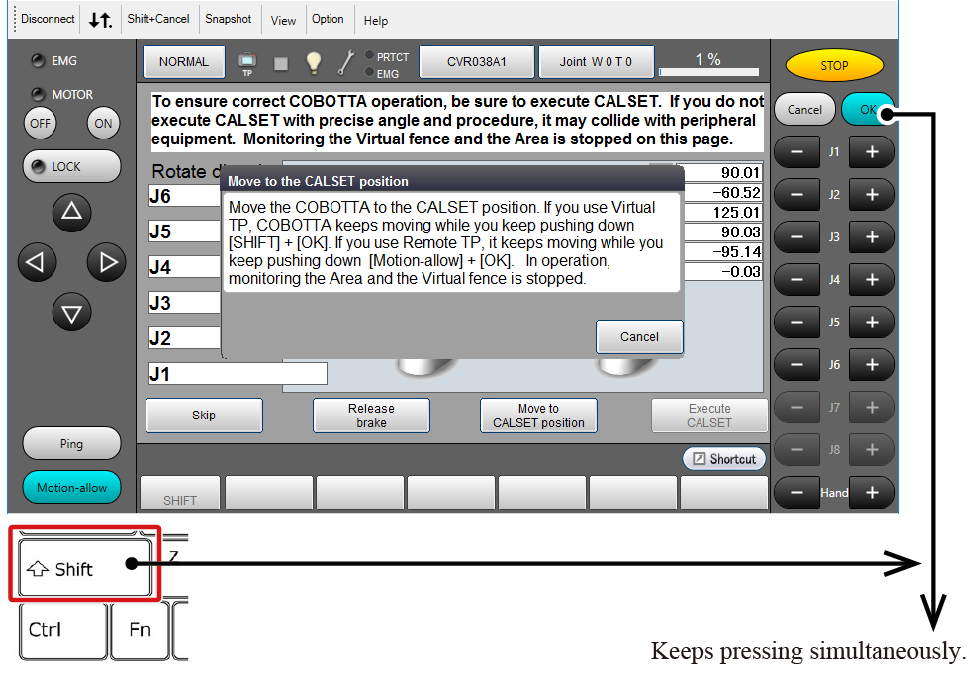
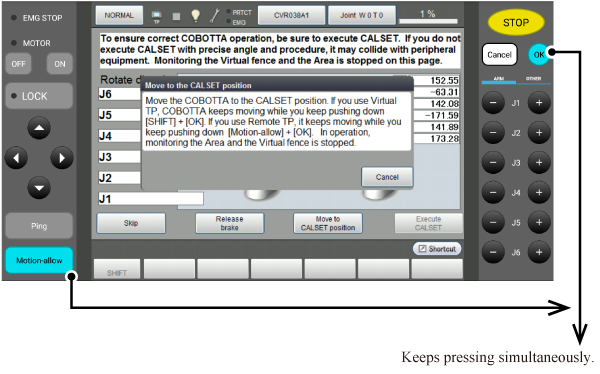
"Move to the CALSET position" window appears. For Virtual TP and Remote TP, the button to be pressed is different. Read the instruction on the window and press the appropriate button.
Releasing either button will stop COBOTTA.
Keep pressing the buttons until the system message informs that COBOTTA has arrived at the CALSET position.
During the automatic CALSET positioning procedure, the robot may exhibit unexpected movements. Do not enter the motion range of the robot.
Window of Virtual TP
COBOTTA keeps moving while the [Shift] key on the keyboard and the [OK] button on the Virtual TP are pressed simultaneously.
Window of Remote TP
COBOTTA keeps moving while the [Motion-allow] button and the [OK] button on the Remote TP are pressed simultaneously.
4
Once COBOTTA reaches to the CALSET position, the following message window appears. Press [OK] on the message window to close the window.
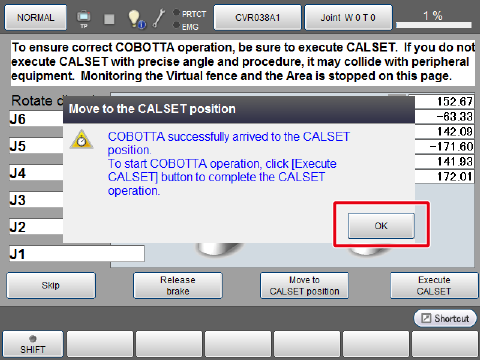
5
Press the [Execute CALSET] button.
6
Once the following system message (Execute CALSET all joints) appears, press [OK].
7
Once the CALSET completes, the initial window appears.
Skipping CALSET
To close the CALSET request window without performing CALSET, press [Skip].
ID : 7290