
ID : 1347
Installing Expansion Board
Methods to install expansion boards such as DeviceNet slave board or CC-Link to expansion slot of RC8 series controller is described here.
1
Turn OFF the power switch of the controller, and then disconnect the power cable.
2
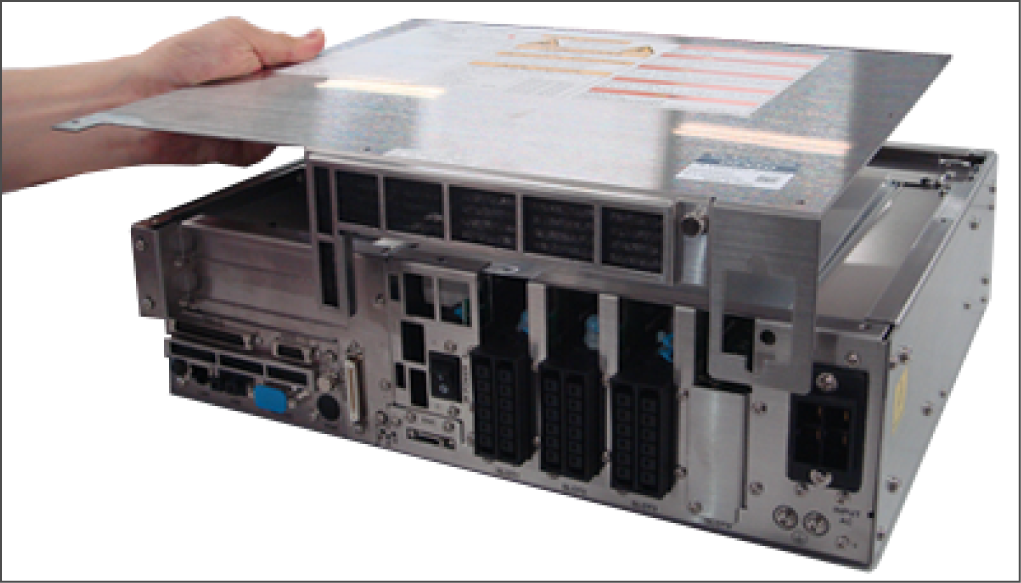
Remove seven screws to remove top cover of the controller.
6 minutes or more must be elapsed after turning OFF the power switch before accessing inside the controller by removing cover for maintenance or other purpose. Failure to do so may be subject to risk of electrical shock.
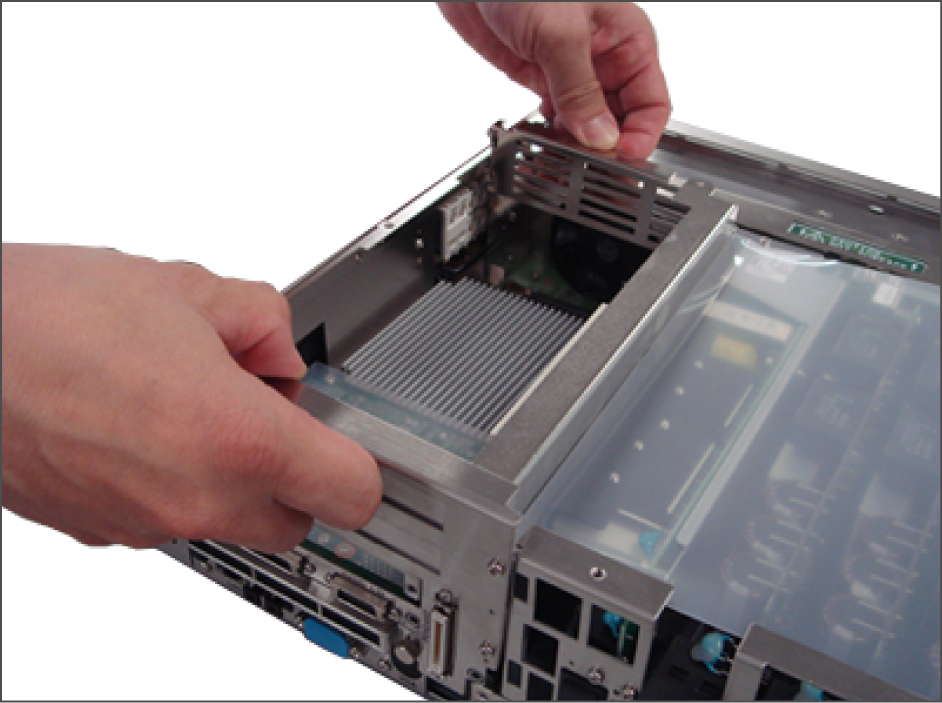
3
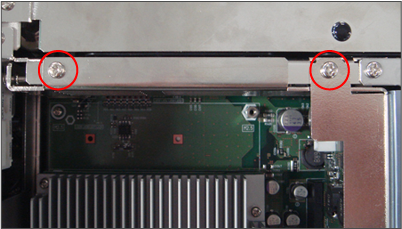
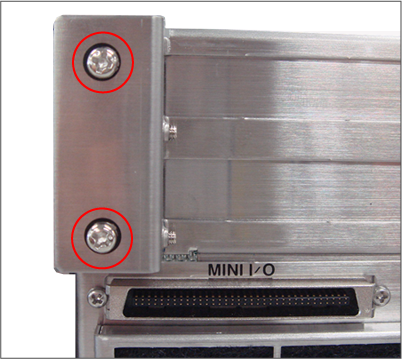
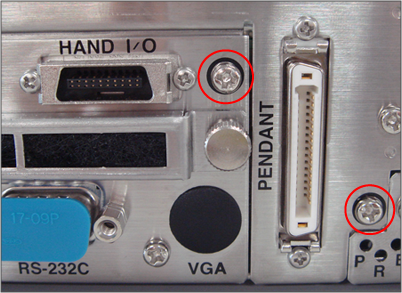
Remove four screws on the front of the controller and two screws on the top of the controller, and then remove the expansion board mounting case.
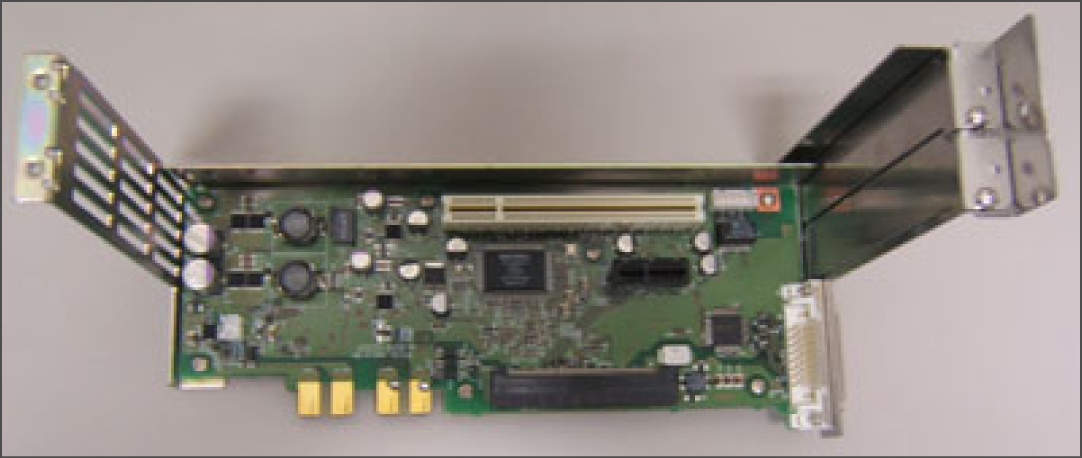
4
Place the expansion board mounting case on surface.
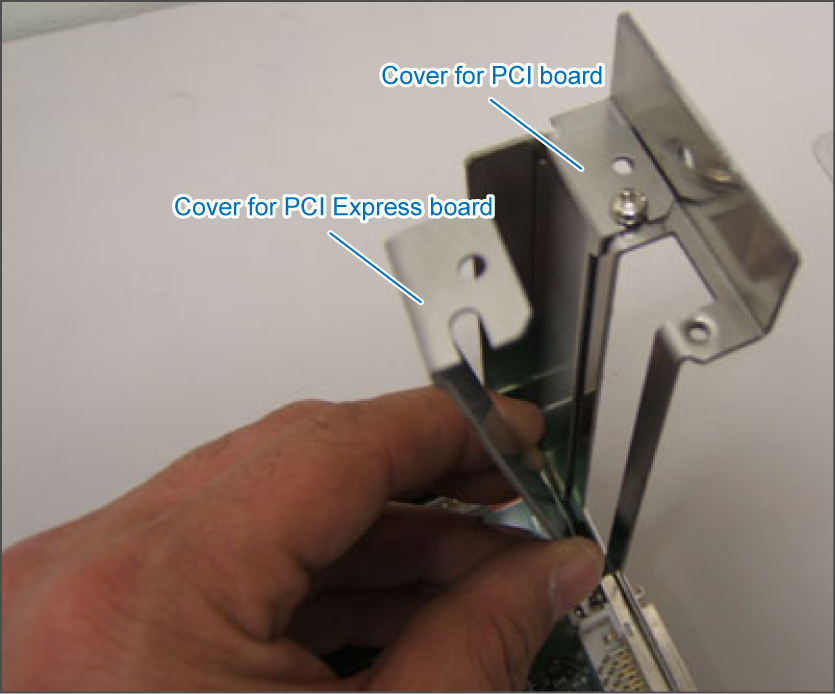
5
Remove screws to remove cover.
6
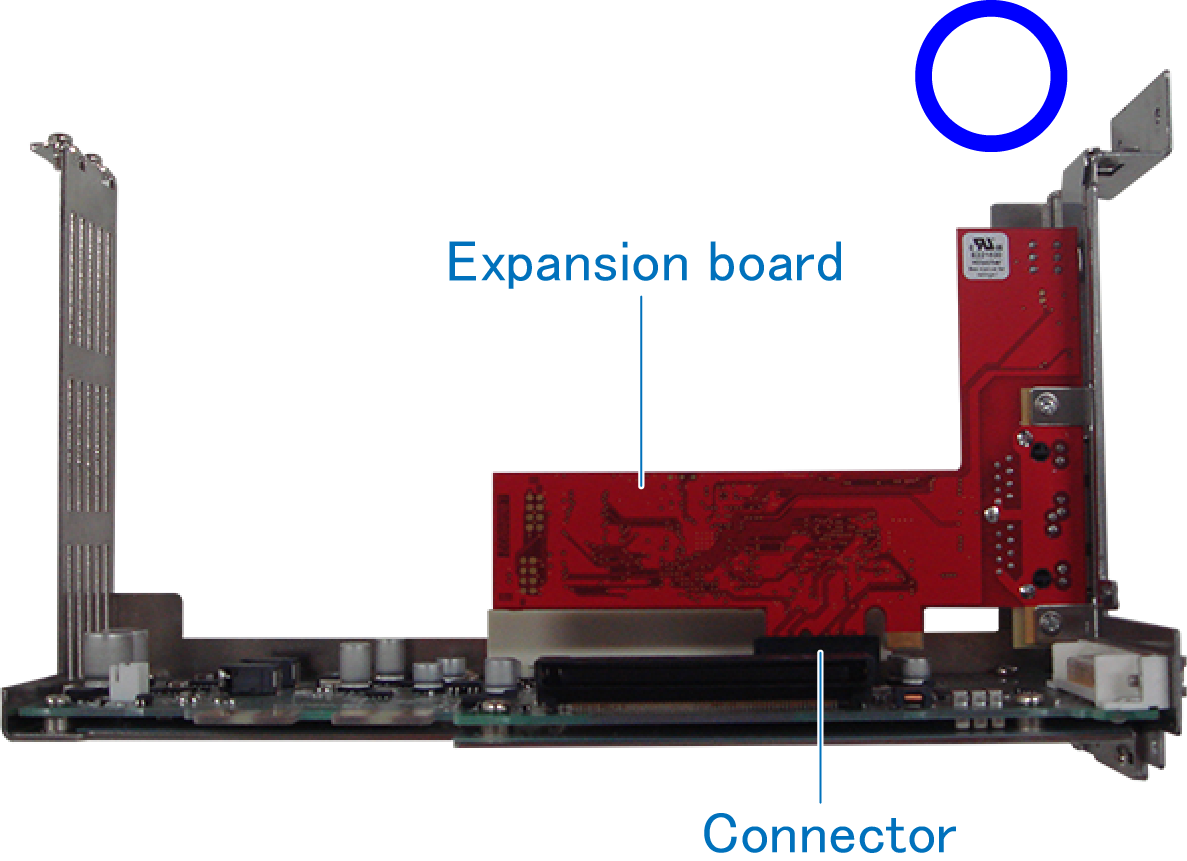
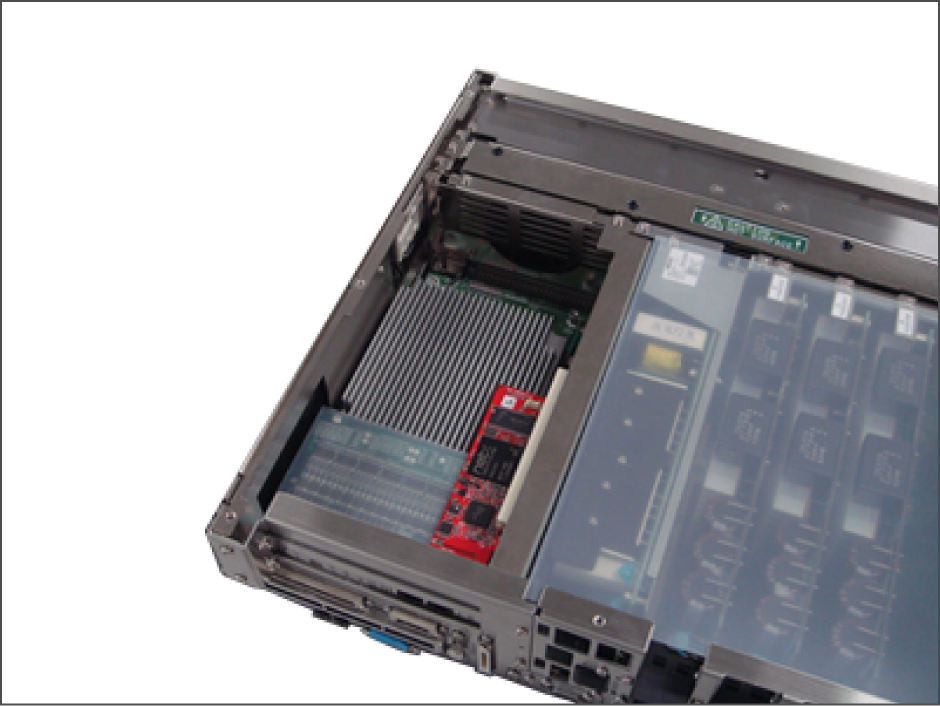
Insert the expansion board in the expansion board connector securely all the way to end.
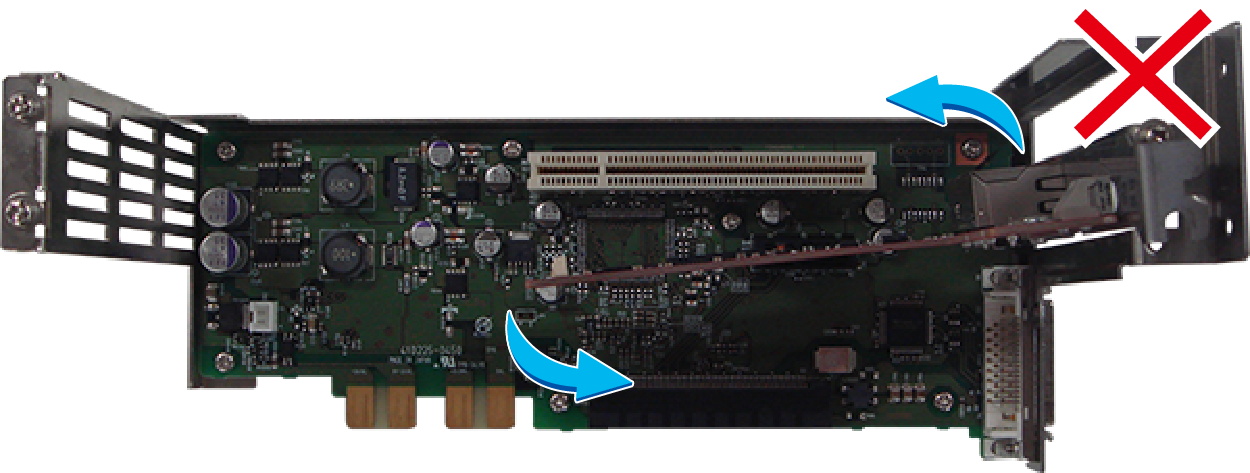
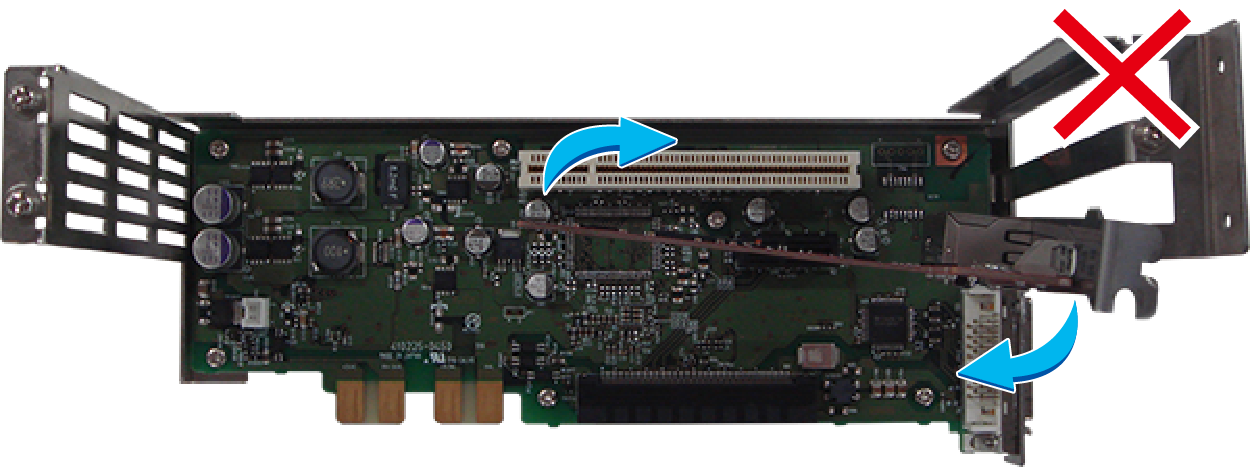
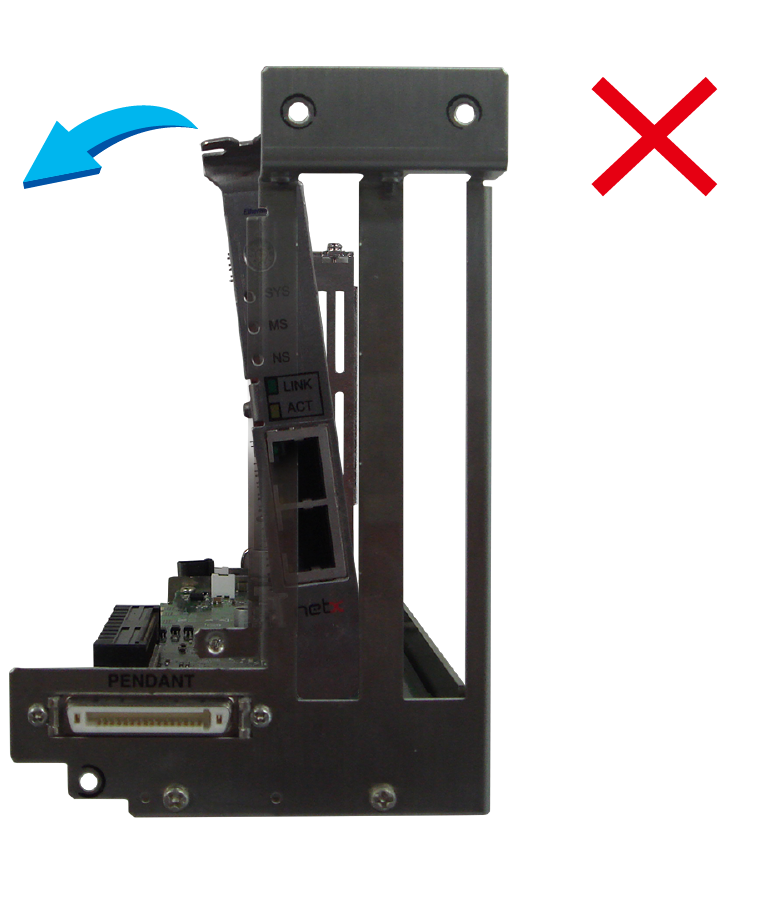
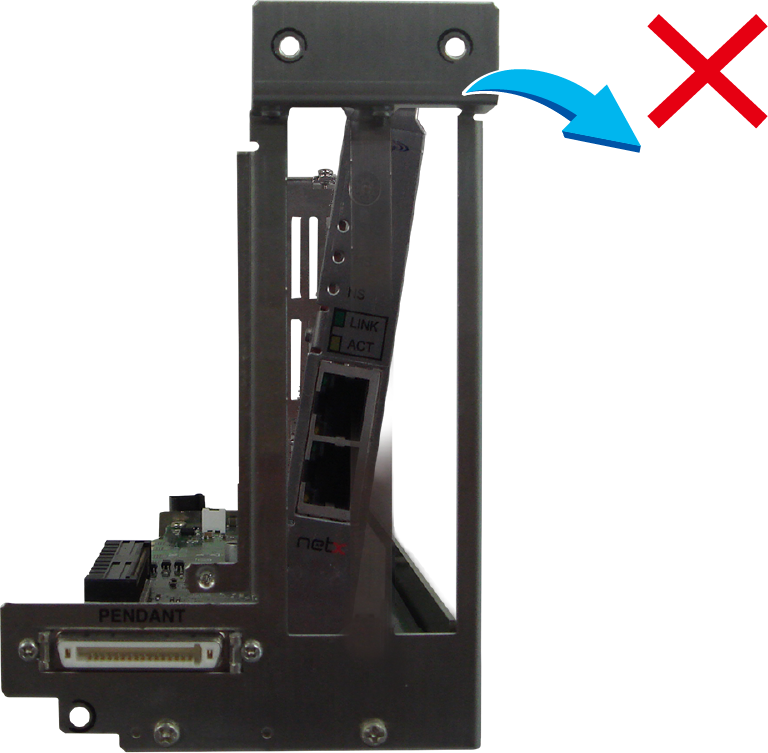
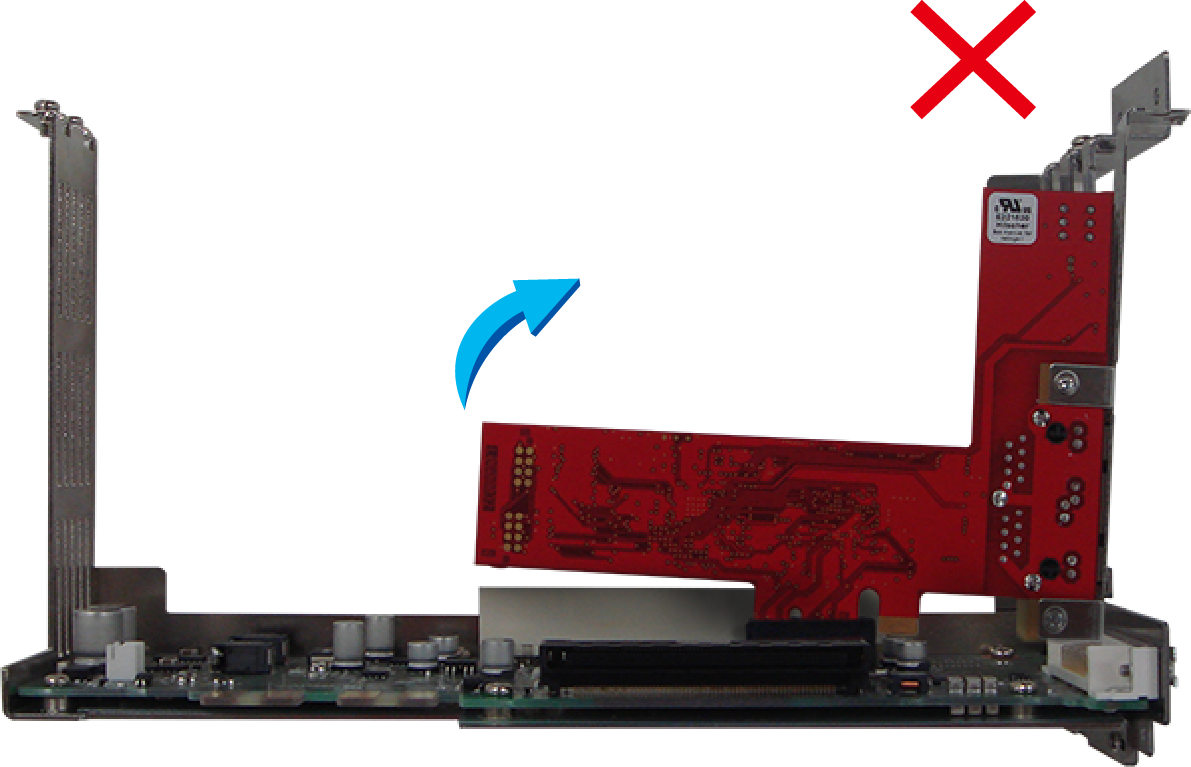
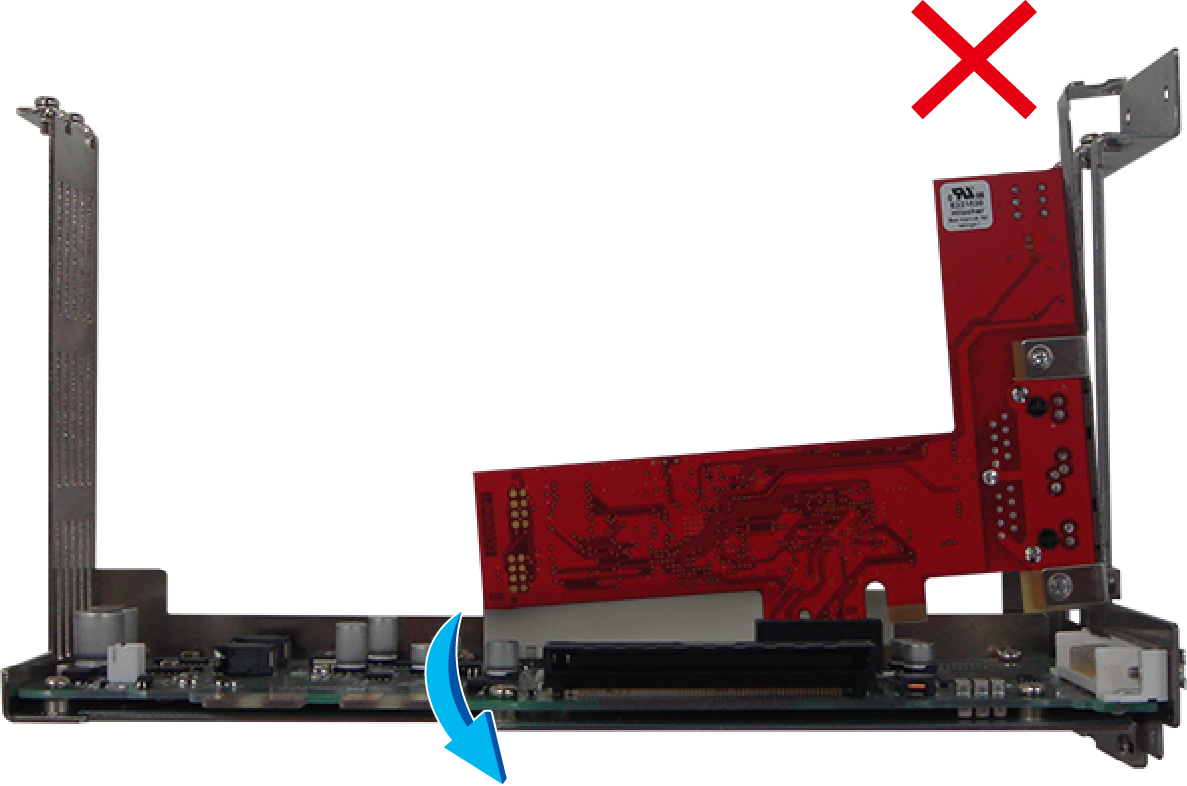
The expansion board must be inserted vertically to the connector (referring to the following figure, “Good/Bad examples”). If fail to insert, the expansion board might not work properly (the robot controller might not recognize the expansion board: Error code "8150202C").
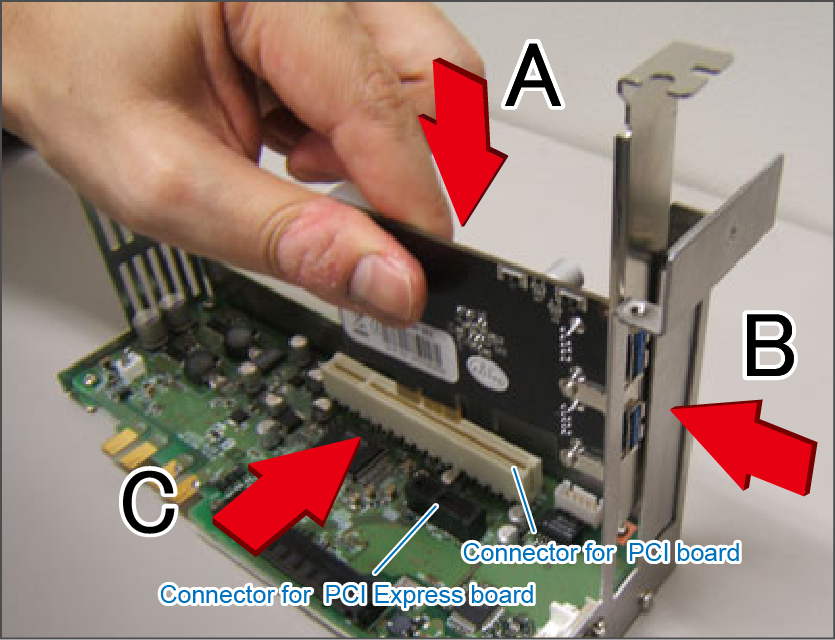
- Good/Bad examples
| View from A |
|---|
 |
 |
 |
| View from B | |
|---|---|
 |
|
 |
 |
| View from C | |
|---|---|
 |
|
 |
 |
7
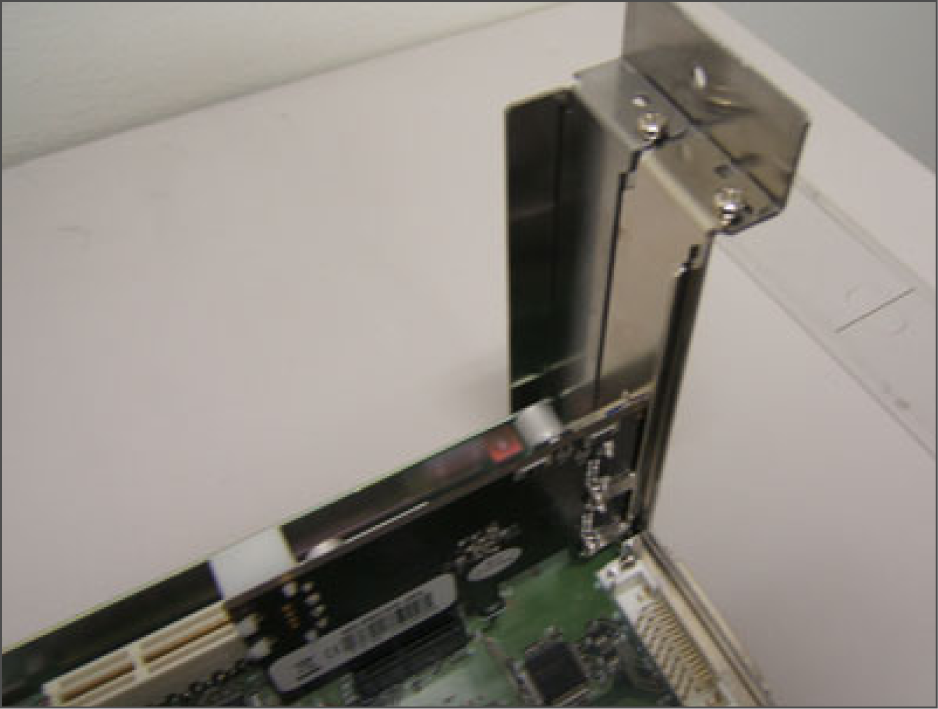
Fix expansion board stay with screws.
At this time, keep the connector vertical to the expansion board (referring to Good/Bad examples above).
If fail to positioning, the expansion board might not work properly (the robot controller might not recognize the
expansion board: Error code "8150202C").
8
Re-assemble the expansion board mounting unit.
9
Re-assemble the top cover of the controller.
ID : 1347