ID : 3425
Putting the Jacket On
1
Put the jacket on the robot. The seams of the jacket must be on the front side of the robot.
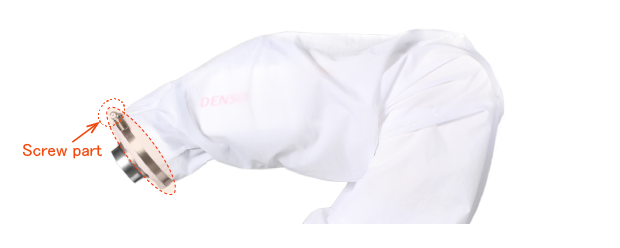
Cover the robot from the tip of J6 to the base with the jacket and tighten the tip of the 6th-axis so that the soft fabric inside the jacket is around the flange.
Do not put the jacket on inside out. The side with the washing instruction tag is the inside as shown in the picture.

- Do not apply excessive force to the jacket when putting it on the robot.
- If parts prepared by the customer are installed on the robot, take appropriate actions, such as by attaching tape to sharp edges, to prevent damage to the jacket when putting it on. (Example: Wiring/piping plate guide, etc.)
2
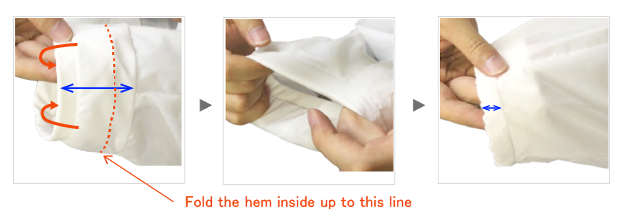
Tighten the jacket at the tip of the 6th-axis so that the soft fabric inside the jacket is around the flange.
Fold the hem of the jacket inside before tightening.

3
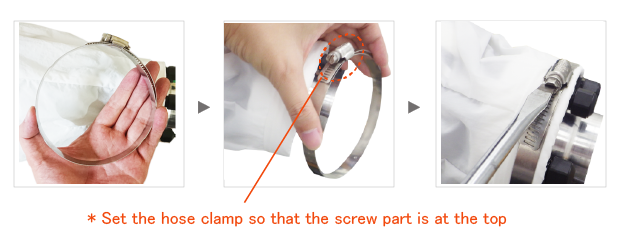
Tighten the jacket at the tip of the axis with the hose clamp.
Set the hose clamp with the screw part at the top.
- Hose clamp tightening torque: 3 Nm +/-20%


4
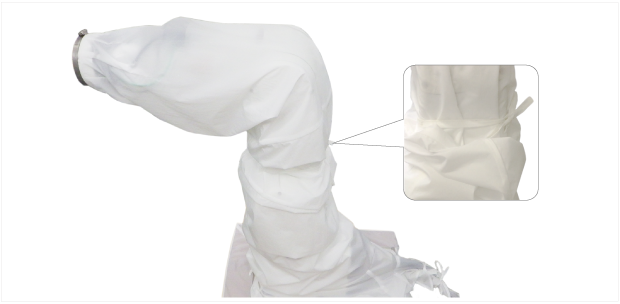
The loosen part of the jacket may get in the way depending on the robot motion set by the customer. In such a case, adjust the looseness by tightening the jacket at the robot arm using the accompanied 90-cm band.

After putting the jacket on the robot, make sure that it is not torn or damaged before starting the robot.
ID : 3425

