
ID : 5451
Mounting the CALSET Jig on the 4th Axis (For models having no mechanical stop on the 4th axis)
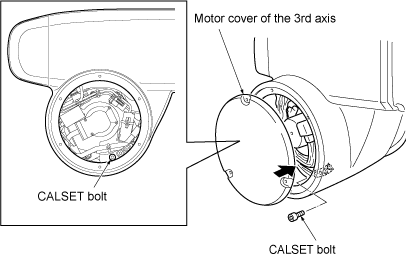
As a CALSET jig, a special bolt (CALSET bolt) is provided inside the 3rd-axis motor cover in the robot unit.
1
Remove the 3rd-axis motor cover and unscrew the CALSET bolt.
After performing CALSET, be sure to set the bolt back into place and torque it to 1.0 Nm ±20%.
2
Release the brake of the 4th axis. Refer to “Releasing Brakes on Individual Axes”.
3
Refer to “Precautions about CALSET for the VS-6556/6577 Series” and move the 4th axis to near 0 degrees.
4
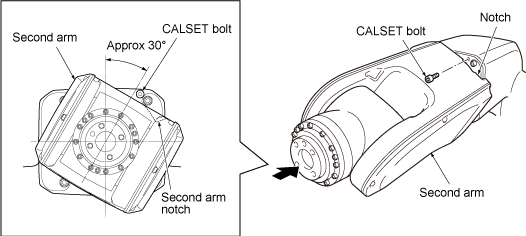
Turn the second arm in the positive direction by approximately 150 degrees. 
5
Set the CALSET bolt to the end of the 3rd axis housing as shown in the figure below.
Tightening torque of the CALSET bolt: 2.9 Nm ±20%
Be sure to use the CALSET bolt as a CALSET jig. Using any other bolt will result in a positional error in CALSET.
The CALSET position of the 4th axis refers to the point where the notch of the second arm comes into contact with the head of the CALSET bolt by turning the second arm.
ID : 5451