
ID : 2489
Sending Monitoring Data
With WINCAPSIII and RC8A Safety parameter tool, send the data necessary for monitoring to the controller and the safety motion.
The following shows how to send the data.
Preparation for Data Sending
With Ethernet cable, connect a WINCAPSIII-installed computer and a robot controller (refer to "Connecting LAN"). Make sure that the computer and robot controller are connected as a single pair.

If either the WINCAPSIII-installed computer or the robot controller has been connected to any other devices through a HUB, remove such devices from the connection to make sure that the WINCAPSIII-installed computer and the controller are connected only. Send the monitoring data with this condition, and then connect the remove devices to the previous state.
Examples of HUB-used Connections
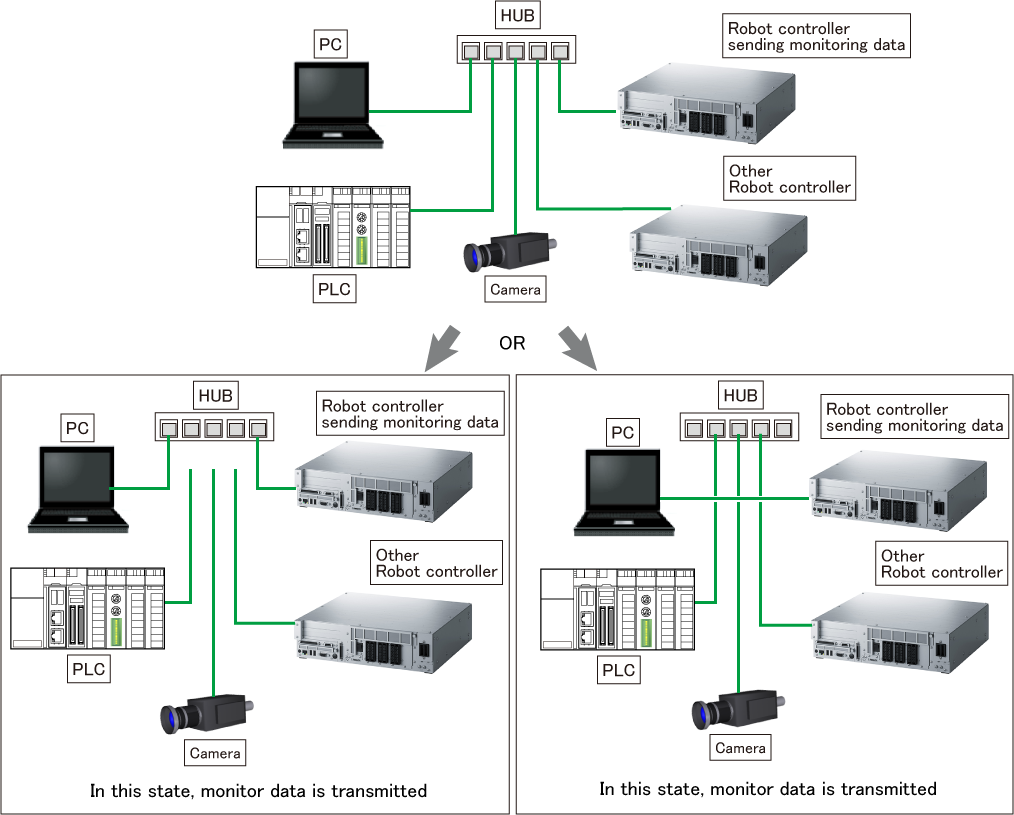
Unless the WINCAPSIII-installed computer and robot controller are connected as a single pair, monitoring data could not be send properly.
Sending Data with WINCAPSIII
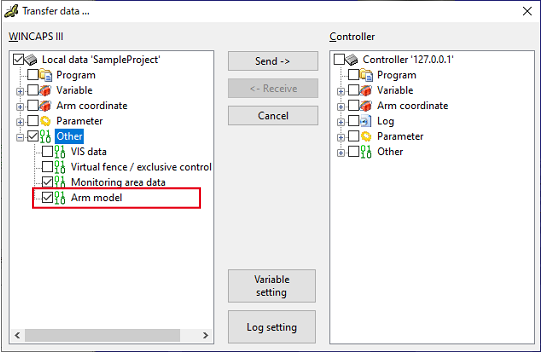
On the [Transfer data] window, select the check box of [Monitoring area data] and send it to the controller.
For details about data transfer, refer to Link with Robot Controller of WINCAPSIII GUIDE.
However, before the data sending, be sure to connect the WINCAPSIII-installed computer and robot controller as explained in "Preparation for data sending".
When you select the check box of "Arm model", you can send the creation source model data of the monitoring area data to the controller. However, if the storage area is insufficient in the controller, the item "Arm model" will not be displayed.
This function is available in Ver.2.11.* or higher.
Sending Data with RC8A Safety Parameter Tool
1
Start the RC8A Safety parameter tool.
From the Start button on your computer, click [All Programs], click [DENSO ROBOTICS], click [WINCAPSIII], click [Tools], and then click [RC8A Safety parameter tool].

2
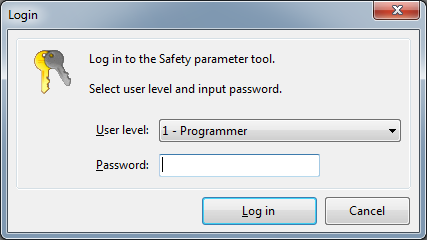
Login with [1: Programmer].
3
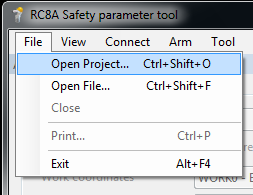
Open a project crated with WINCAPSIII.
From the Menu bar, click [File], and then click [Open Project].
When open the project, RC8A Safety parameter tool checks the range of parameters.
4
Check if the values of [Safety monitoring parameter] and [Area monitoring parameter] are correct.
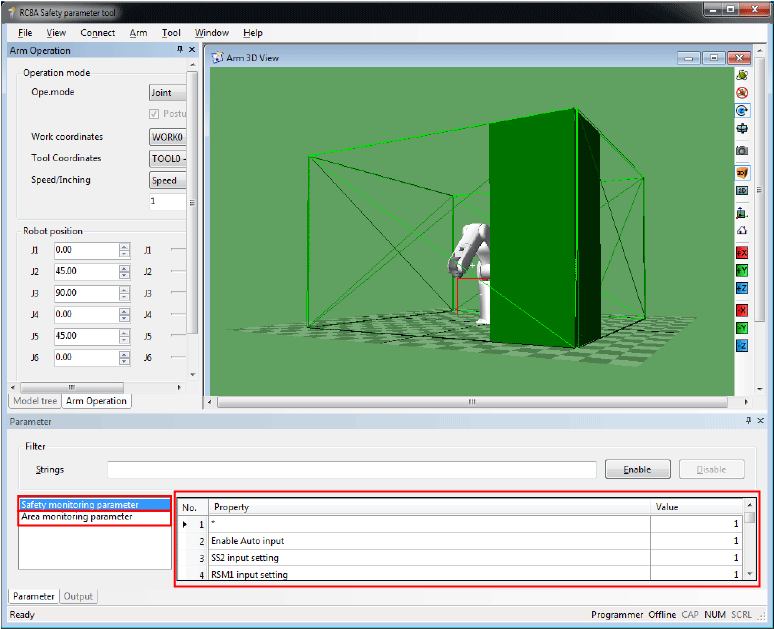
You cannot change parameters with RC8A Safety parameter tool. To change parameters, use WINCAPSIII.
5
Send the monitoring model data to the safety motion.
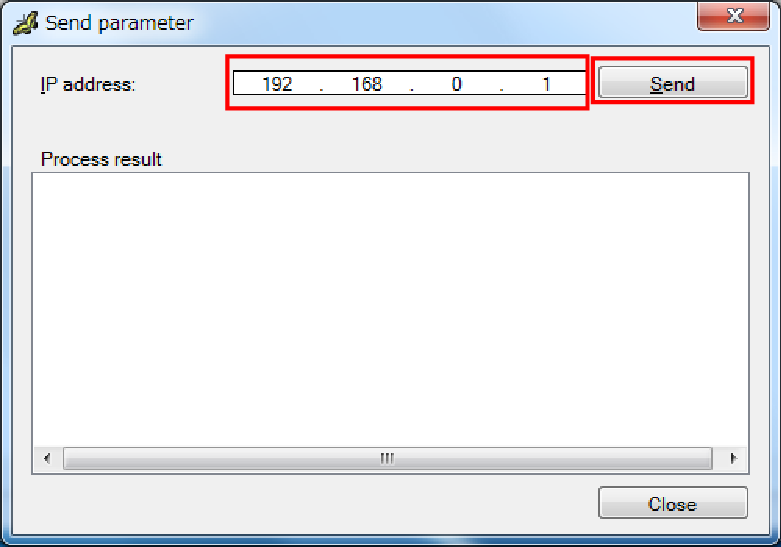
From the Menu bar, click [Connect], and then click [Send parameter].
Enter an IP address, and then click [Send].
-
Once clicked [Send], RC8A Safety parameter tool will execute the following instructions.
- Sending parameters
- Writing check
After sending a parameter, receives the parameter from the safety motion at first; then compares the parameter which has been sent and the one which has been received to see if any change exists. - Once sending the parameter, the safety motion checks the range of the parameter.
6
Once the parameter has successfully written into the safety motion, [Safety parameters have been transferred successfully] is displayed.
If [Failed to transfer the safety parameters.] is displayed, take appropriate action and then send the data again.
| Message | Causes |
|---|---|
| "Could not connect to the controller." | Failed to connect to the controller. |
| "Cannot communicate with the controller of less than Ver.2.1.0." | Controller's version is lower than 2.1.0. |
| "This controller is not RC8A." | Other than RC8A controller is used. |
| "The robot type is different." | Robot type selected by the controller is different from the actual robot type. |
| "The unexpected error was occurred." | An error occurred during communication. |
7
After the transfer is completed, an error occurs to show that the safety parameters have been updated.
The image below is the error message window displayed on a teach pendant when the error occurs.
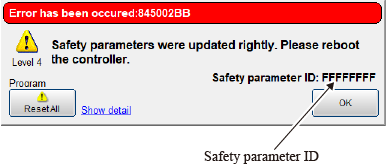
Safety parameter ID is displayed on the error message window that appears when this error occurs.
Safety parameter ID is a specific value that changes depending on the safety parameter setting values. For details, refer to “this page".
The error message window does not display Safety parameter ID if the robot controller's software version is lower than 2.15.*.
8
Restart the robot controller and operate the robot with the safety speed to see if its safety motion works as expected.
If the safety motion doesn't work as expected, modify the parameter.
After sending the parameter, that parameter which has been sent cannot be reflected to the controller until you restart the robot controller. Be sure to restart the robot controller after sending the parameter.
ID : 2489