
ID : 5331
Setting Procedure of the Conveyor Tracking
Outline
This section describes the outline of how to set up the conveyor tracking/extended-joint tracking.
(1) Selecting a Hardware
In this step, execute various settings of hardware.
- Selecting the conveyors and devices
- Setting of the encoder joint number
- I/O setting
(2) Hardware Connection Confirmation
In this step, execute Joint and I/O setting confirmation.
(3) Calibration
Calibration measures the exact positional relationship between the conveyor, sensor (vision sensor), and robot.
Detailed Procedure
Detailed setting procedures are different for sensor tracking and for vision tracking.
For details about the sensor tracking, refer to "Setup of the Sensor Tracking".
For details about the vision tracking, refer to "Setup of the Vision Tracking System".
Extended-joint tracking requires extended-joint setup before the tracking-related setup described in this page. For details, refer to "Start-up procedure of the extended-joint (ball screw)".
Adding the Conveyor Tracking Function to the Existing Robot Controller
When adding the conveyor tracking function to the existing robot controller, the license of the conveyor tracking function and the encoder hub are necessary.
Please contact your DENSO representative for more details.
When adding the conveyor tracking function to the robot controller, customers may need to change the project data of the robot controller to the project for extended-joint.
In that case, please perform the procedure below.
Procedure to Change to the Project Data for Extended-joint
With WINCAPSIII, after getting data from the robot controller and changing to the project for extended-joint, send data to the robot controller.
1
Use WINCAPSIII.
| Operation path:[File] - [New Project] |
Select "Get information from the controller for creating a new project.", create data.
For details, refer to "Creating a New Project".
2
| Operation path:[Project] - [Property] |
Change to "Use" by [Change] button of "Robot info." tab.
For details, refer to "Robot" of "Robot info." tab.
3
| Operation path:[Connect] - [Transfer data] |
Select "Local data" of WINCAPSIII and click [Send].
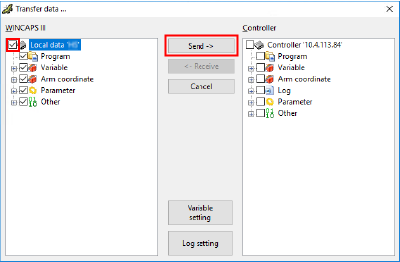
When sending is complete, please restart the controller.
ID : 5331
- Related Information
- Setup of the Sensor Tracking
- Setup of the Vision Tracking System