
ID : 1146
Ethernet Connection Setting of Computer
Perform the Ethernet connection setting of a computer so that the computer can communicate with a force sensor through Ethernet.
To do this, you need to know the IP address that is set to the force sensor.
This section describes on the assumption that the IP address of the force sensor is the factory default value (192.168.1.1).
The following explains the operation window of Windows10 as an example.
When an equipment other than the force sensor and the computer is connected through Ethernet network, if the equipment is DHCP server, the IP address of the force sensor may be changed automatically to the address other than above. For DHCP setting of the force sensor, refer to the instruction manual published on ATI Industrial Automation website.
1
Perform the computer setting with the computer and the force sensor are not connected through Ethernet cable. If those are connected, remove them once, and connect them again after the computer setting completes.
2
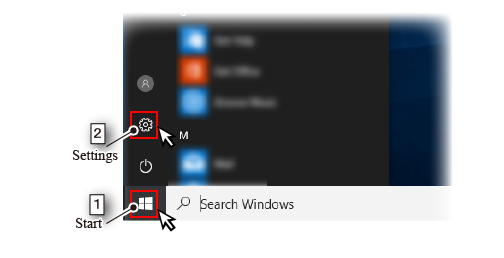
Perform the following operation from your computer’s desktop.
- Select [Start] button.
- Select [Setting] button.
3
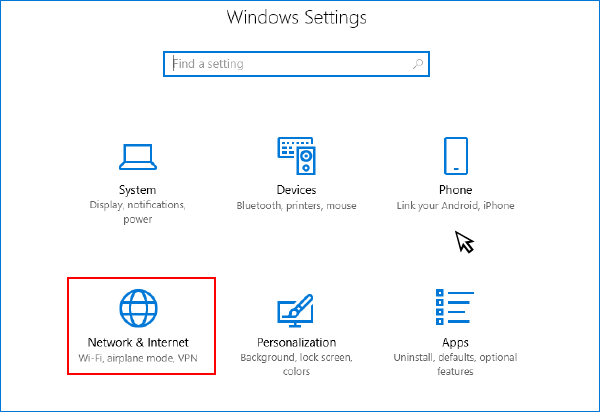
Select [Network & Internet].
4
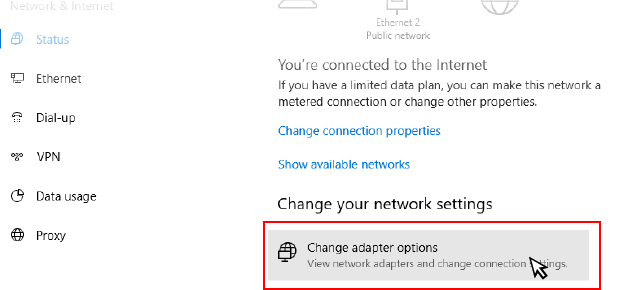
Select [Change adapter options].
5
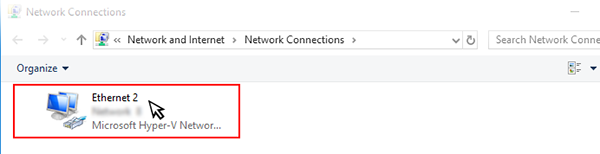
Select [Ethernet].
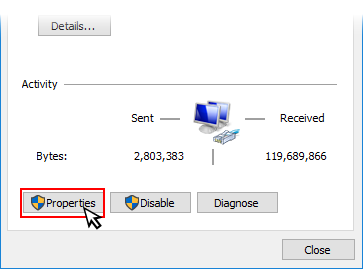
6
Select [properties] button.
7
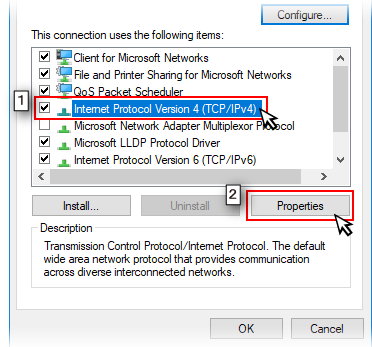
Perform the following operation.
- Select [Internet Protocol Version 4 (TCP/IPv4)].
- Select [properties] button.
8
Perform the following operation.
-
Select [Use the following IP address], and then set the following values to [IP address] and [Subnet mask].
IP address 192.168.1.100 Subnet mask 255.255.255.0 - Select [OK] button.
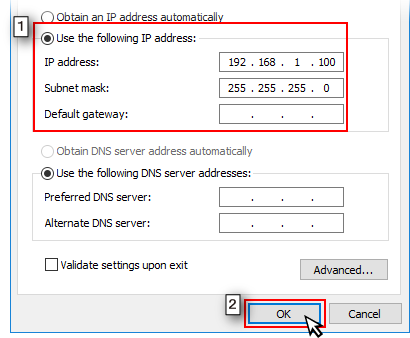
Above setting value is an example. If it is inconvenient in your environment in use, set another value that can communicate with the force sensor.
This completes the setting.
ID : 1146