
ID : 2487
Creating and Saving Monitoring Models
Create monitoring model with Arm modeling of WINCAPSIII, and export it.
Creating monitoring model means the modeling of the monitoring target and restricted area.
Creating a New Project
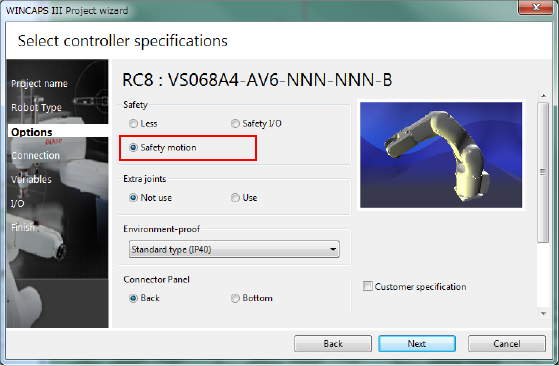
In the WINCAPSIII Project wizard, on the [Select controller specification], select [Safety motion].
For details about how to create a new project, refer to Loading WINCAPSIII of STARTUP MANUAL.
Creating a Monitoring Target Model
- Robot
The robot type (VS, HS, etc.) of the monitoring target robot will be the one that has been specified at the creation of the project. A robot model is automatically created. - Tool
With WINCAPSIII, create a Tool model and set Tool coordinate system. For details about arm modeling, refer to Simple Modeling, for details about Tool coordinate system setting, refer to Tool Setting. Tool number available are TOOL 0 to 15. - Extended-joint
To use extended-joints, in the WINCAPSIII Project wizard, on the [Select controller specification], on the [Extra joints] pane, select [Use].
This completes the creation of monitoring target.
Creating a Restricted Area Model
The following shows how to create a temporary restricted area and a permanently restricted area.
A temporary restricted area should be an "Object (BOX)".A permanently restricted area should be a "Fence model".
Creating a Temporary Restricted Area (Object Model)
The following shows how to create an object model.
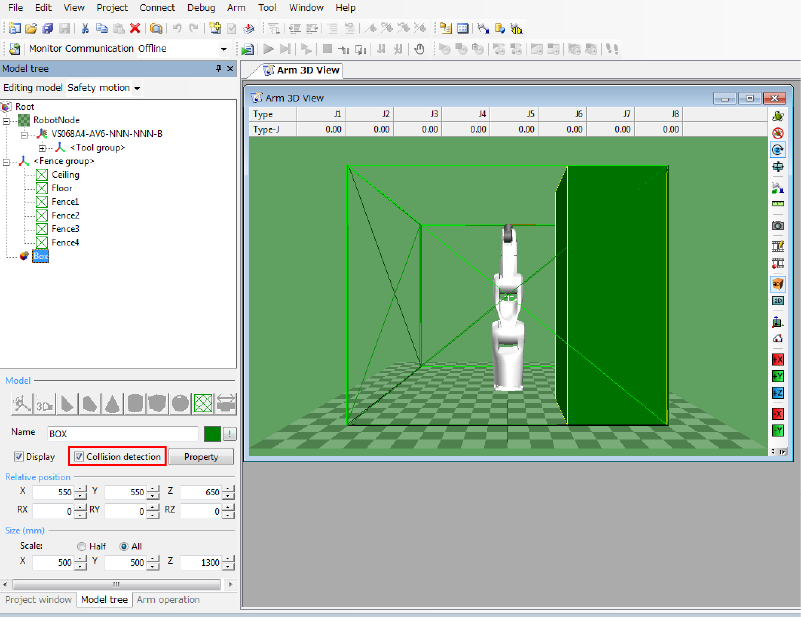
1
Create models with WINCAPSIII. For details how to create a model, refer to Simple Modeling.
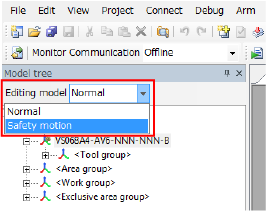
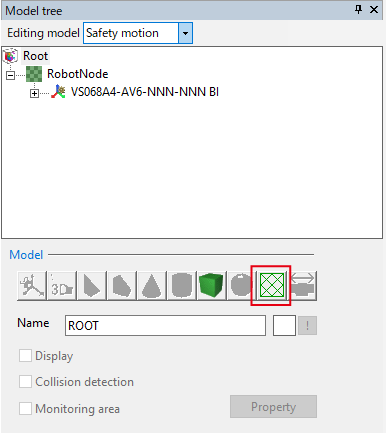
From the [Editing model] drop-down list box, select [Safety motion].
2
Select a target object, and then check if the [Collision detection] check box is selected.
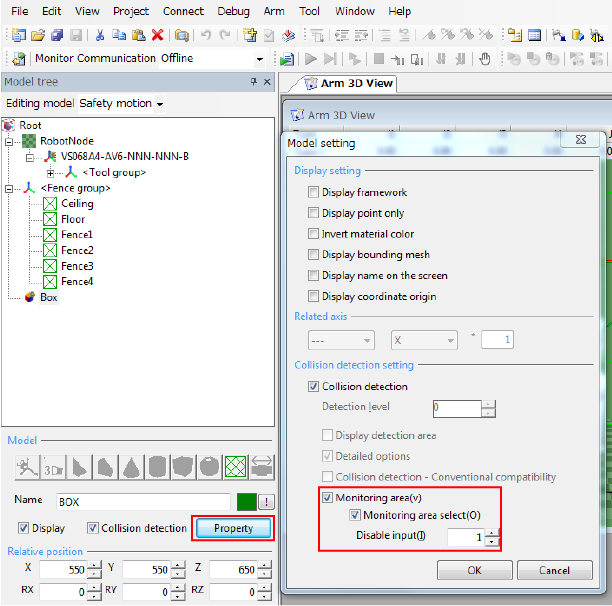
3
Click [Property] to open [Model setting] window. On the [Model setting] window, set items in the [Collision detection setting] pane.
To temporarily restrict an object (BOX), select the check box of [Monitoring area select], and then type or select the desired temporary restricted area number (0 to 3) in the [Disable input (I)] box.
4
To create more objects (BOX), repeat STEP1 to STEP3.
Creating a Permanently Restricted Area (Fence Model)
The following shows how to create a fence model.
1
Create models with WINCAPSIII. For details how to create a model, refer to Simple Modeling.
From the [Editing model] drop-down list box, select [Safety motion].
2
On the object tree, select the reference object.
3
Click the add button of the fence.
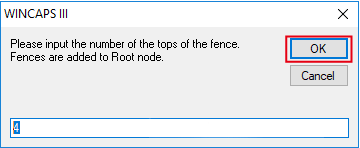
4
Input the number of the tops of the fence (can be considered as "the number of fences"), and then click [OK].
This completes the creation of the fence model.
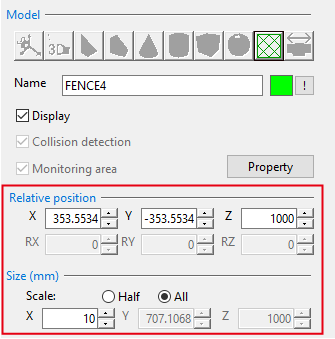
For fence models, collision detection is always enabled.
For the position and size of the fence, you can change by [Relative position] and [Size(mm)].
Saving Model Data
Convert the monitoring area data to the data format that can be processed by controller, and then save it.
[Menu] - [Arm] - [Export monitoring area data]
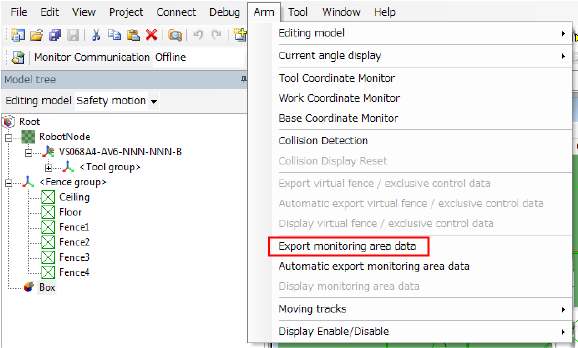
To confirm the monitoring area data being output, from the Menu bar, click [Arm], click [Display monitoring area data].
When you change the monitoring model, execute [Export monitoring area data].
If the [Automatic export monitoring area data] is enabled, [Export monitoring area data] is automatically executed when the project is saved, and the data is overwritten.
ID : 2487