
ID : 3334
Concept of the Dual Arm Control Project
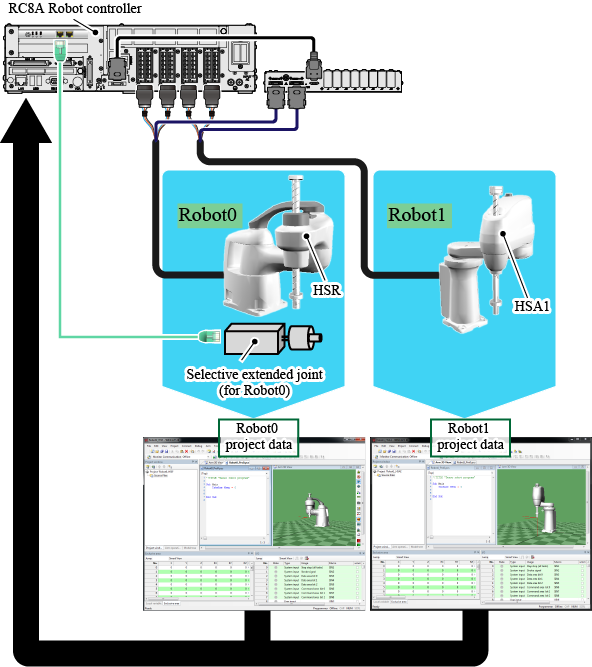
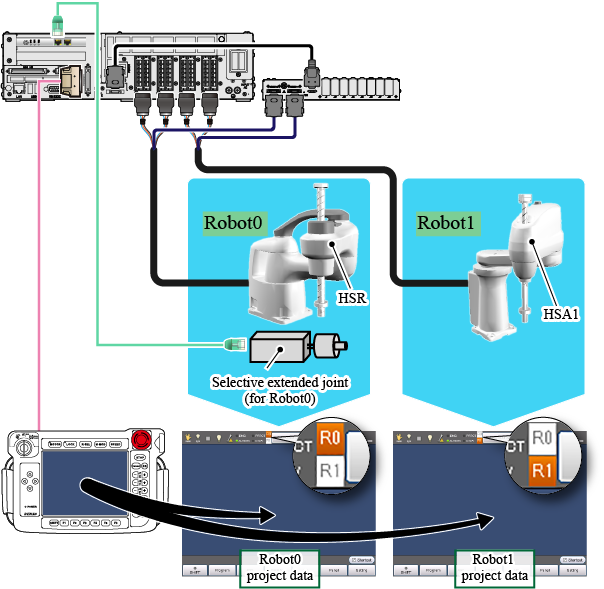
The RC8 robot controller (hereafter, RC8 series) or the MC8 series motion controller (hereafter, MC8 series) controls two project data.
The following figure shows the system structure example that controls an HSR, an HSA1, and selective extended joints.
There are two ways to control two project data.
Control with WINCAPSIII
The following shows the structural relationship of two project data in WINCAPSIII.
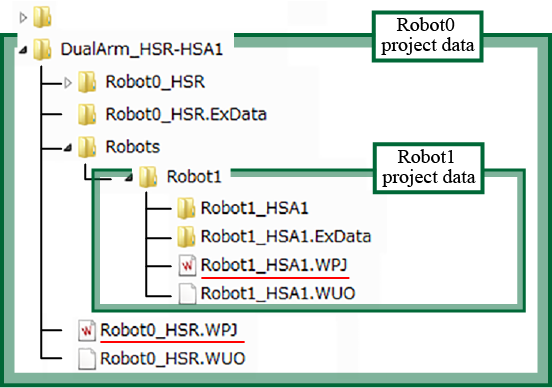
Robot1 project is stored in the "Robots" folder in the Project data of Robot0.
In this case, to edit Robot0 project data with WINCAPSIII, you will open "Robot0_HSR.WPJ" (project file). To edit Robot1, open "Robot1_HSA1.WPJ".
In the above-mentioned system structure example, a selective extended joint connects to Robot0. To set selective extended joints, open the Robot0 project. The later process is the same as the one for the dual arm control function-unused (Concretely to say, the operation that one robot is controlled by one RC8 series or one MC8 series). (Refer to "Parameter Setting" in the "SELECTIVE EXTENDED JOINT (ETHERCAT) MANUAL".)
When you use the MC8 series and/or internal extended joints as a part of the system structure, if you make any setting change, open the project data of each robot, and then do the same process as the one for the dual arm control function-unused.
When you send data after the setting change to the RC8 series or the MC8 series, the dual arm control function-specific operation is required. Refer to "Send and Receive Project Data".
For detailed information about how to assign extended joints to each robot, refer to "Selective Joint Assignment to Each Robot". Be sure to read this link destination when you use extended joints.
Control with a Teach Pendant
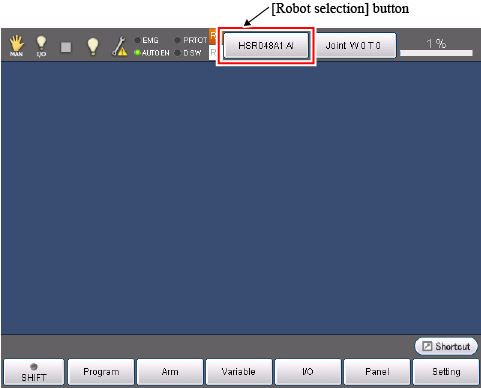
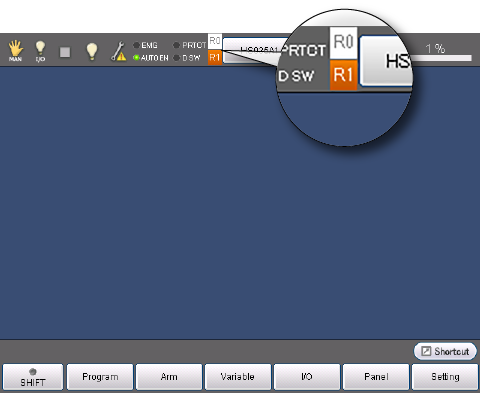
With a teach pendant, you can change the two projects from the [Robot selection] button.
Do the following steps.
1
Press the [Robot selection] button.
2
From the robot selection list, select a robot that you want to edit a project data.
"R0" and "R1" in the robot selection list represent as follows.
| R0 : Robot0 |
| R1 : Robot1 |
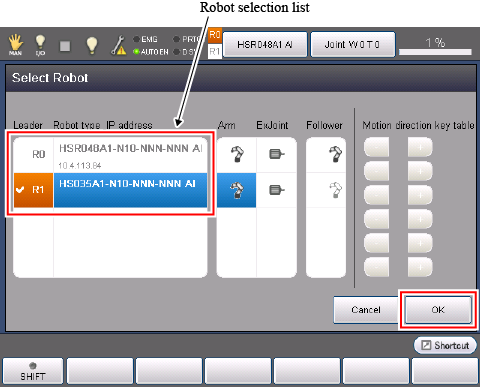
In this example, edit Robot1 project data. From the robot selection list, select [R1], and then press [OK].
3
The [R1] icon on the left side of [Robot selection] will turn orange. If you make any parameter setting in this status, the parameter of Robot1 project data will be changed.
Note that the orange-colored robot (in this case, R1) is called "leader". This idea is the same as the cooperative function. However, the meaning of "leader" in this context is different from the "leader" of the cooperative control function. To operate two robots (leader and follower robots) in the cooperative control, use the cooperative control function.
This completes the robot selection setting.
As explained above, to change the edit-target project data, from the Select Robot window, select the robot that you want to edit as a "leader".
Also, the robot selected as a "leader" will be operated. For example, if Robot0 (R0) is selected as a leader, the manual operation and variable-specified robot motion are executed to Robot0.
ID : 3334
- Related Information
- Selective Joint Assignment to Each Robot