
ID : 3332
MC8 Series-Controlled Robot × 2 Internal Joint Only
When you purchase this robot combination, at the factory default setting, the MC8 series motion controller (hereafter , MC8) has only one project data for MC8 robot controller. To use the MC8 as a controller for two robots, you need to split one project data into two project data.
To split project data, use the cooperative control dual arm tool.
Note that the split project data is programmed so that each internal joint is individually controlled.
To control internal joints as a robot joint, you need to convert the split project data to the robot control project data. This data conversion is performed with the kinematics configuration tool.
The following describes the entire setup procedures, including above-mentioned information.
| Process | Description |
|---|---|
| 1. Wiring | To connect internal joint motors, a teach pendant, and other components to the MC8 series. |
| 2. Software License Registration | To register a software license in the MC8 series. |
| 3. Send and Split the Project Data | To receive one project data from the MC8 series, and then split it. |
| 4. Convert the Project Data for the Robot Control | With the kinematics configuration tool, to convert the project data into the robot control project data. |
| 5. Send the Project Data | To send two project data to the MC8 series. |
The following describes above-mentioned processes.
1. Wiring
To connect internal joint motors, a teach pendant, power cable and other necessary components to the MC8 series.
Connect necessary devices with referring to "MC8 series-Controlled Robot × 2 Internal Joint Only" in "System Configuration".
2. Software License Registration
If the software license has been registered in the MC8 series, skip to "Send and Split to the Project Data". (For example, when you purchase software license-registration completed MC8 series.)
If any software license has not been registered in the MC8 series, register the dual arm control license by connecting a teach pendant to the MC8 series. If necessary, register the license for the kinematics function license and/or other functions.
For how to register it, refer to “Registering License in OPTION.
3. Send and Split the Project Data
To receive project data, use WINCAPSIII. To split received project data, use the cooperative control dual arm tool. The cooperative control dual arm tool is software that is installed at the installation of WINCAPSIII simultaneously.
Do the following steps.
1
Receive project data from the MC8 series.
The concrete process is as following: When creating a new project with WINCAPSIII, on the WINCAPSIII Project wizard, select [Get information from the controller for creating a new project]. WINCAPSIII will receive project data from the MC8 series, and the data will be saved as a new project data.
For information about operation method, refer to "Creating a New Project" in the "WINCAPSIII GUIDE".
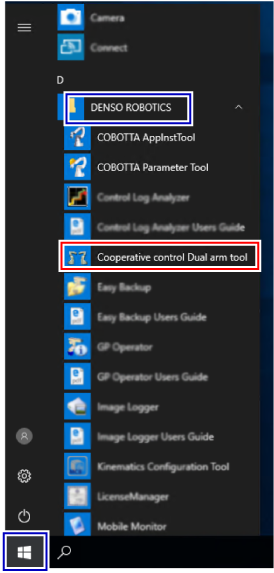
2
Start the cooperative control dual arm tool.
(The figure below shows a sample image of Windows 10) |
3
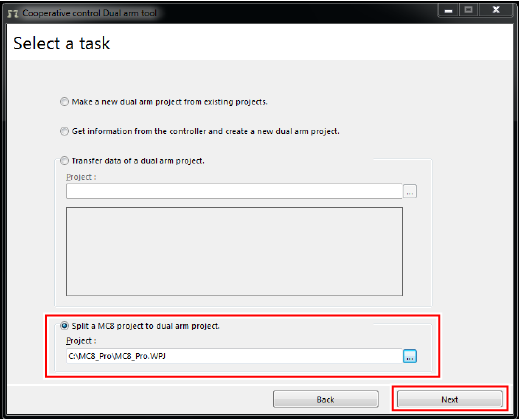
Select [Use dual arm project].

4
Select "Split a MC8 project dual arm project". In the [Project] text box, enter the project file (extension : wpj) of project data that you have just created. For the project file entry, enter the folder path of the target project file with the absolute path.
Click [Next].
Note that the project data specified her will be remained as-is. Concretely to say, the newly created data will be saved as a copy of the specified project data.
5
Enter the folder name and storage destination folder path of the split project data.
Select the joint split pattern. For example, to control two of 4-axis robots, select
- "Robot0 : J1 - J4 , Robot1 : J5 - J8"
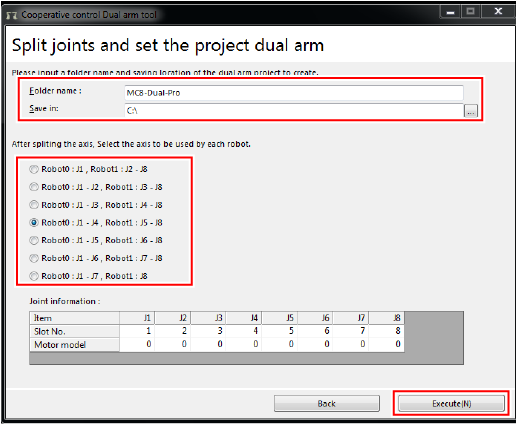
If the number of joints you use is 7 or less, check out the number of joints used for Robot0. If you use Robot0 as a 3-axis robot, Robot1 as a 4-axis robot, Robot0 occupies three joints. Therefore, select
- "Robot0 : J1 - J3 , Robot1 : J4 - J8"
In this case, the 8-th joint is ignored.
Also, if you use extended-joints for Robot0 and/or Robot1, check out the number of joints for Robot0 as well. For example, if you use Robot0 as a 4-axis robot + one extended joints, Robot1 as a 3-axis robot, Robot0 occupies 5 joints in total. Therefore, select
- "Robot0 : J1 - J5 , Robot1 : J6 - J8"
Once you select the joint split pattern, click [Execute].
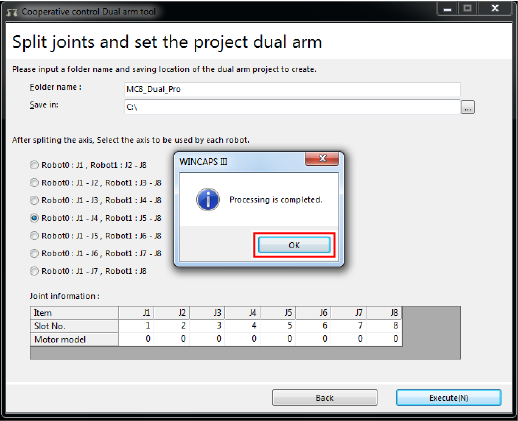
6
It takes a few seconds to complete the project data split process. Wait until the following message window appears.
Once the following message appears, click [OK].
4. Convert the Project Data for the Robot Control
To convert the project data to the robot control project data, use the kinematics configuration tool. The kinematics configuration tool is software that is installed at the installation of WINCAPSIII simultaneously. (For details, refer to "Kinematics Configuration" in the "MC8 SERIES (MOTION CONTROLLER) MANUAL").
If you use neither Robot0 nor Robot1 as a robot, go to "Send the Project Data".
The following describes how to convert the project data to the robot control project data.
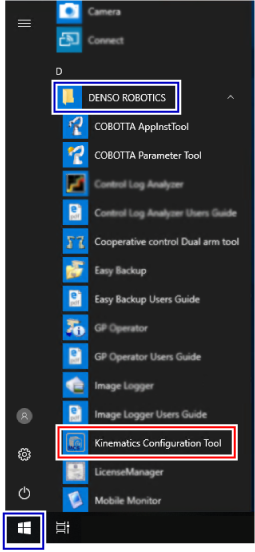
1
Start the kinematics configuration tool.
(The figure below shows a sample image of Windows 10) |
2
Select [Edit an existing project data]. In the [Project] text box, among Robot0 and Robot1 project data that you have just specified in the joint split process, enter the project file (extension: wpj) that you converted to the robot control project data. For the project file entry, enter the folder path of the target project file with the absolute path.
For information about folder structure of the project data, refer to "Concept of the Dual Arm Control Project".
If you convert both Robot0 and Robot1 to the robot control project file, convert them one by one.

Click [Next] to display the configuration windows for robot selection and arm length. Complete necessary setting by following the instruction of each window.
3
When the [Complete] window appears, close the window to complete.
5. Send the Project Data
Send project data to a controller. For information of how to send data, refer to "Send and Receive Project Data".
To move the MC8 series-controlled robot in actual operation, you need to set necessary parameters. The idea of setting is the same as the extended-joint setting. Refer to "Start-up procedure of the extended-joint (ball screw)" in the "EXTENDED-JOINT MANUAL".
ID : 3332