
ID : 4940
Checking the Encoder Feedback
Check that the controller receives a correct response from the extended-joint encoder.
Checking method
1
With the top screen, press the robot selection button (or R-SEL key).
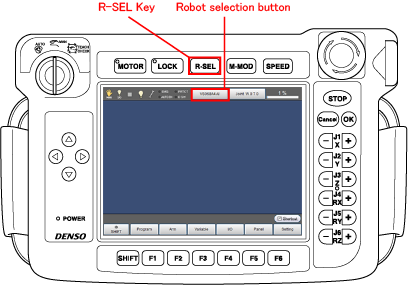
The Select Robot window is displayed.
2
Select "ExJoint" then press [OK].
The operation object of the Motion direction key turns to the extended-joint.
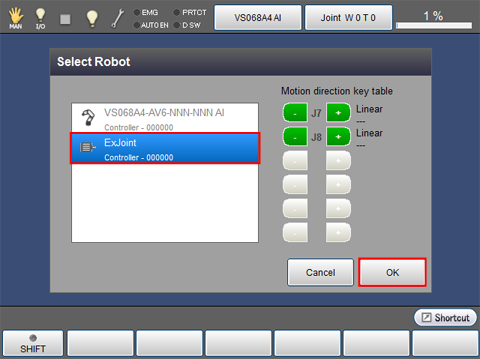
The setting is confirmed and then the display returns to the top screen.
3
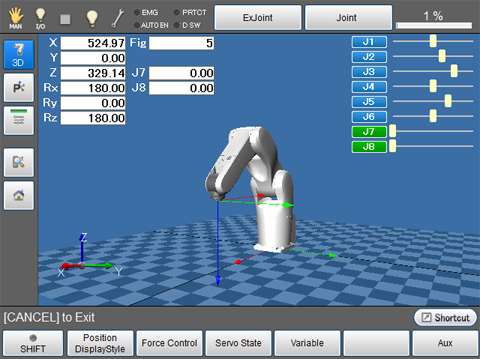
Click [F2 Arm] on the top screen to display [Current Robot Position] window.
4
Move the extended-joint by hand to check that the encoder follows the joint movement.
Once the extended-joint moves, the current position of the robot on the "Current Robot Position" window display moves.
For an extended-joint having a brake, release the brake using the following procedure beforehand.
- Releasing brakes
- Operation path: Top screen -[F2 Arm]-[F12 Maintenance]-[F1 Brake]
-
Select the joint to release the brake and then press OK.
Press OK again to lock the brake except when absolutely necessary.
For about how to release the brake, see "Checking the Wiring".
Running the extended-joint manually
- Turn the motor ON.
- Use the teach pendant to move the extended-joint in the positive (+) and negative (-) directions in Manual mode for checking for normal operation.
- No large movement is required in this step.
- Check that the movement direction specified with the motion direction key matches the actual one of the extended-joint. If the direction is opposite, change the "Motor rotation direction" with reference to the "Configuring Other Extended-Joint Parameters and CALSET Operation".
ID : 4940