ID : 5089
Checking the Wiring
Check that the brake wiring, encoder wiring and motor wiring in the following way.
Checking the brake wiring
If the extended-joint motor has a brake, release the brake in the following way and check that the brake of the specified joint will be released.
1
Press Top Screen — [F2 Arm] — [F12 Maintenance] — [F1 Brake]
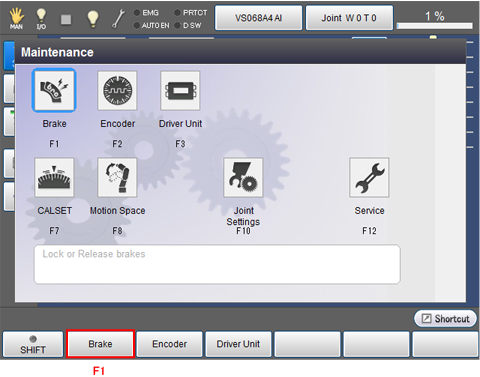
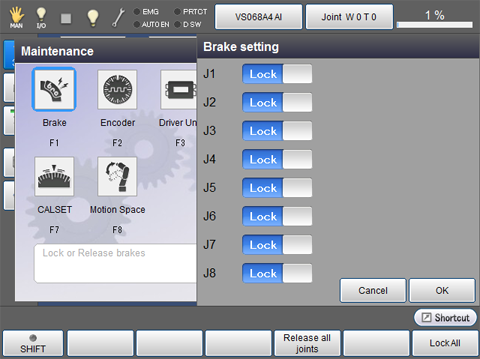
Brake setting window appears.
2
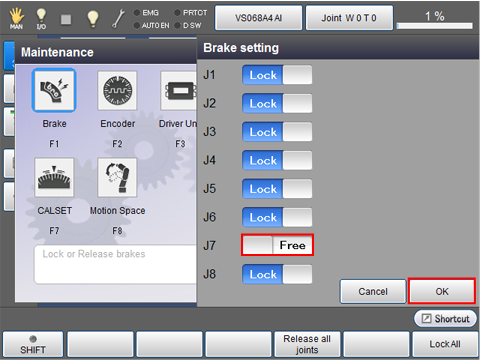
Press the button of joint whose brake is released. The indicator of the button turns into "Free".
The following examples are the displays when the 7th axes is selected.
When all brake settings are completed, press [OK].
3
System message appears to confirm whether to change the brake settings, then press [OK] button of the teach pendant to change the settings.
Brake settings are changed and brakes are released.
Brakes are not released if [Cancel] is pressed.
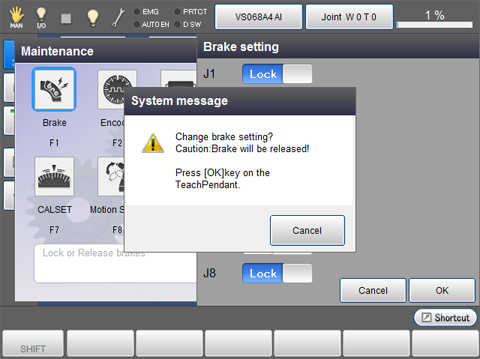
Brakes are released and then Maintenance window appears.
4
Move the axis by hand to check that the brakes are released.
Brake-released joint can be moved by hand.
5
Display the Maintenance window in the way of STEP1. Then following STEP2, changes the joint whose brake is released from "Free" to "Lock", then press [OK] key of the teach pendant.
The brake is locked and the Maintenance window appears.
6
Move the joint whose brake is locked to confirm whether it is locked.
Checking the encoder wiring
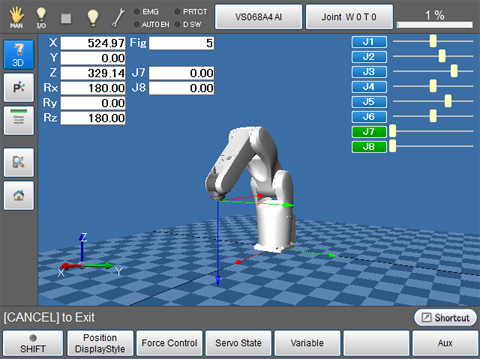
After releasing the brake of the extended-joint motor, apply external force to the motor and check that the data of the joint corresponding to the motor will change in the Current Robot Position window of the teach pendant.
Operation route: Top Screen — [F2 Arm]
Checking the motor wiring
Turn the extended-joint motor on, set the motor speed at SP10, and check that you may drive the extended-joint manually in Joint mode.
If the motor vibrates abnormally or stops due to any error, check the wiring of the motor. If the wiring is correct, gradually decrease the positional loop gain and speed proportional gain of the servo configuration parameters.
ID : 5089

