
ID : 4896
Operating Extended-Joints Manually
This section describes items relating to the extended-joints. For other details, refer to the "Manual Mode."
Extended-joints can operate only in Joint mode, independently of each other.
From the teach pendant
1
Set the mode switch to the MAN position and press the MOTOR key to turn the motor on.
2
Press the robot selection button (or R-SEL key).
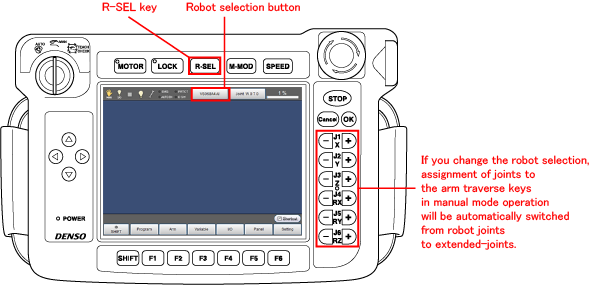
The Select Robot window will display as shown below.
3
Select Ex-Joint and then press the OK button.
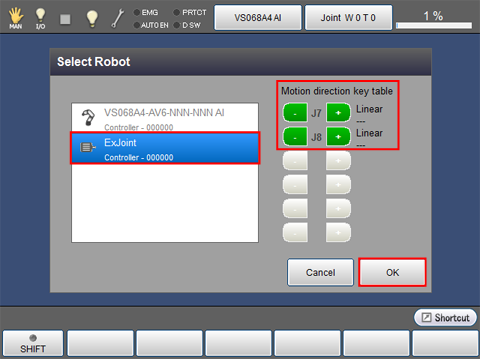
The window switch to the Ex-Joint settings. Key assignments are displayed on the Motion direction key table.
In the Select Robot window, the "Ex-Joints" appears only when any extended-joint is set to "Valid" in the servo configuration parameters window.
If no "Ex-Joints" appears, access [F2 Arm]-[F12 Maintenance]-[F10 Joint Settings]-[F5
Servo Parameter] and then enable the desired extended-joint.
For more details, refer to "Setting the servo configuration parameters"
4
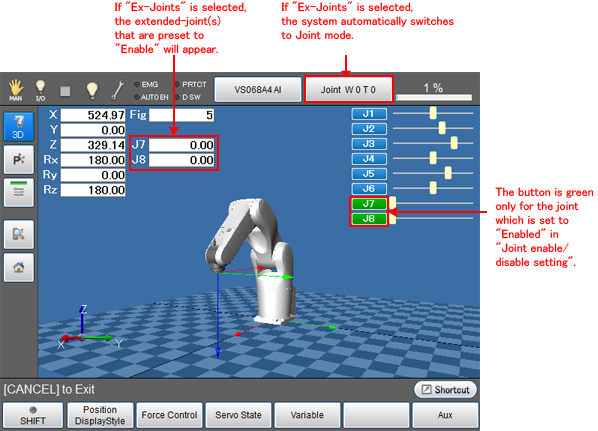
On the top screen, press [F2 Arm] to display the Current Robot Position window as shown below.
- Without displaying this window, you can operate the extended-joints manually.
-
By the aid of the deadman switch linkage function, this can set the motor power ON/OFF by pressing/releasing the deadman switch respectively. Turning on the [Motion direction key] displays a key to indicate the motion direction on the right side of the screen when the deadman switch is gripped.
For more details, see "The Setting of the Deadman Switch Linkage Function" of the "Teach Pendant Operation Guide".
5
While holding down either one of the deadman switches, press any of the Motion direction keys that are assigned the extended-joint you want to move.
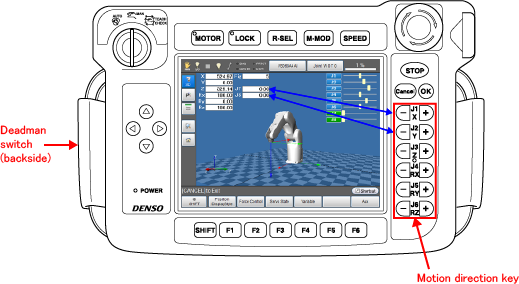
Assignment of joints to the motion direction keys is arranged from the top line first, as shown above.
If the [Motion direction key] of the deadman switch linkage function is turned on, a key to indicate the motion direction is displayed on the right side of the screen.
In this figure, you can move the 7th joint by using the [+ J1 X] and [- J1 X] keys.
ID : 4896