
ID : 4902
Setting the Link Info
The RC8 series robot controller always monitors the motion speed of the robot joints being driven and limits it to a maximum of 250 mm/sec in Manual or Teach check mode.
When driving extended-joints also in Manual or Teach check mode, the controller applies the same speed limit to them.
If the link info is set up between robot joints and extended-joint(s), the controller can limit the total motion speed of the linked joints to a maximum of 250 mm/sec. Note that the total motion speed differs from the actual composite speed since the controller does not take the motion directions of individual joints into account.
Concept of the Link Info
"Link info" defines whether or not robot joints and extended-joints affect with each other when they are being driven.
If the link info is set up, the linked joints are mutually affected; if not, they are driven independently.
All of robot joints are configured in a batch so that all of them are either linked or not.
An example of the link info setup window is given below.
Link info setup window of WINCAPSIII (ex. 6-joint robots)

[1]: Linked, [0]:Not linked
In the above example,
Link info 1 links robot joints J1 to J6 and extended-joint J8 together so that the robot
joints and J8 are mutually affected in motion.
Link info 2 does not link extended-joint J7 with any joints so that J7 affects neither robot joints nor J8 in motion.
Configuration Samples of Robot Joints and Extended-Joints
Given below are configuration samples and their link info to be set up.
< Configuration Sample 1 > Linking Robot Joints and Extended-Joints (J7 and J8) Together
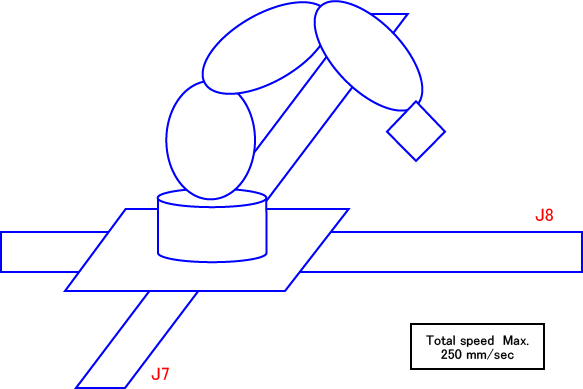
In the configuration shown above, the motions of extended-joints J7 and J8 affect those of the robot joints, so link the robot joints and extended-joints together.
The speed limit applies to the total motion speed.
- Link info setup sample (6-joint robots)

< Configuration Sample 2 > Linking Robot Joints and Extended-Joint (J7) Together
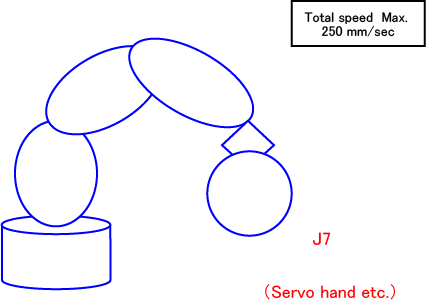
In the configuration shown above, the motions of robot joints affect that of extended-joint J7, so link the robot joints and J7 together.
The speed limit applies to the total motion speed.
- Link info setup sample (6-joint robots)

< Configuration Sample 3 > No Link between Robot Joints and Extended-Joints, but Linking Extended-Joints J7 and J8 Together
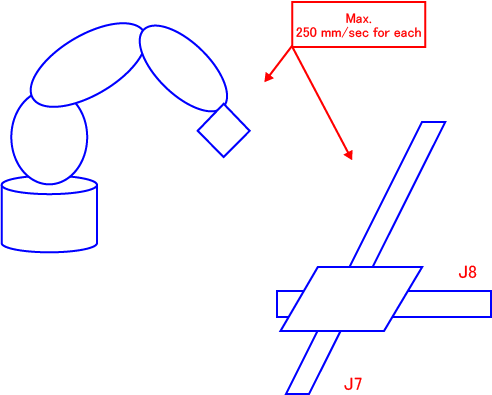
In the configuration shown above, the motions of extended-joints J7 and J8 does not affect those of the robot joints, so do not link the robot joints and extended-joints together.
But, the motions of J7 and J8 are mutually affected, so link them together.
The speed limit applies to each of the robot joints and extended-joints (J7 and J8) independently. But for J7 and J8, it applies to the total motion speed of them.
- Link info setup sample (6-joint robots)

< Configuration Sample 4 >No Link between Robot Joints and Extended-Joints or between Extended-Joints J7 and J8
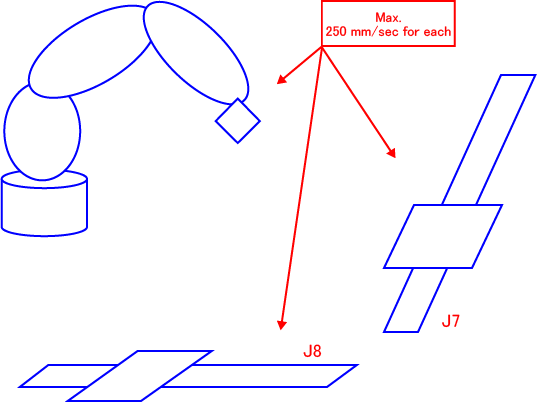
In the configuration shown above, the motions of extended-joints J7 and J8 does not affect those of the robot joints, so do not link the robot joints and extended-joints together.
Neither do the motions of J7 and J8 mutually, so do not link them together.
The motion speed limit applies to each of the robot joints, J7, and J8 independently.
- Link info setup sample (6-joint robots)

Setting Up Link Info
1
Operation path: Top screen-[F2 Arm]-[F12 Maintenance]-[F10 Joint Settings]-[F3 LinkInfo]
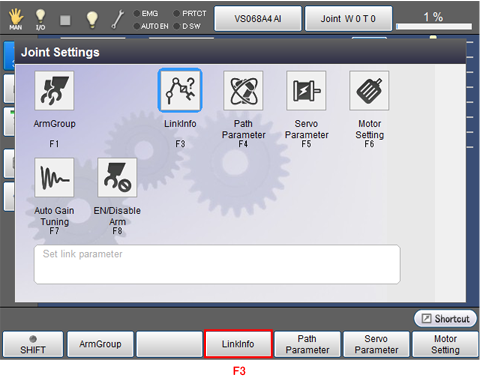
[Link information setup] window appears as follows.
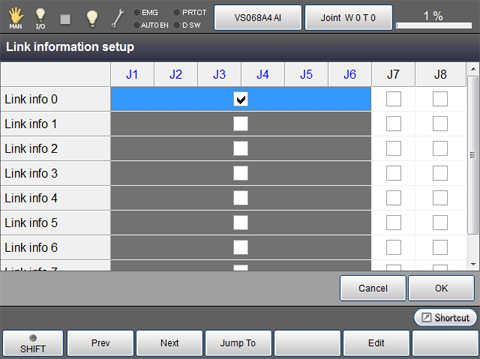
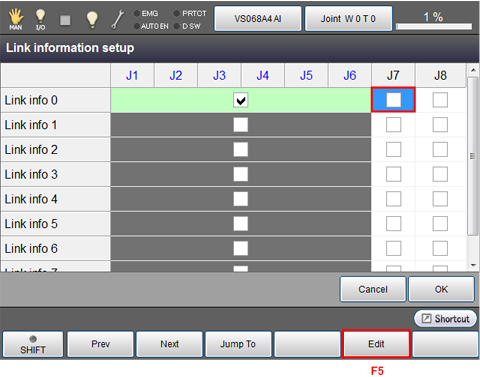
2
Select a joint that you would like to change the link information, then press [F5 Edit].
3
System message appears as follows. Press [OK] to confirm the change. To discard the change, press [Cancel].
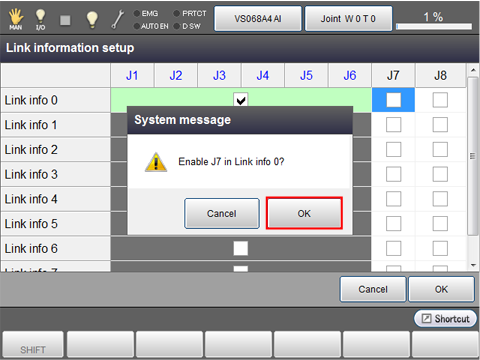
Checkbox of the selected joint is is ticked.
4
Once all the change has done, press [OK].
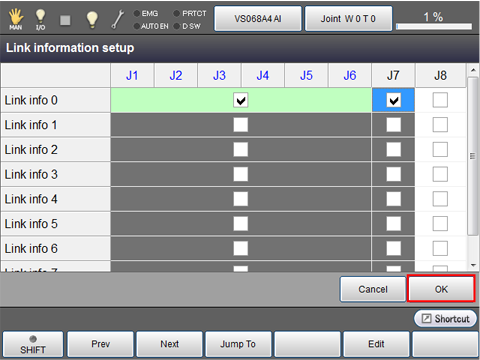
The change is confirmed, and then the [Joint Settings] window appears.
Notes for Setting Up Link Info
- The newly configured link info goes into effect when the controller is restarted.
- All of robot joints are configured in a batch so that all of them are either linked or not.
-
Extended-joints to be selected for linking should be set to "Enable" in the servo parameters window beforehand.
Operation path : Top screen -[F2 Arm]-[F12 Maintenance]-[F7 Joint Settings]-[F5 Servo Parameter]
For more details, refer to "Setting the servo configuration parameters".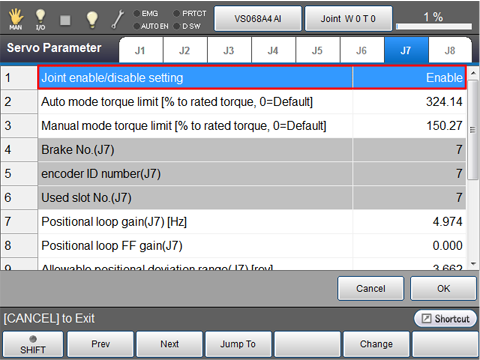
ID : 4902