
ID : 2505
Easy Setting (Teach pendant)
Robot can exert its highest performance with the settings optimized for the operation environment. With this Easy Setting, users can easily complete the robot settings suitable for the actual operation environment. (Ver.2.0.*or higher)
- This function is available for VS-A3, VS-A4, VS-S2, HSR and HSA1 robots.
- This function cannot be controlled from a Mini-pendant.
- For details about operation procedure in WINCAPSIII, refer to "Easy Setting (WINCAPSIII)".
Items
- Floor-mount or Overhead-mount (*1)
- Mass of payload [g]
- Payload center of gravity X [mm]
- Payload center of gravity Y [mm]
- Payload center of gravity Z [mm]
- Payload moment of inertia Ix [kgcm^2]
- Payload moment of inertia Iy [kgcm^2]
- Payload moment of inertia Iz [kgcm^2]
- Control set of motion optimization
- HighPathAccuracy setting
- Efficiency of gravity effect (*1)
- DEFECTION mode setting (*1)
*1 : Available for VS series
Operation Procedure
The following example shows how to perform Easy Setting for a VS-A4 robot.
1
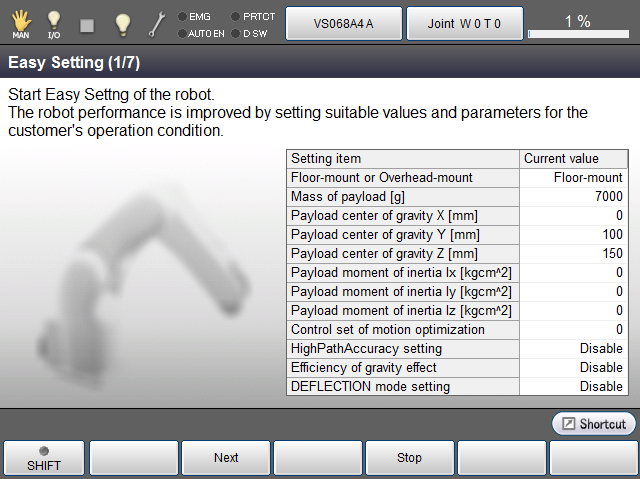
Easy Setting window appears at the controller startup.
This window shows items to be set and the current values. Press [F2 Next] after the check.
To perform Easy Setting with WINCAPSIII, press [F4 Stop].
2
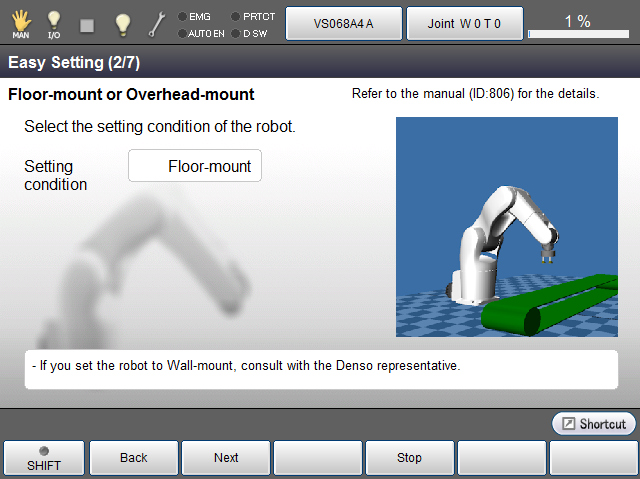
Specify the installation type (floor-mount or overhead-mount).
Pressing the textbox will display the Input window. Select [0: Floor-mount] or [1: Overhead-mount], and then press [OK].
For details, refer to "Setting Robot Installation Conditions".
When you complete the setting, press [F2 Next].
Pressing [F1 Back] in each setting window will go back to the previous setting window.
3
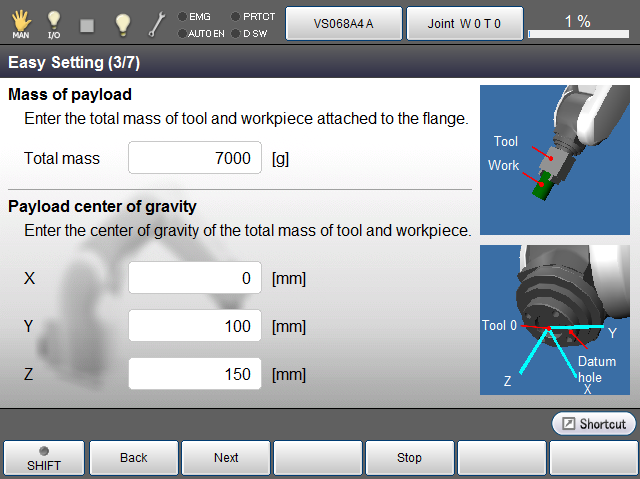
Specify [Mass of payload] and [Payload center of gravity].
- Mass of payload
Enter a value in the textbox, and then press [OK]. (0 to 7000) - Payload center of gravity
Select a textbox, enter a value of the payload center of gravity position for X, Y, and Z, and then press [OK]. (-10000 to 1000)
When you complete the setting, press [F2 Next].
4
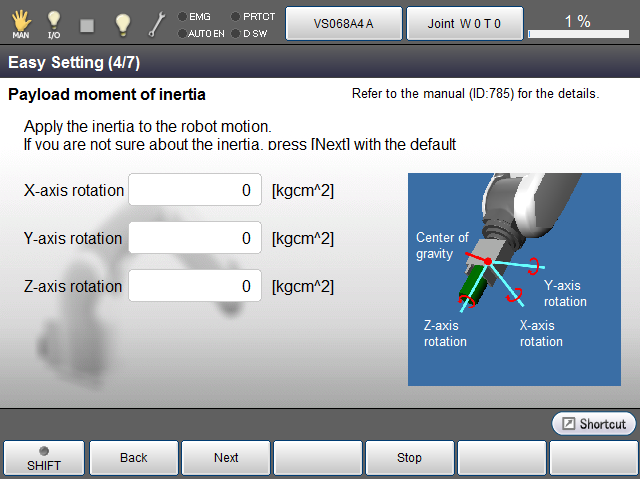
Specify [Payload moment of inertia].
Select a textbox, enter a value for both X- and Y-axis rotation, and then press [OK]. (0 to 100000)
For details, refer to "About Calculation of Edge Load Inertia".
When you complete the setting, press [F2 Next].
Using the payload estimation function is able to estimate the values automatically and enter them.
Thus, mass of payload and payload moment of inertia Iz (around the Z-axis) can enter the values without entering values directly at Step3, Step4.
Press [Automatic measure] button to use this function. This is only for a HSR robot.
This function is available in Ver.2.1.* or higher. For details, refer to "Payload Estimation Function".
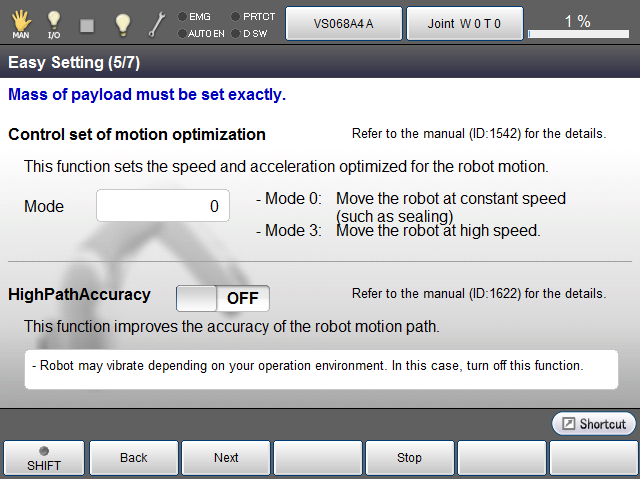
5
Specify [Control set of motion optimization] and [HighPathAccuracy setting].
- Control set of motion optimization
Pressing a textbox will display the Input window. Select [0:Mode 0] or [3:Mode 3], and then press [OK].
For details, refer to "Optimal Speed Control Function". - HighPathAccuracy
Enable/Disable the High Precision Control function.
For details, refer to "High Precision Control".
When you complete the setting, press [F2 Next].
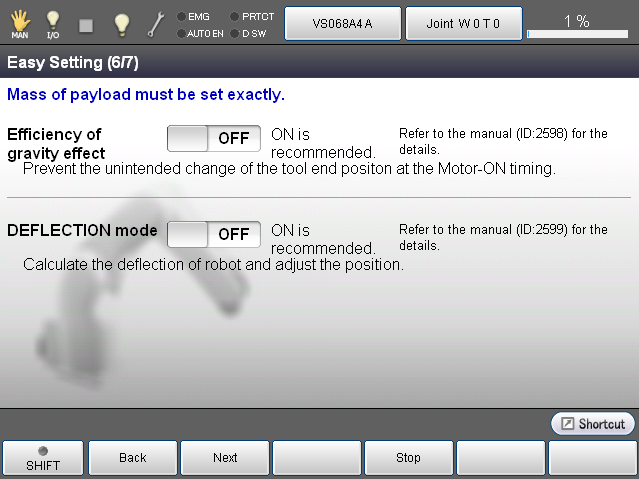
6
Specify [Efficiency of gravity effect] and [DEFECTION mode setting].
- Efficiency of gravity effect
Enable/Disable the Gravity compensation function.
For details, refer to "Gravity Compensation Function". - DEFECTION mode
Enable/Disable the Deflection compensation function.
For details, refer to "Deflection Compensation Function".
When you complete the setting, press [F2 Next].
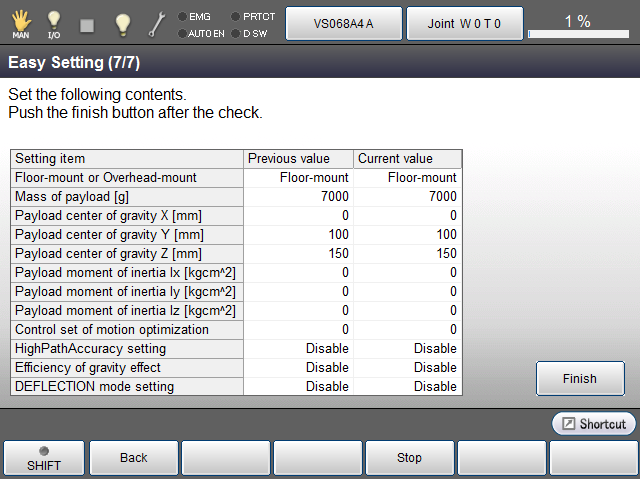
7
Check the settings you made and then press [Finish] to save setting values to the controller.
This completes the settings.
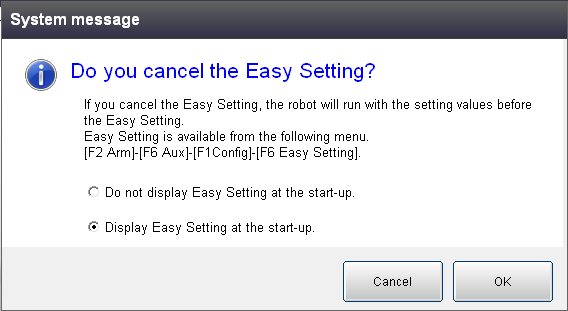
Cancel of Easy Setting
Pressing [F4 Stop] in each setting window will display the system message window that asks whether to cancel the Easy Setting. To cancel the Easy Setting, press [OK] in the window. Once it is canceled, all the setting values you have made will not be saved.
In this system message window, you can select whether the Easy Setting dialog is displayed at the next startup.
If Easy Setting is started from the Menu, when you press [F4 Stop], the system message window does not show the selection that asks whether the Easy Setting dialog is displayed at the next startup.
Change of Settings
To change the settings you have done, press [F2 Arm] - [F6 Aux] - [F1 Config] - [F6 Easy Setting].
ID : 2505