
ID : 3317
How to Use RS-422A Micro Converter
The following shows how to use an RS-422A micro converter.
(This device requires robot controller software version 2.5.* or higher.)
Preparation and Setup
Do the following steps.
- Set the DIP switch of RS-422A micro converter.
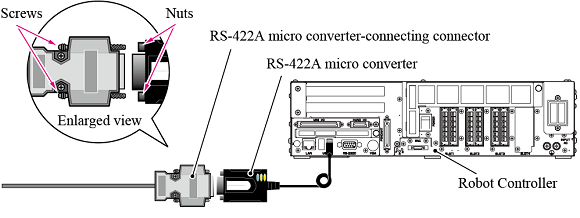
- Connect the RS-422A micro converter to the USB connector of the robot controller.
- Set necessary options with a teach pendant.
After the above operation, if the force sensor-robot controller communication starts under the strong noise environment, force sensor communication-related error may occur.
In this case, take any measures for noise reduction with reference to Noise Reduction When Using RS-422A Micro Converter.
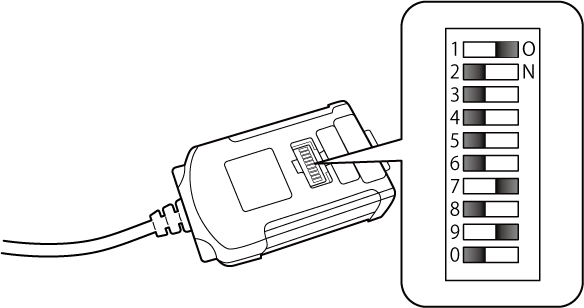
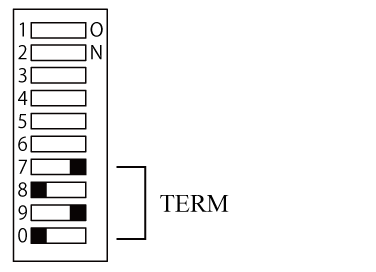
Setting a DIP Switch
Set the DIP switch of RS-422A micro converter as the following shows.
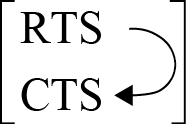
- Set the data transmission mode to RTS/CTS-looped full duplex.
- Enable the terminator.
Position of a DIP Switch
DIP switch has a cover as the following shows.
With a slotted screwdriver, remove the cover, and set the DIP switch, and then put the cover on.
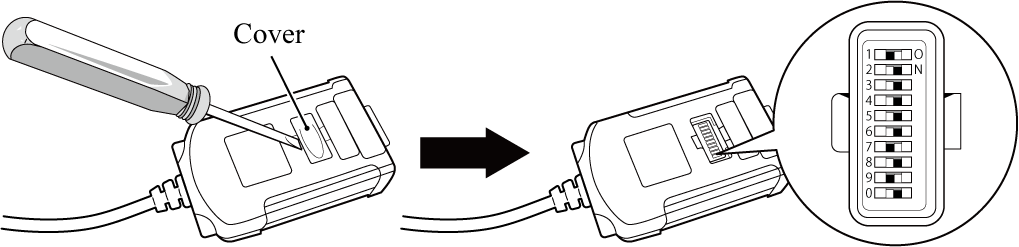
If the tip of slotted screwdriver goes deeper into the switch, inside of the switch may be damaged. Turn the slotted screwdriver without applying force inside of it.
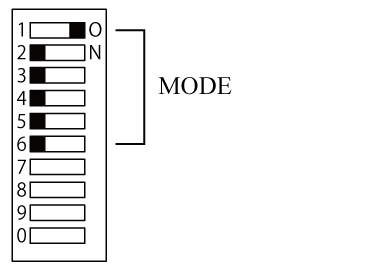
DIP Switch Setting
Set the switch as the following shows.
| Function | Switch setting |
|---|---|
|
・Full duplex
|
Set the data transfer mode setting switch as the following shows.
Do not turn on both Bit 1 and 2 simultaneously. Doing so may damage the product. |
| Terminator inserted |
Set the terminator setting switch as the following shows.
|
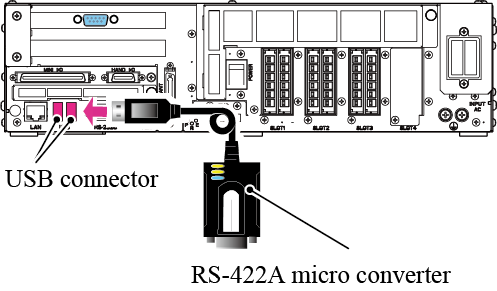
Connecting to an USB Connector
Do the following steps.
- Turn off the robot controller.
- Connect the RS-422A micro converter to the USB connector of the robot controller.
If the RS-422A micro converter connects to the robot controller for the first time, an error message window appears just after the robot controller power-on. This error message informs that the driver of a new device has been installed.
Once the [OK] button on the error message window will shut down the robot controller automatically.
When the shutdown completes, the following window appears. Wait until the message [It is now safe to turn off your computer] appears. Once you confirm the message, reboot the robot controller.
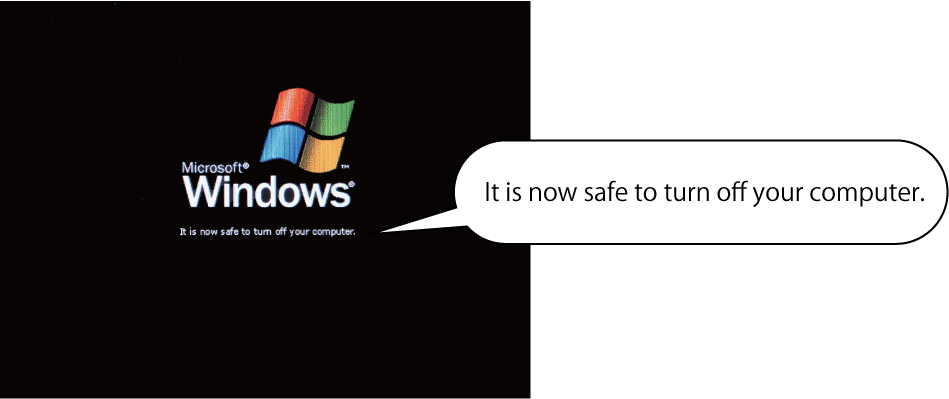
Do not turn off the robot controller before the above message appears.
Doing so may damage data.
Setting Necessary Options with a Teach Pendant
Set the following option with a teach pendant.
- Enable a FIFO buffer (Check the value of Latency timer after FIFO is enabled).
- Select RS-422A as connection mode, and specify a port.
Enabling a FIFO Buffer
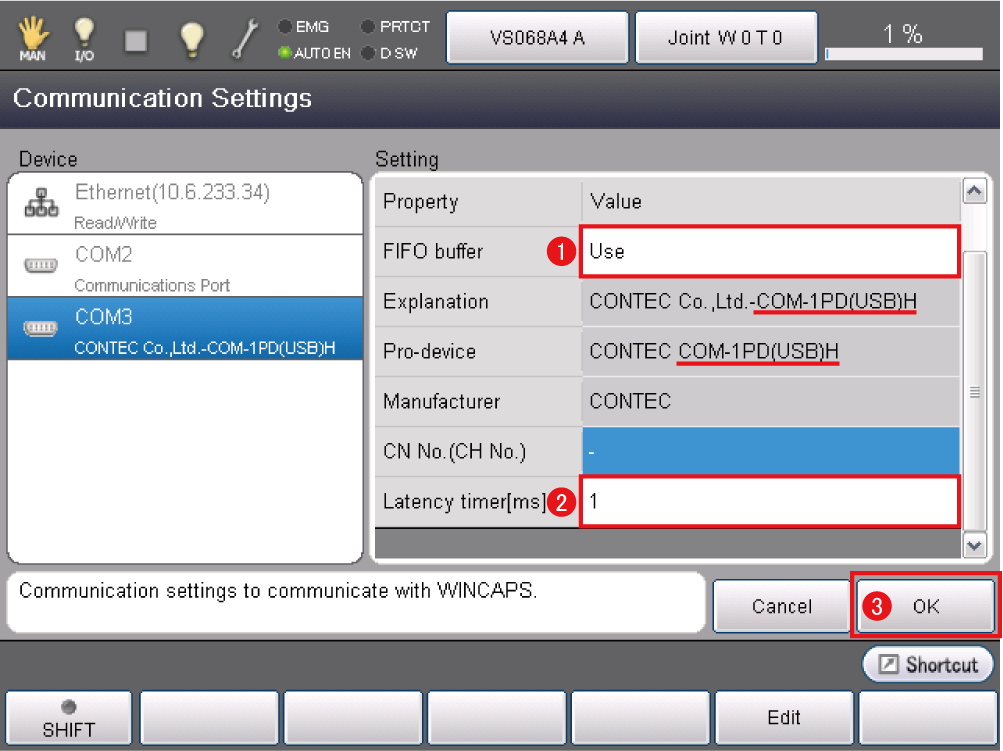
From the following operation path, display the [Communication Settings] window.
| Operation path: [F6 Setting] - [F5 Comunication and Token] - [F2 Network and Permission] |
-
From the Device list, select a port of RS-422A that connects to the force sensor.
(When RS-422A micro converter is connected, "COM-1PD(USB)H" is displayed in both or either of "Explanation" and/or "Pro-device".)
From the Setting panel, from the Property column, select [FIFO buffer]. Press [Edit] button.
[FIFO buffer] window appears, select [Use]. Press [OK] button. -
Next, check if the value of Latency timer[ms] is "1".
If not, change the value to"1". - Once the setting finishes, on the "Communication Settings" window, press [OK] button.
Selecting RS-422A as Connection Mode
This setting is done when a force sensor's setting.
For details, refer to "RS422A Communication Setting" of "Sensor Setting".
Attention
In some case, screws passing through the RS-422A micro converter-connecting connector may not reach the nuts on the RS-422A micro converter. In this case, fix the connector with a cable tie or alike not to fall off the connector.
ID : 3317
- Related Information
- Noise Reduction When Using RS-422A Micro Converter